Module 8 - PPRL linkage project simulation
In this Module, we will conduct a complex PPRL linkage project involving four encoded datasets.
The project will simulate a PPRL linkage of Primary (GP) to Secondary health care data similar to that described in Module 5 (only in an encoded form):
- Secondary health care data will comprise three encoded, synthetic datasets of Death registrations, Hospital admissions records (HOSP) and Emergency department presentations (EMER).
- Primary care data is also simulated and is supplied as encoded General Practice (GP) data.
Please note that clear text versions of these same datasets are also available as part of your Training Package, so it is possible to undertake a similar clear text linkage project using the unencoded versions of these datasets. For instructions on how to undertake a clear text version of this linkage, please refer to Module 5.
This module is part of a series of training modules that can be used with any LinXmart deployment. However, the user will require permissions to create Linkage Projects, load data for linkage extract linkage map results.
All required data files are available from the main self guideded training page.
Getting started
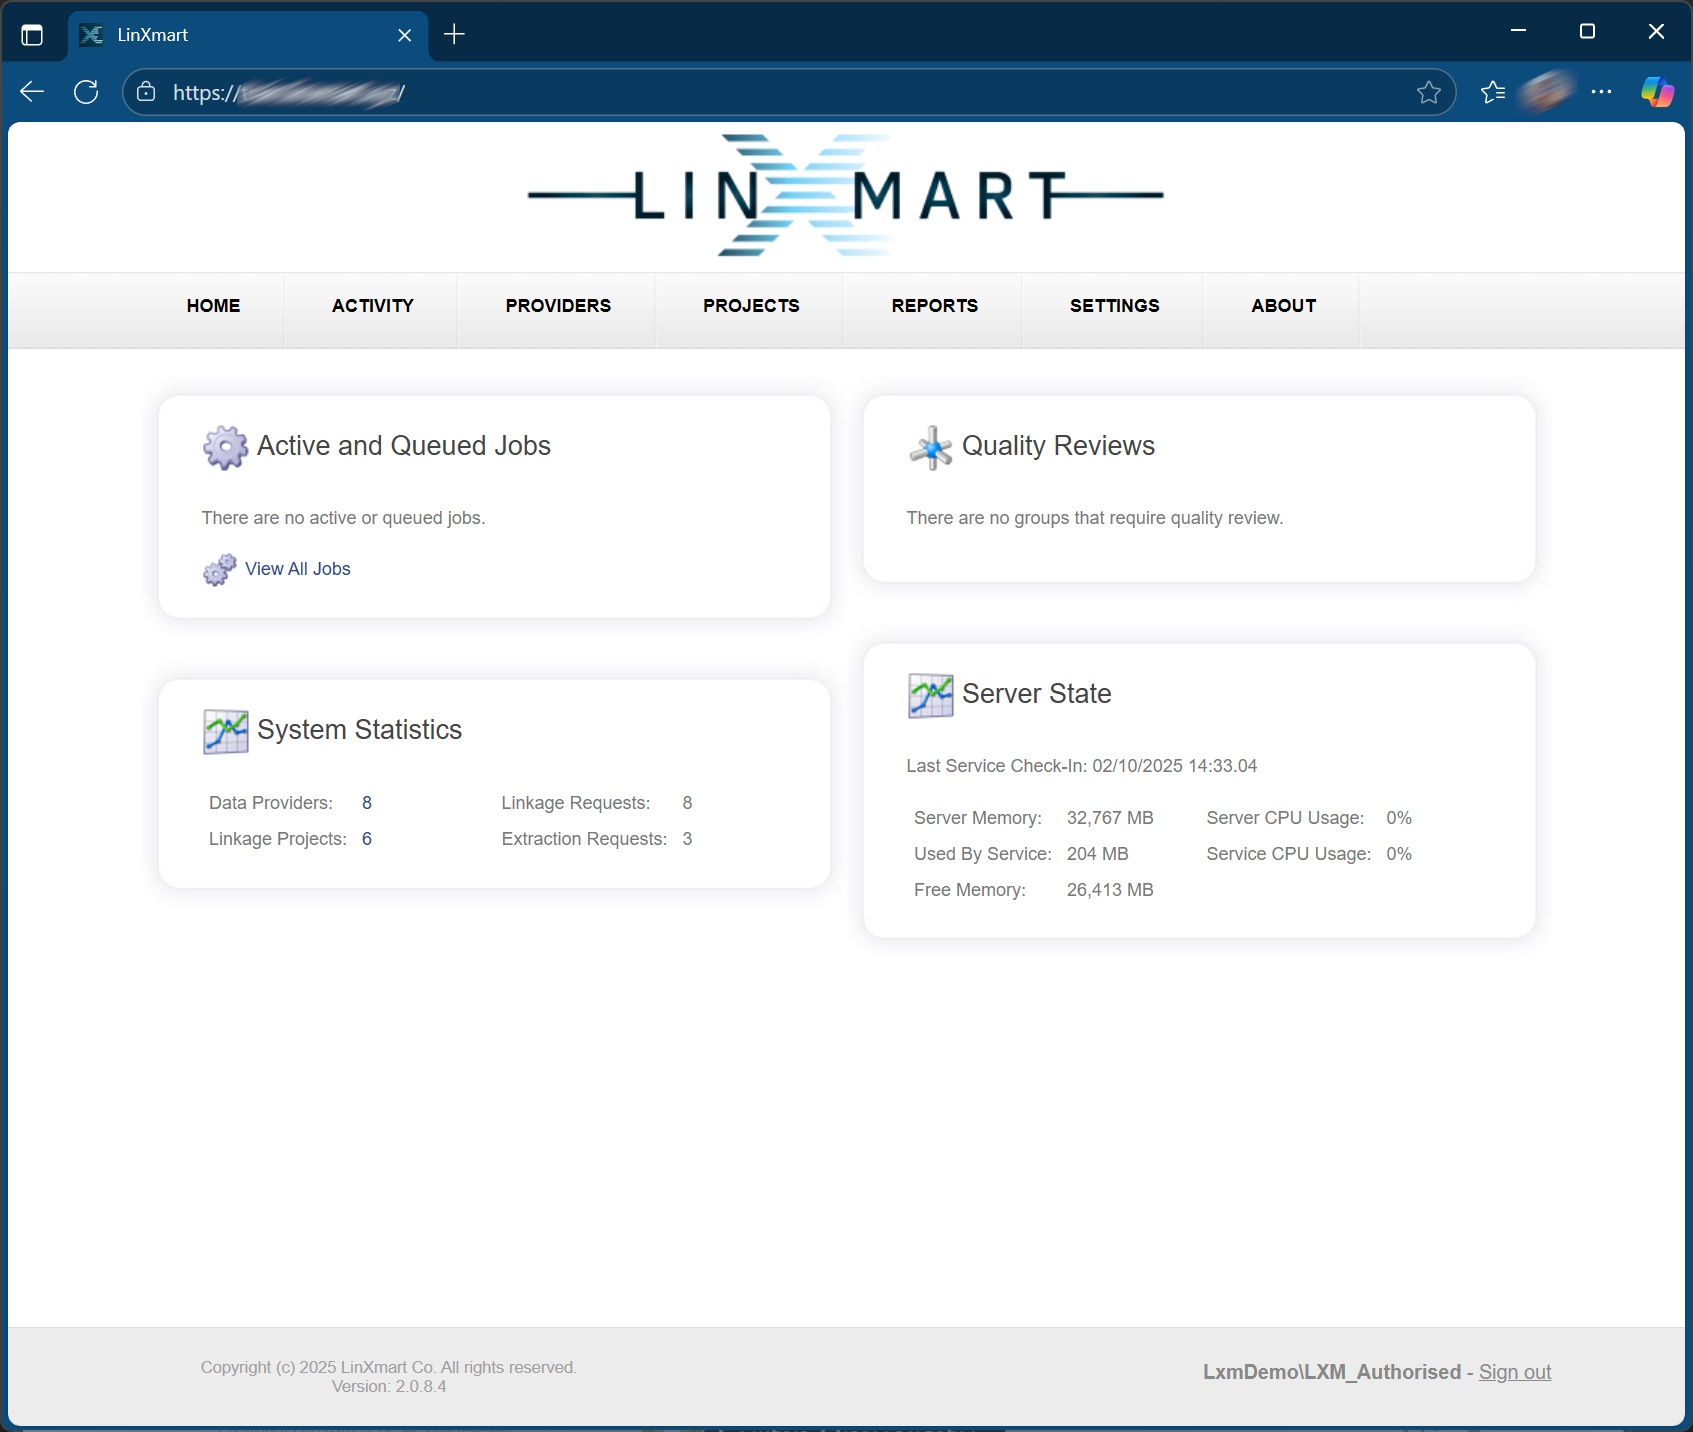
Step 1: Connect to the LinXmart web interface by typing in the LinXmart web address. You will see a screen similar to this:
Step 2: Ensure that your installation of LinXmart has a Data Provider called TRAINDP. To do this, click on the CATALOG tab at the top of the page.
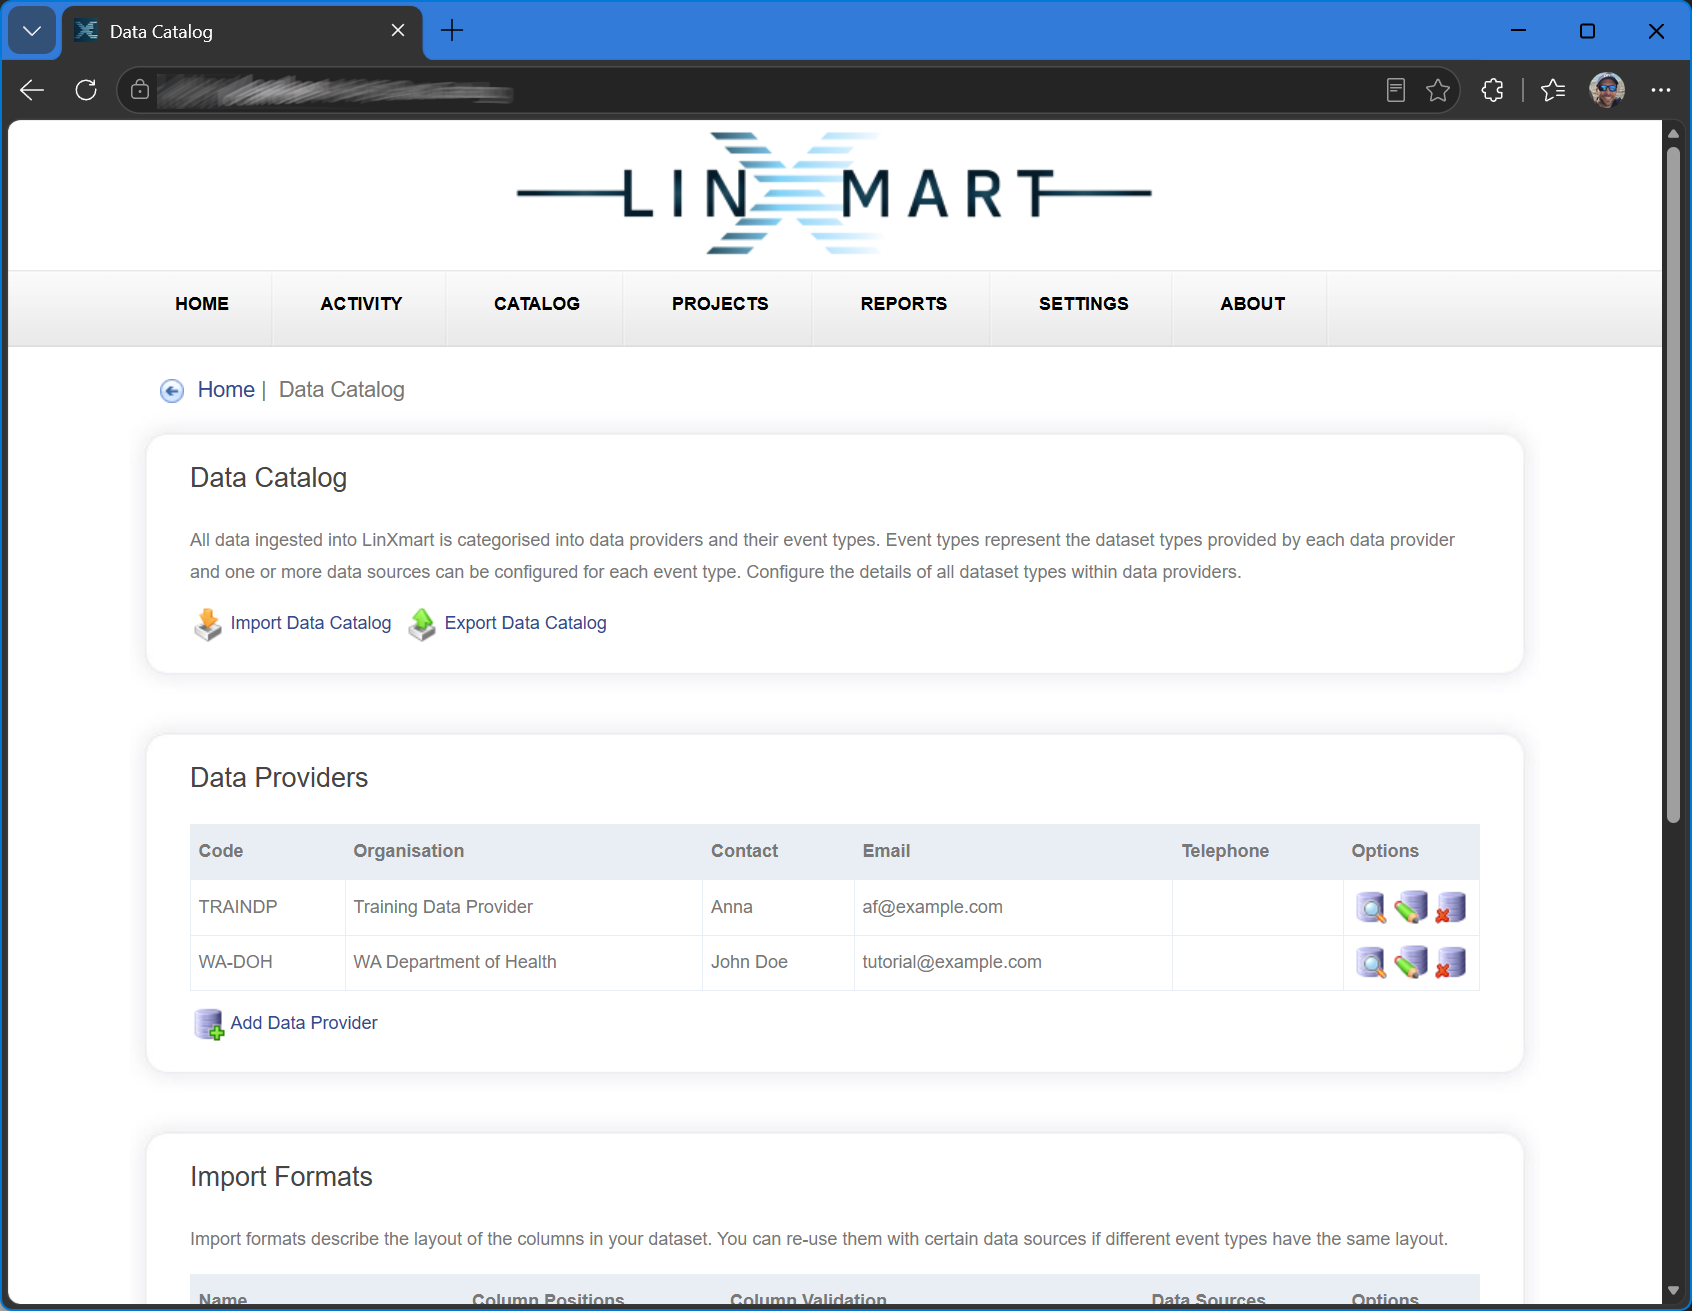

If this Data Provider is not displayed, please follow the setup instructions for this series of training modules before continuing.
If the TRAINDP Data Provider is displayed, click on the row it is on to view the details of the provider. You will notice that this Data Provider supplies you with several datasets (Event Types) – in both clear text and encoded forms (shown below). The import formats of these files have already been defined.
You will use these pre-defined formats when you come to upload data as part of this Module.
With LinXmart now aware of the Data Provider called TRAINDP and the kinds of datasets (Event Types) that it supplies, you are ready to create a project that uploads and links the encoded versions of these datasets.
Creating a Linkage Project
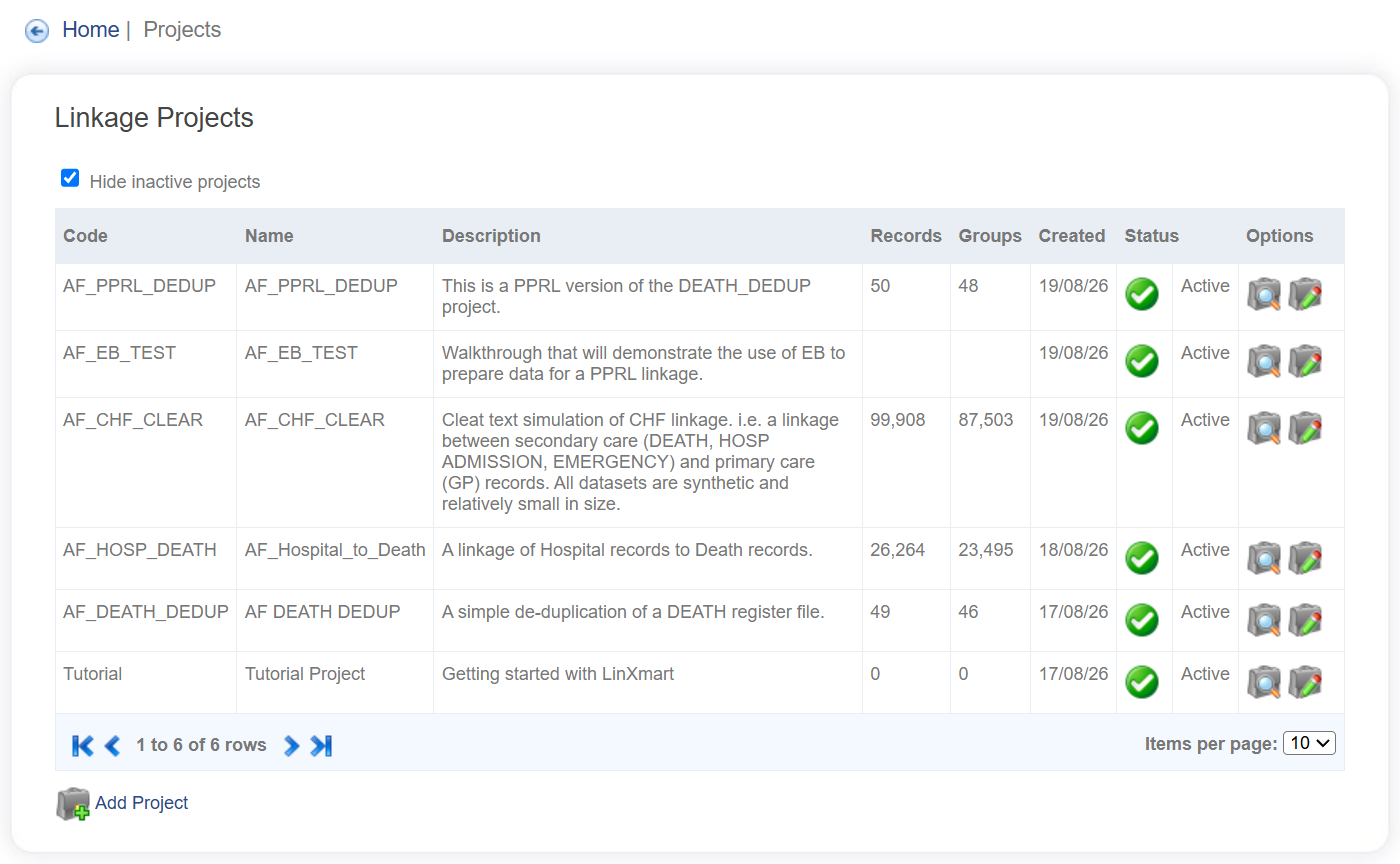
Step 3: Click on the PROJECTS tab at the top of the web page. This will present you with the dashboard of current projects (shown below). At the bottom of the list, click on Add Project.
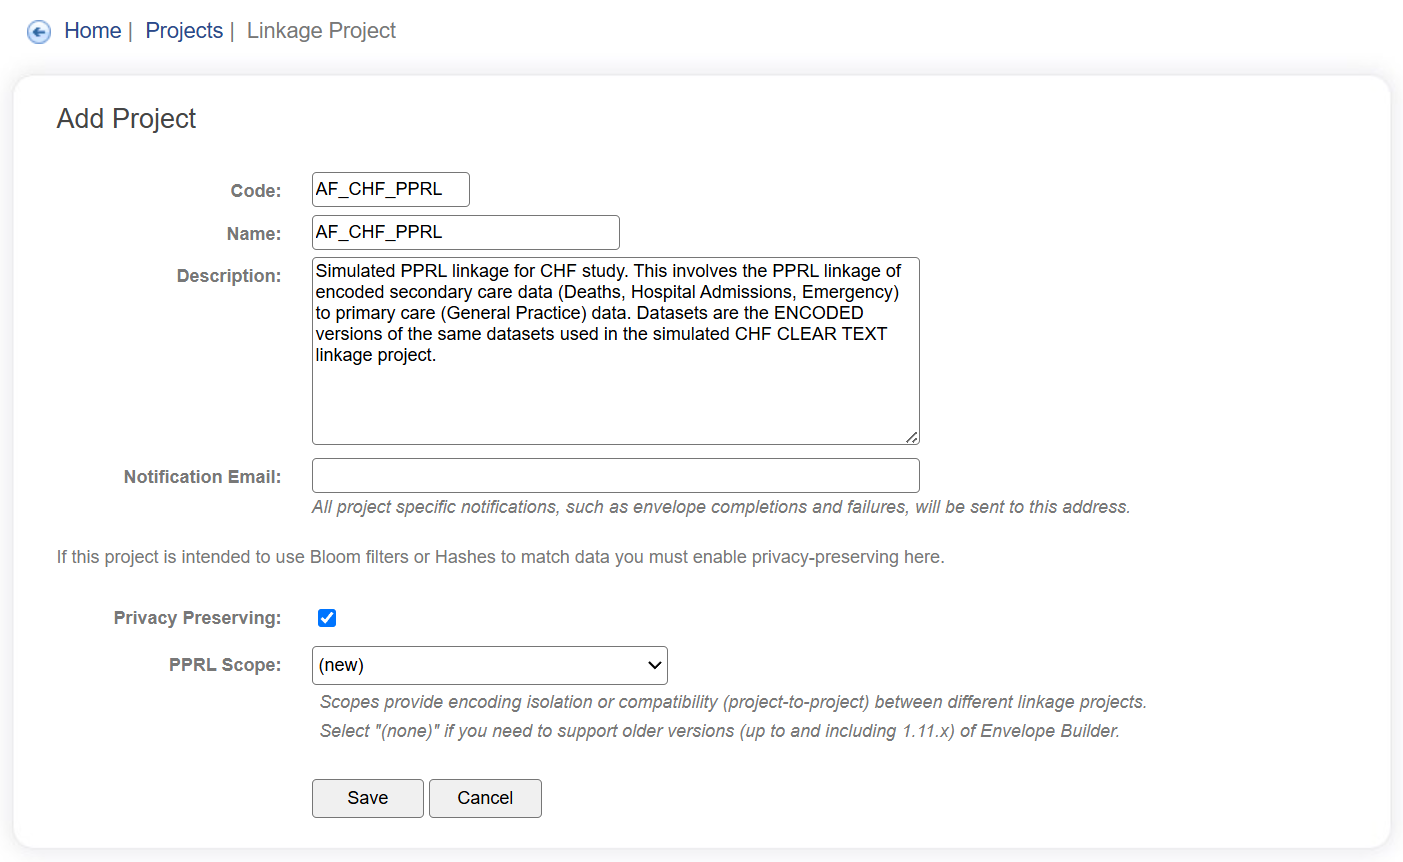
Step 4: Create your project (e.g. XX_CHF_PPRL) as shown below. Also tick the Privacy Preserving checkbox. Then click Save to finish.
Adding data to a Linkage Project
Step 5: Click on your XX_CHF_PPRL project to bring up the Project Details page.
You are presented with an empty project (as shown below).
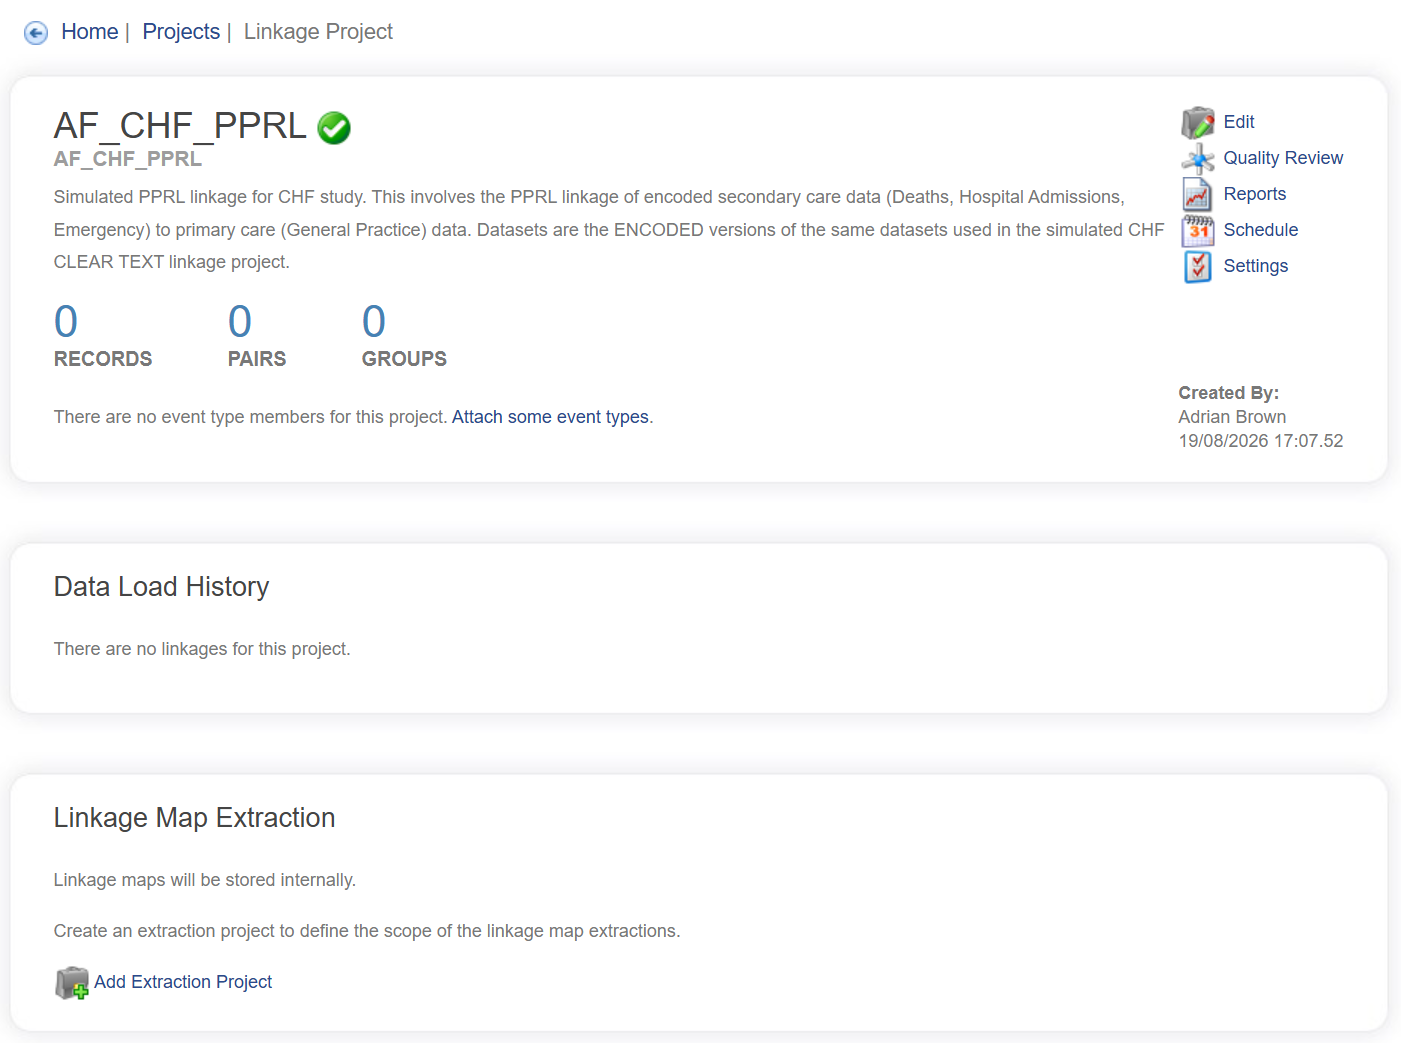
Before data can be loaded into this Project, one or more Event Types need to be attached to the Project and a suitable Match configuration needs to be defined.
You can add each of these event types manually (as you did in the CLEAR TEXT linkage described in Module 5). However, an alternative and arguably faster way of adding event types and configuring your PPRL project, is to import settings from a previous PPRL project.
We will now show you the latter approach.
The settings of a previous PPRL project have been stored in a JSON file which is available to you as part of your training package: LinkageProject_CHF_SIM_PPRL_config.json.
We will show you how you can import settings from that JSON file into your current project.
Step 6: Click on the Settings link (shown below).
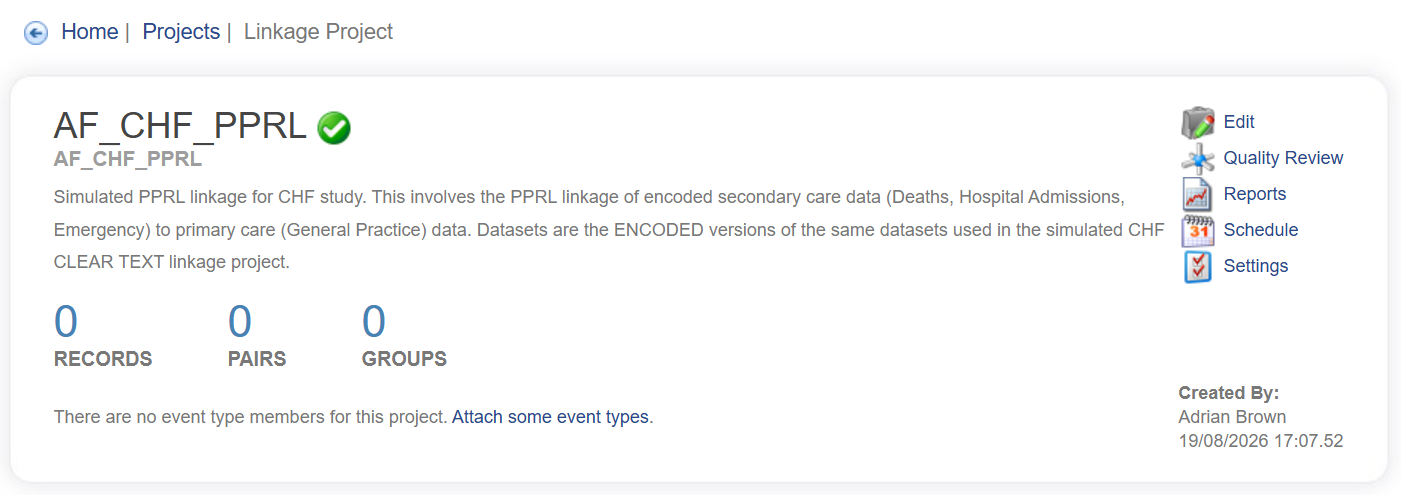
Step 7: From the list of Project Settings, select Import from JSON (shown below).
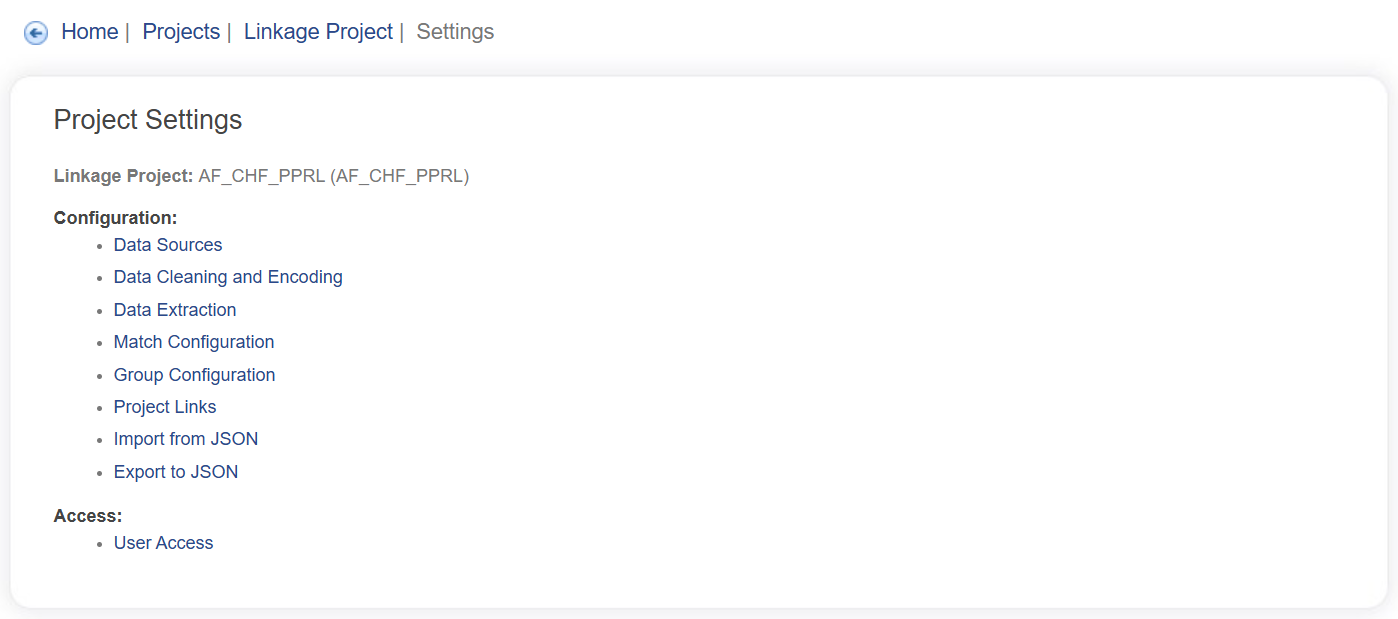
Then click on Choose File, then locate the file in your file system, and upload the LinkageProject_CHF_SIM_PPRL_config.json file (as shown below). Click on Open, then click on Import.
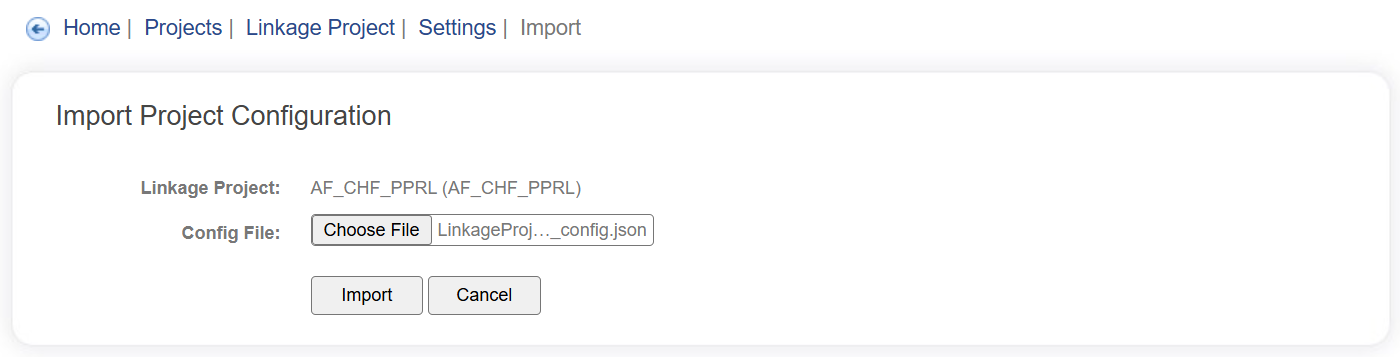
During the import, the system may notify you of some conflicts with settings that are (already) part of your project. If this is the case, then Replace the conflicts (also shown below).
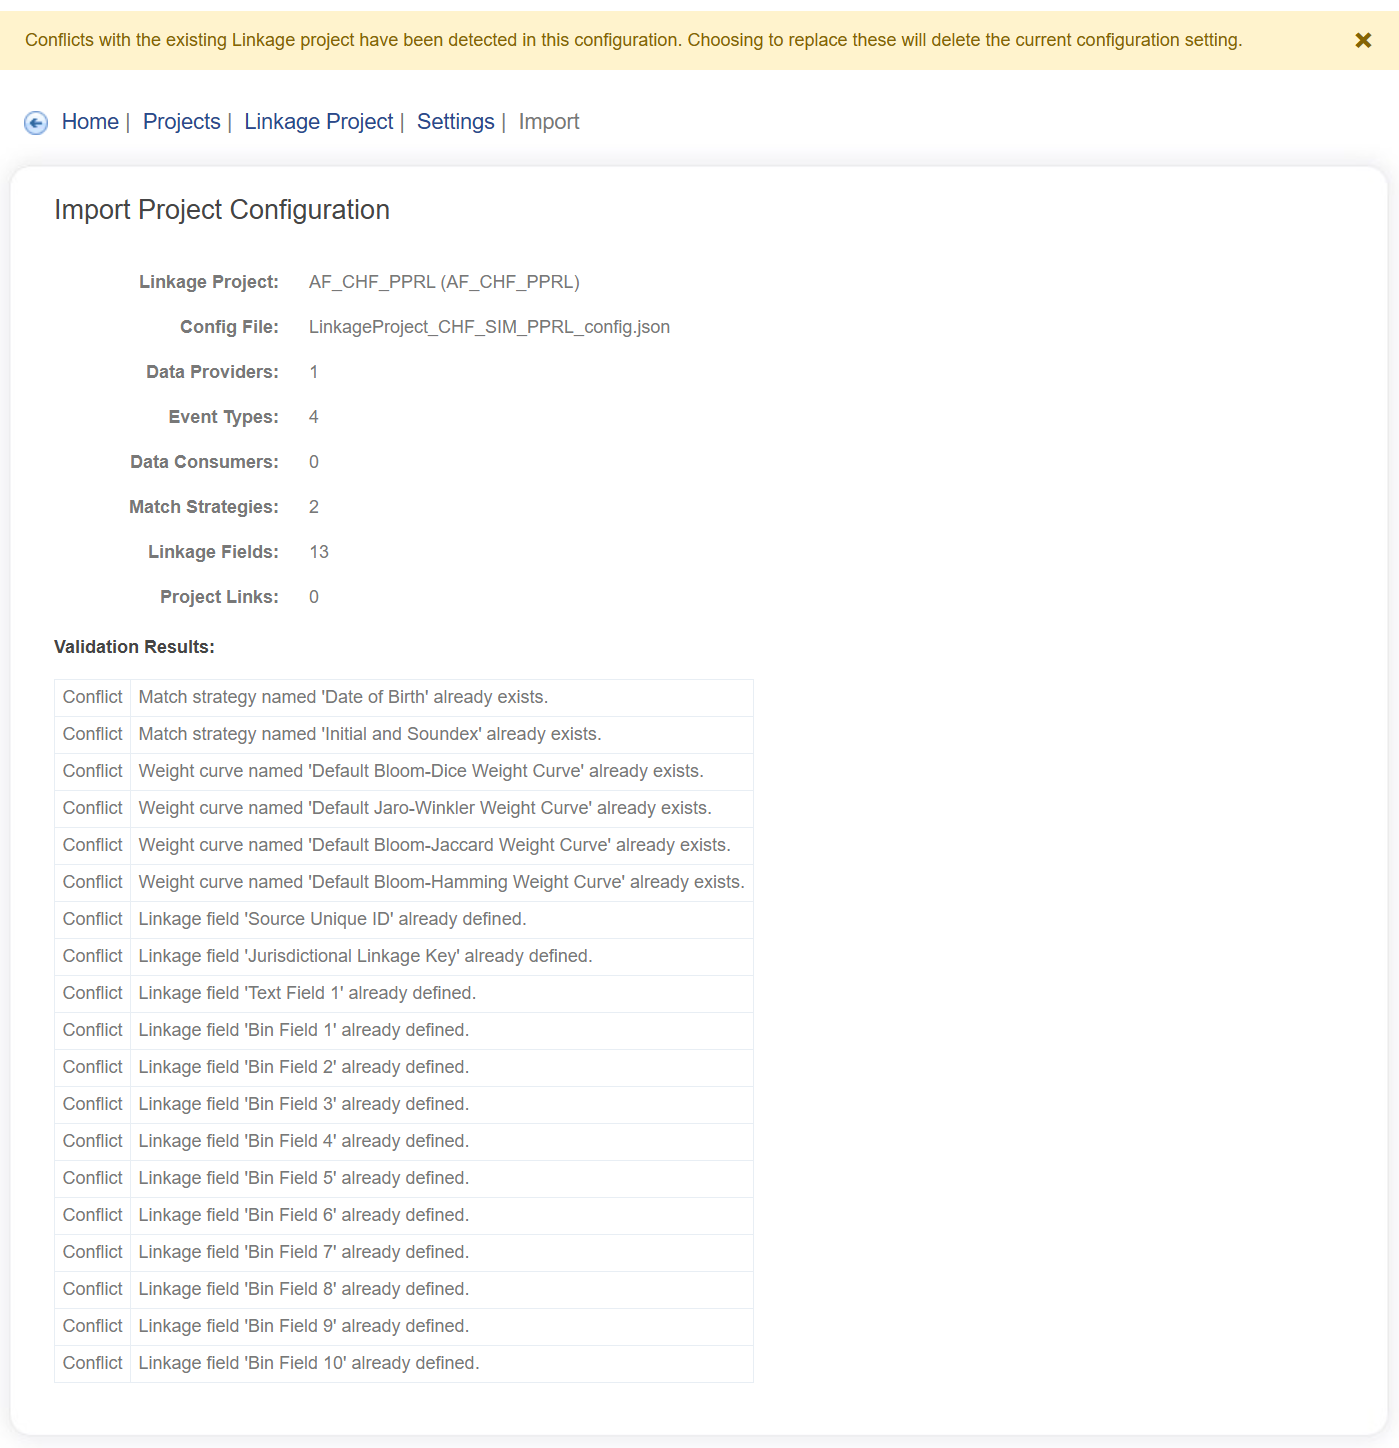

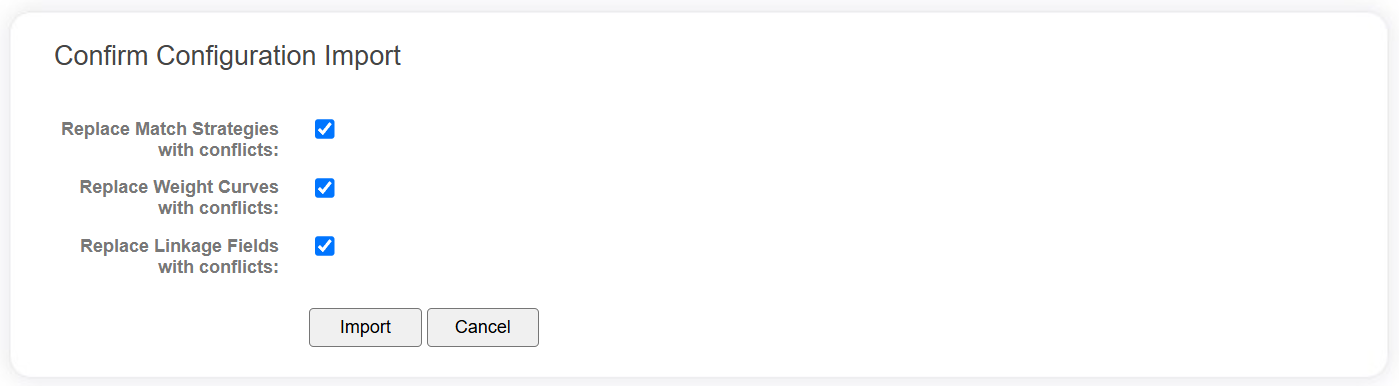
Using the uploaded Match strategy
As a result of uploading project configuration settings from another project, your CHF PPRL project will 'inherit' the matching strategies from that previous project.
Typically, LinXmart sets up two default matching strategies for any new linkage project.
For PPRL projects, the matching strategies are similar but not identical to those used in the CLEAR TEXT linkage. The critical difference being that the fields being used in PPRL linkage are the encoded or binary fields.
Step 8: To view these strategies, navigate to the Project dashboard and select your project (PROJECTS -> click on XX_CHF_PPRL).
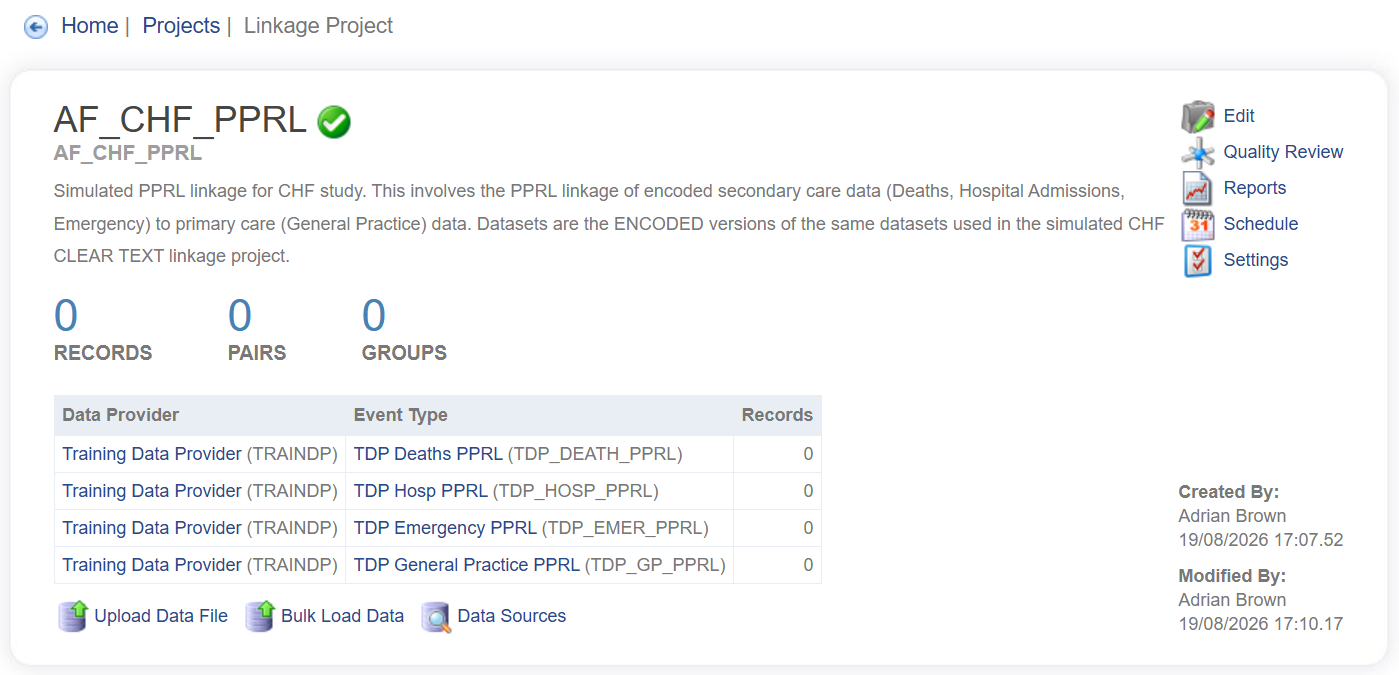
At this point, you can see the list of datasets (Event Types) that form part of your linkage project. Notice that there are four different datasets that will form part of your project and that all of them are encoded.
Drill further by clicking on Settings (as below), then click on Match configuration.
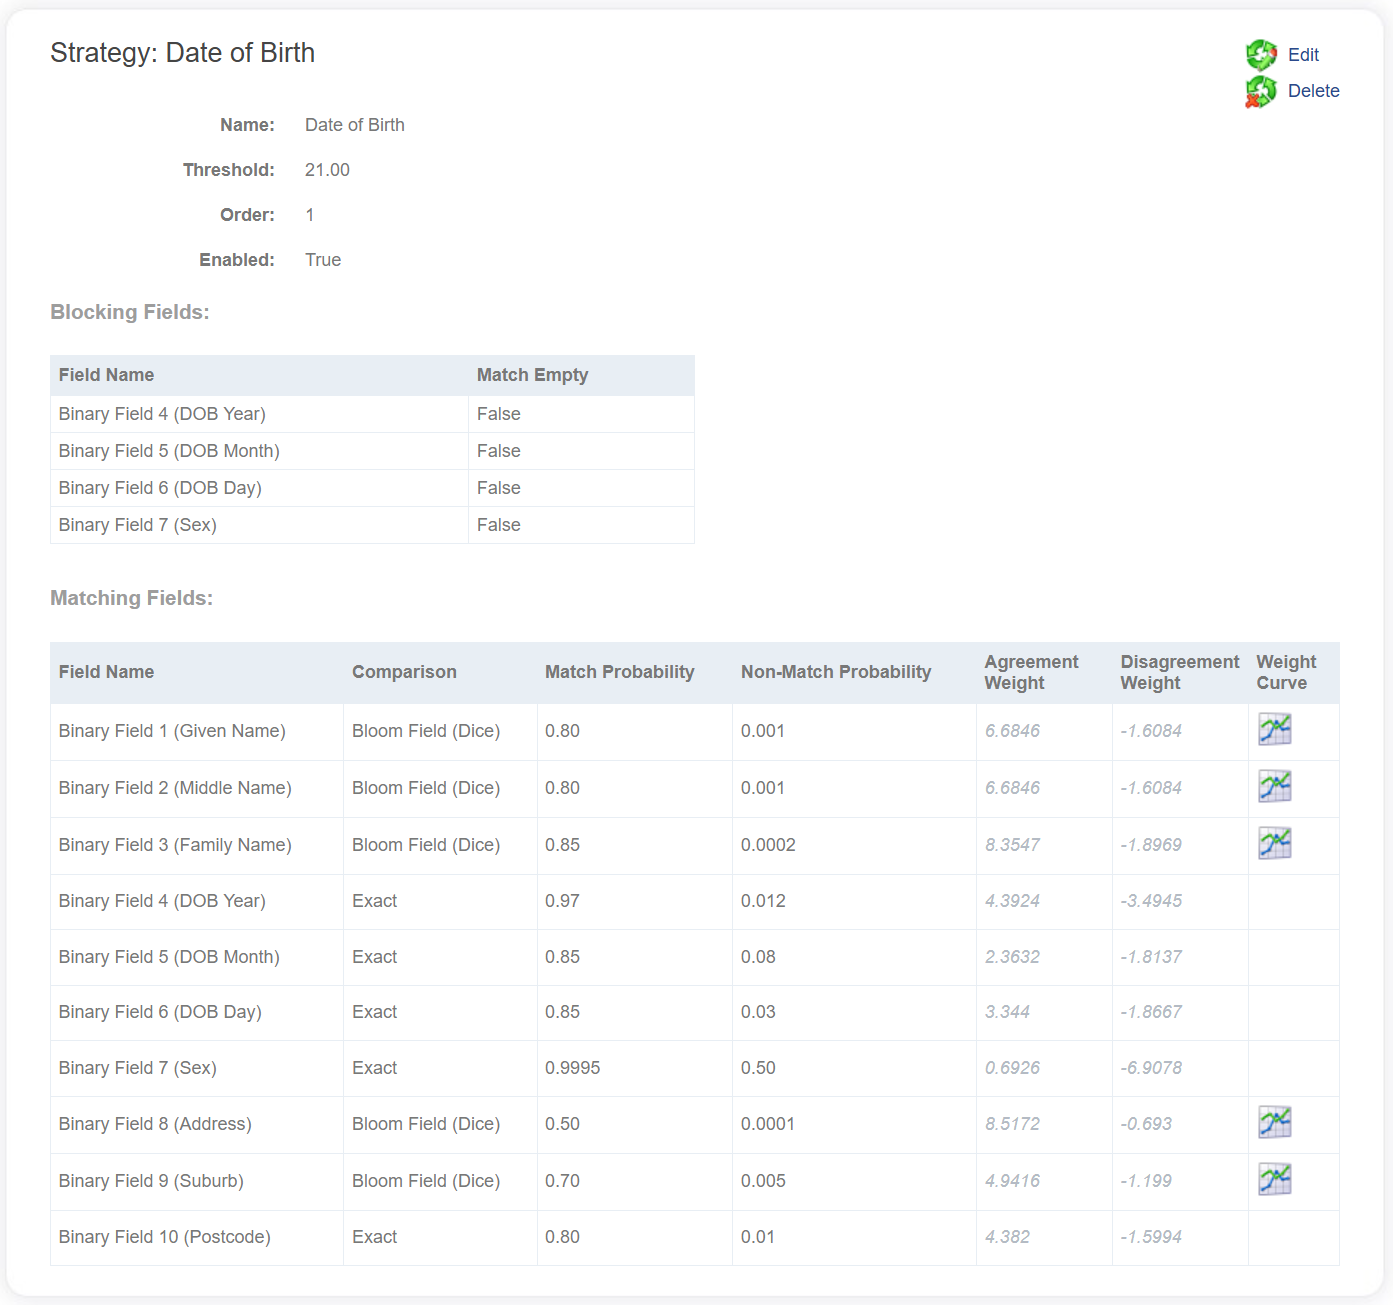
You will notice that the PPRL Match configuration comprises two strategies – one which blocks on a combination of encoded Date of Birth and encoded Sex (shown below), the second which blocks on a combination of encoded Soundex of Family Name and encoded First Initial of Given Name.
Note that in both strategies, the fields being compared are the encoded or binary linkage fields, and that the comparator being used is Bloom Field Dice, not Jaro-Winkler.
Note, however, that the default weights and default threshold in this PPRL linkage are the same as for CLEAR TEXT linkage (see below).
Check Linkage Field-Source Data Item alignment
Before proceeding to the uploading of data as part of a PPRL linkage project, it is important to confirm that the incoming data items align with what is expected by the Linkage Project (as specified in Import formats). These checks ensure that the 'right variables' are uploaded and mapped to the appropriate linkage fields in this LinXmart project.
There is a lot more to say about the cleaning and encoding of data for PPRL linkage. Read about that in Module 6.
Step 9: To check alignment of linkage variables, navigate to the Project dashboard and select your project (PROJECTS -> click on XX_CHF_PPRL). Then click on Settings (as below), then click on Data Cleaning and Encoding.
You will see something like this under the Linkage Fields section.
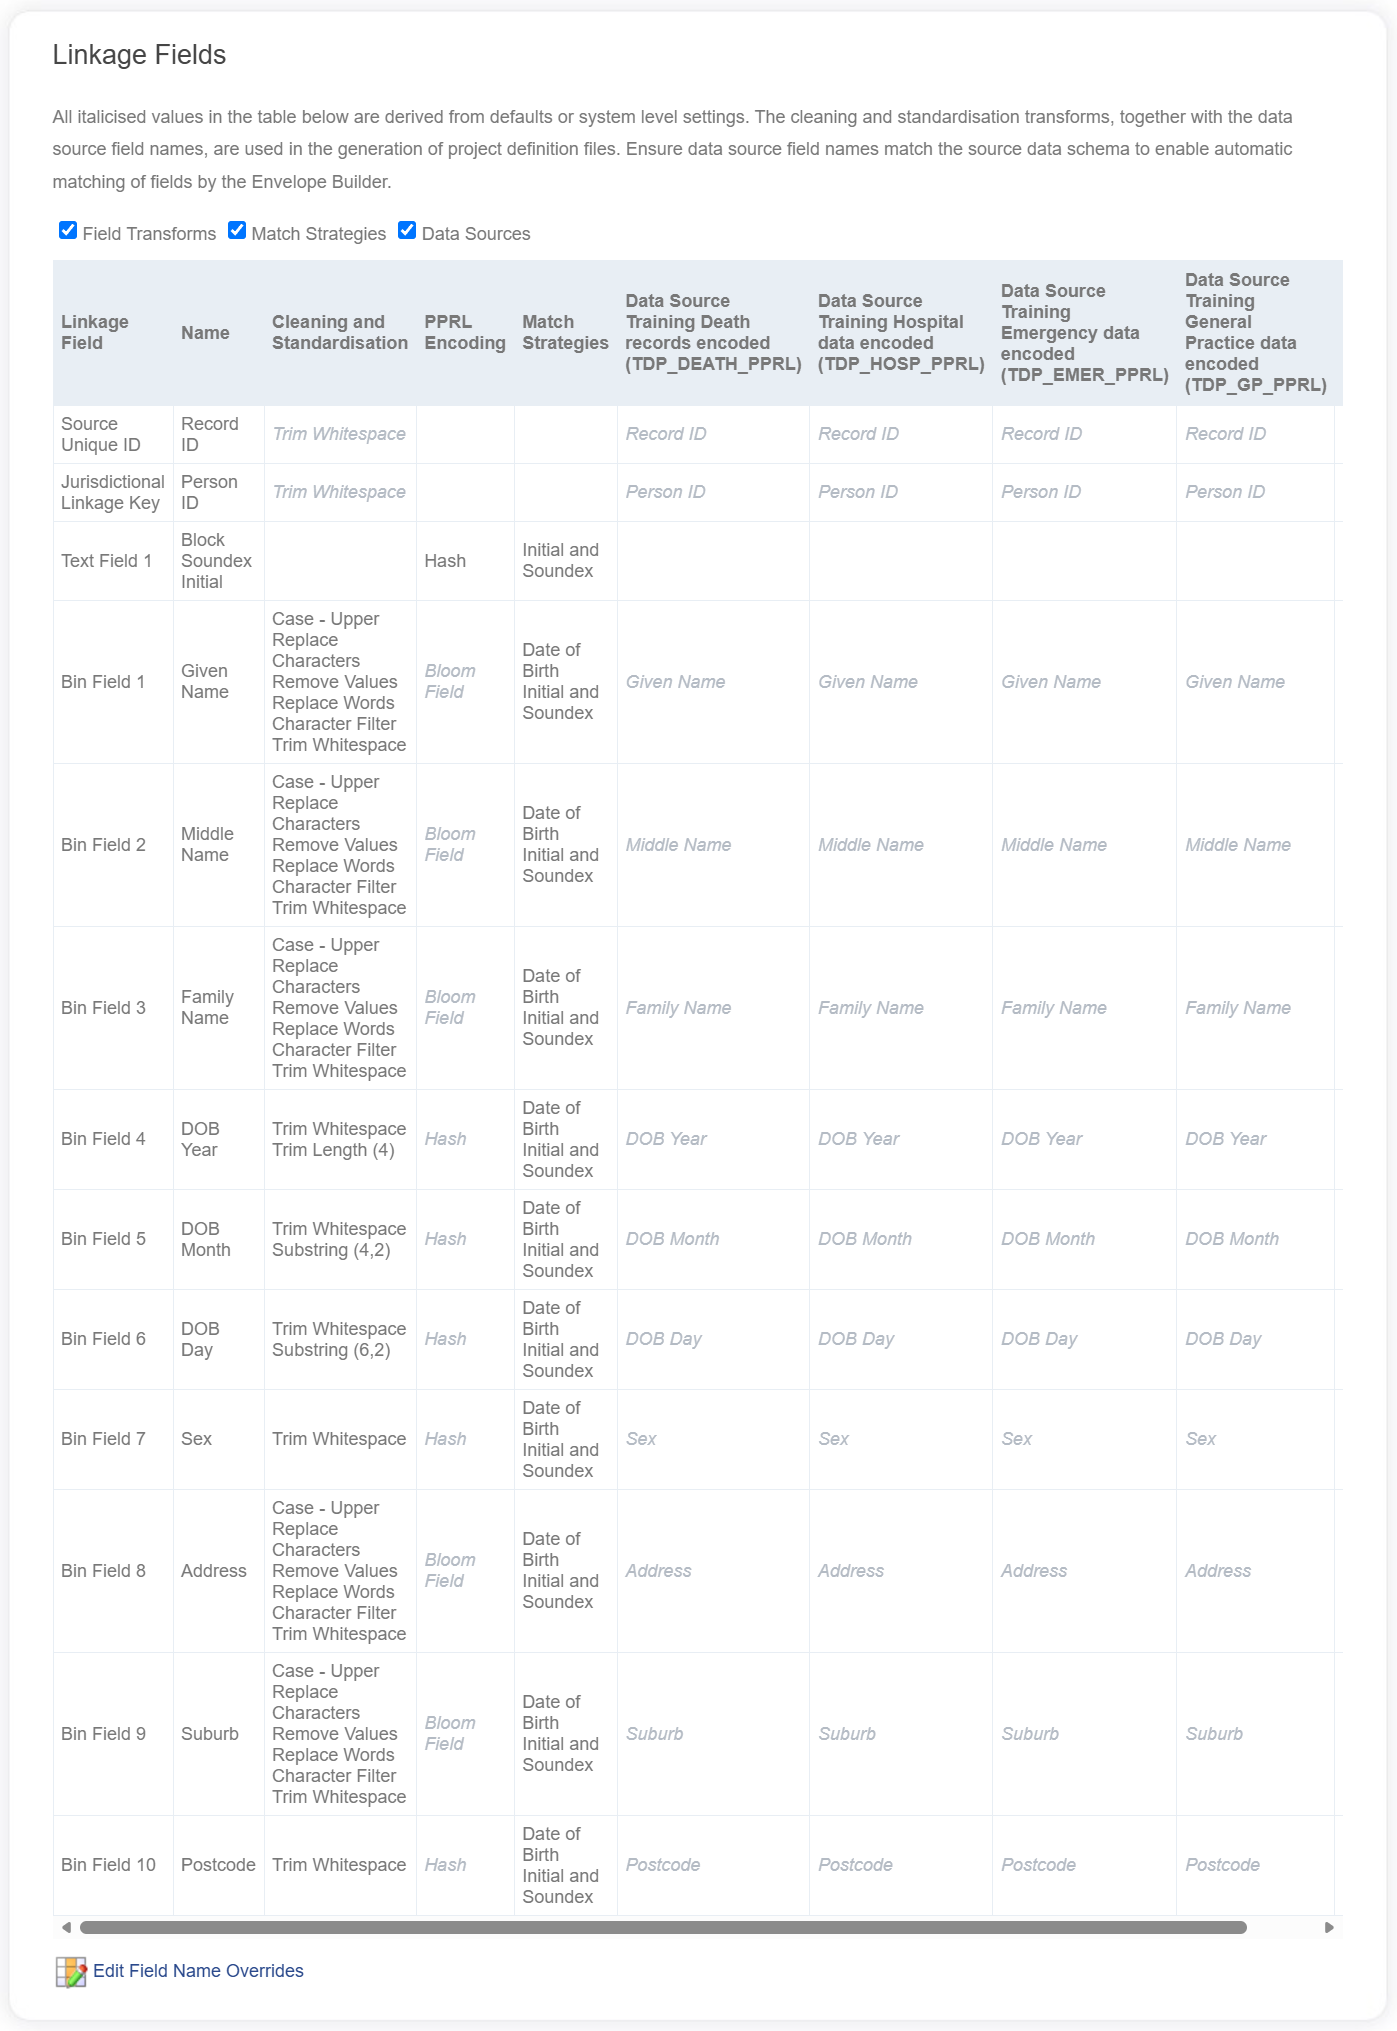
Take a close look at this list of Linkage Fields. Questions to ask yourself are – are these fields the complete set of all encoded linkage variables supplied by the Data Provider(s)? Are they correctly aligned with each other and with the LinXmart Linkage Fields?
If you have answered Yes to these questions, and you are happy with the default Matching strategies (and threshold values) and Grouping configuration settings, then you are ready to proceed to uploading and linking your first encoded dataset.
Linkage files of encoded data
We will start the linkage by uploading the encoded Death records. (Recall why we might load Deaths first?)
The relevant input file can be found as TDP_DEATH_encoded.csv - located in your Training folder: TRAINDP encoded datasets.
You may wish to view this file in a text editor to see its contents. It is a comma delimited file containing a unique record identifier, a unique person ID and various encoded PII fields. For convenience, the format of this file (called the Import Format) has already been defined within LinXmart (refer EB_PPRL_Default).
Step 10: If you are not already on your Project dashboard, navigate to it. Then click on Settings. Then Data Sources. This should take you to your Event Type Data Sources page (see below).
Click the Load icon on the TDP_DEATH_PPRL row on this page.
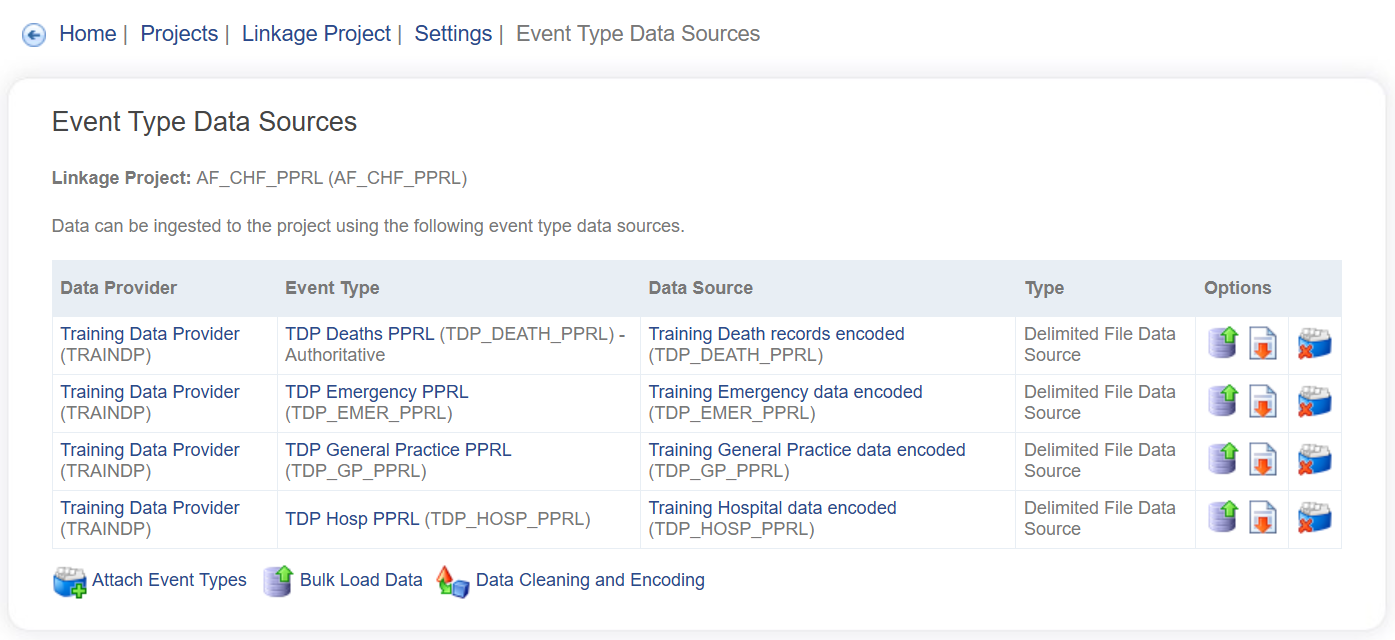
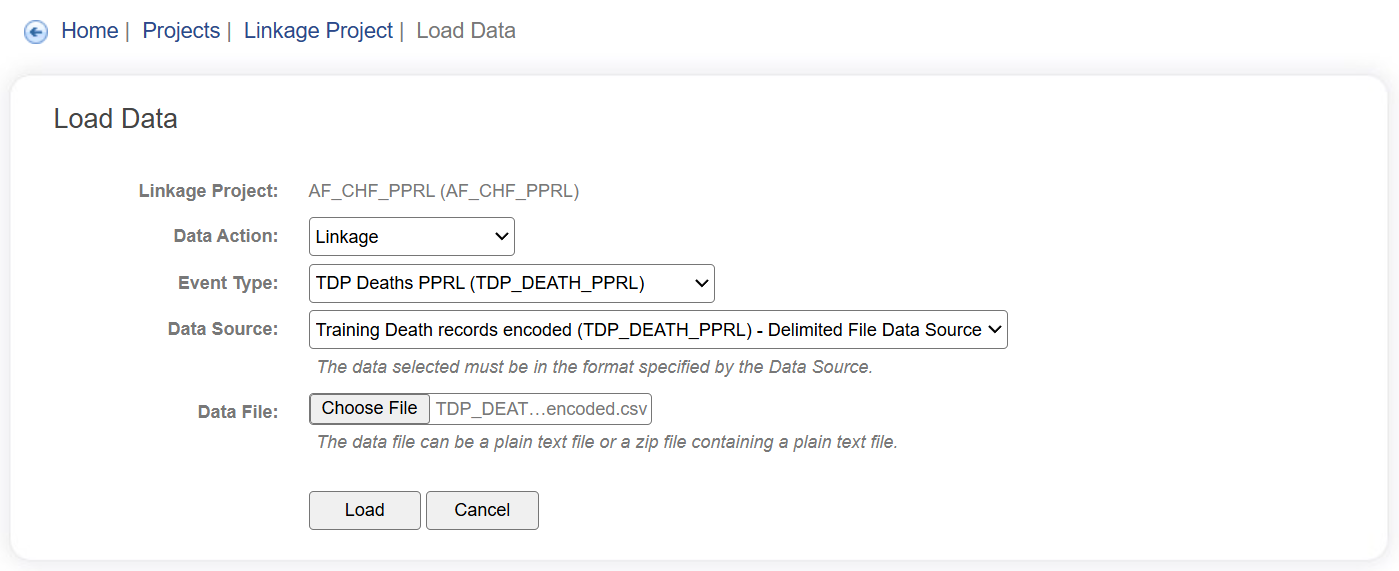
Step 11: Click on the Choose File icon and select the TDP_DEATH_encoded.csv file from the relevant Data folder. Click Load. This may take a minute while the dataset is uploaded to the LinXmart server from your local machine.
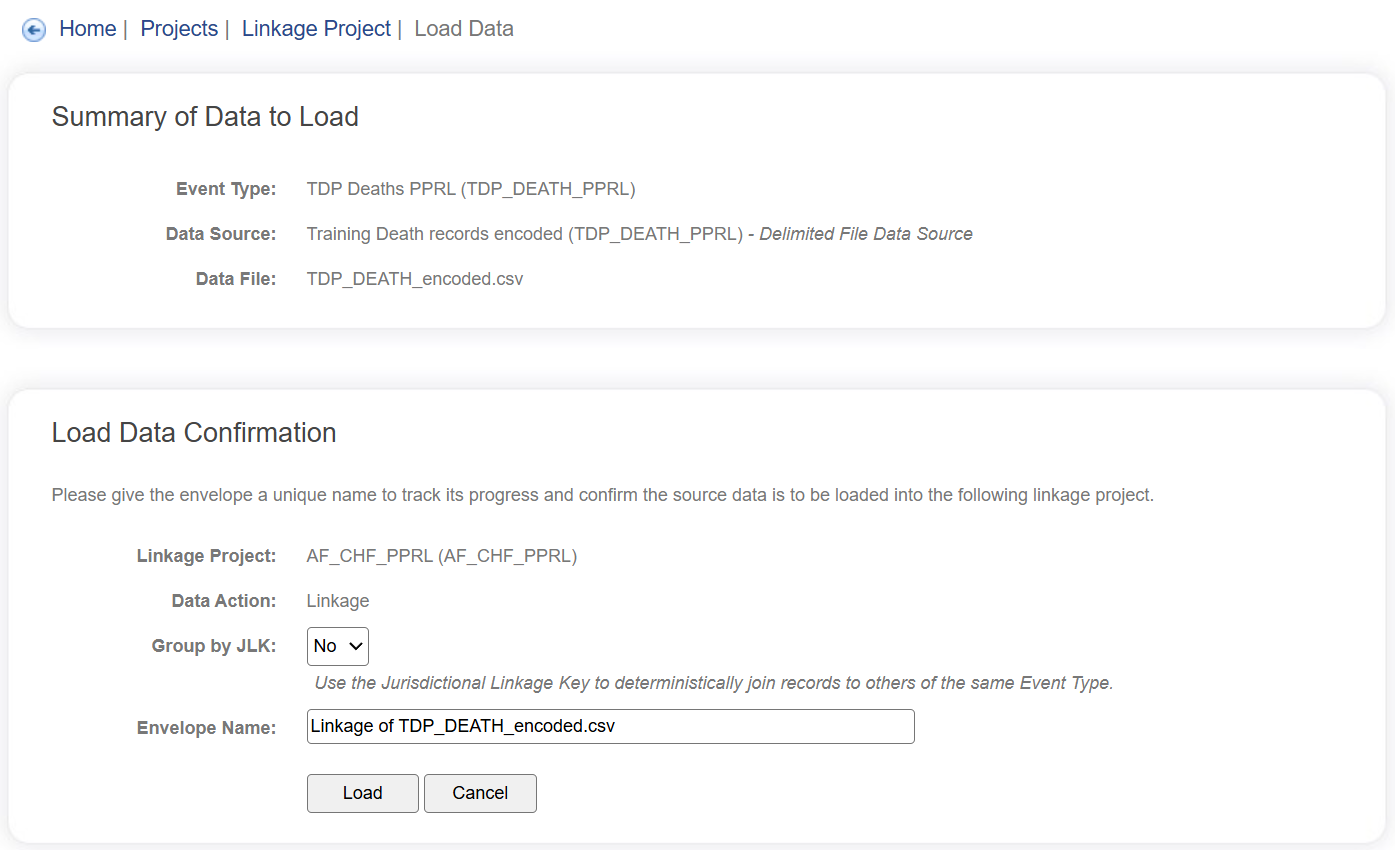
You will be taken to a Load Data Confirmation page.
Please ignore the Group by JLK option and select Load. This will begin the linkage process; its process can be monitored in real-time through the ACTIVITY screen.
Monitoring your load-linkage job
Step 12: To see how this load-come-linkage job is progressing, navigate to the Job Monitoring screen by clicking on the ACTIVITY tab at the top of the screen.
Step 13: Select the ENVELOPES sub-tab. Information regarding the current job's status will be appear under 'All Envelopes'.
The data in this file was internally linked or de-duplicated, identifying records within the file belonging to the same person. As there were no other datasets in the Project, this is the only linkage that took place. A green tick is the Status column indicates that the job ran to completion (green is good).
(Question: How does the results of this PPRL Linkage Job compare to the same Job for the CLEAR TEXT CHF Project?)
PPRL Linkage continued: Adding encoded Hospital records
Next, we upload the encoded hospital admissions data: TDP_HOSP_encoded.csv.
The file is found in the relevant Training Data folder (there are about 25,000 records in this file). The format of this file (called the Import Format) is identical to the format of the encoded TDP_DEATH_PPRL data and uses the same EB_PPRL_Default format.
Step 14: To upload the data, first navigate to the Project dashboard (PROJECTS -> select XX_CHF_PPRL) and then click on Data Sources. Select the TDP_HOSP_PPRL upload icon.
Step 15: Follow similar steps as above to find the encoded hospital data in your folder system, then confirm the load (shown below).
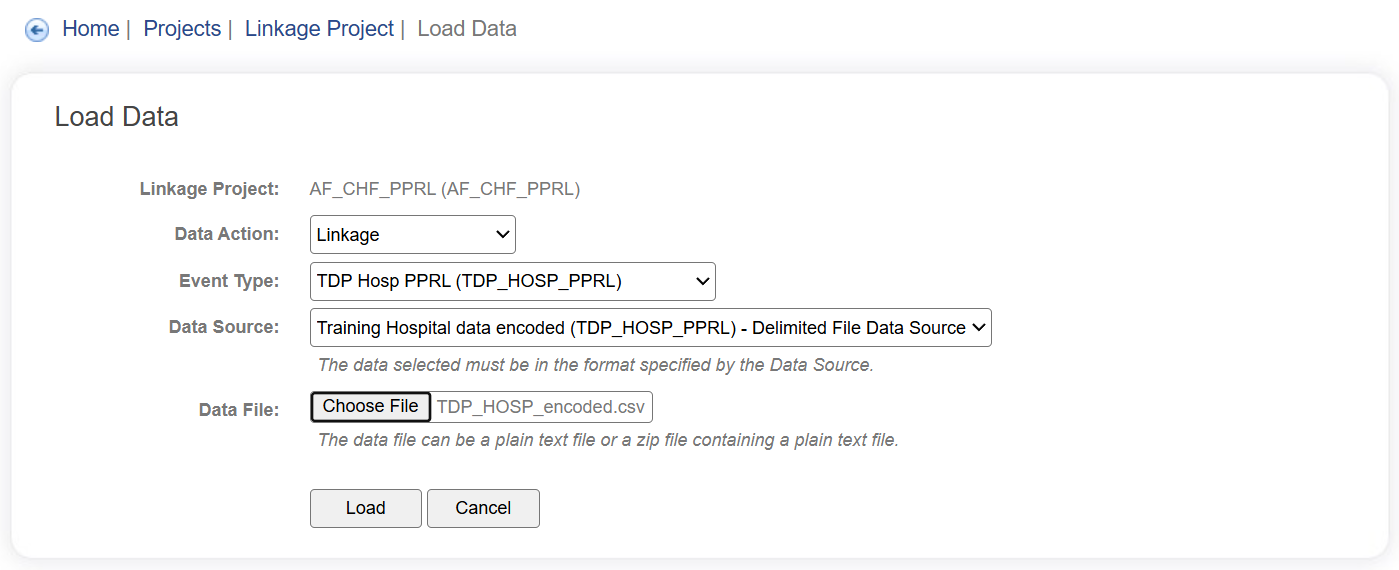
Once uploaded, monitor progress of the Linkage job through the ACTIVITY screen.
Step 16: When the job has completed, go back to the Project Dashboard and review the results from the linkage. Do this by clicking on the Report icon of the recently complete Linkage Job (shown below).
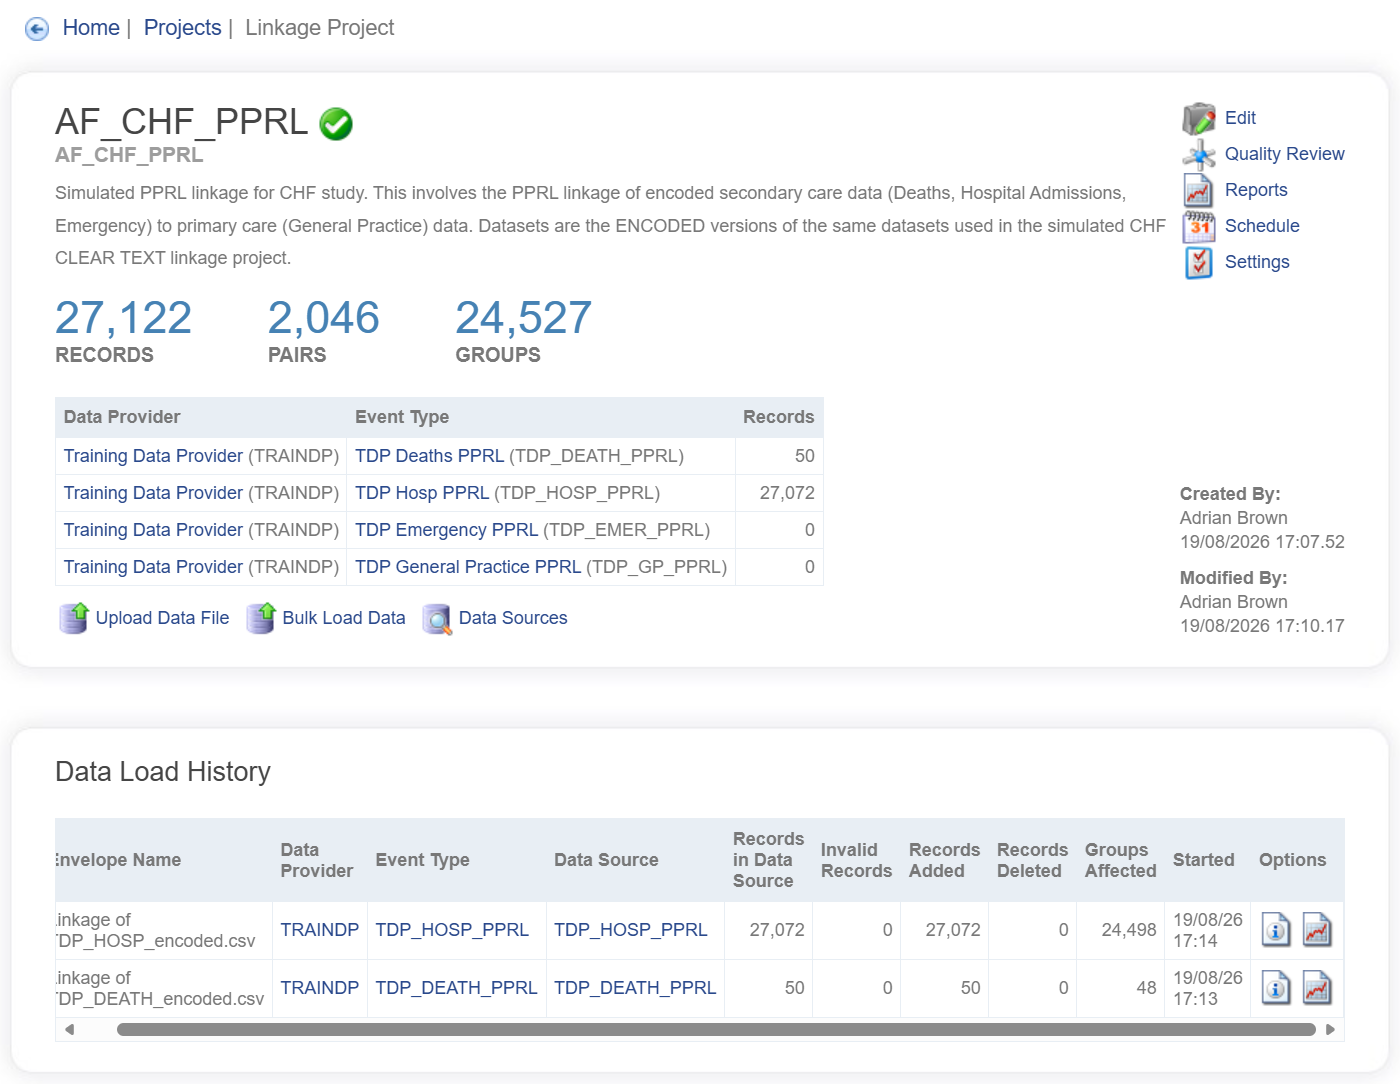
PPRL Linkage continued: Adding encoded Emergency records
Step 17: Follow similar steps (as above) to find and upload the encoded emergency data (replace TDP_HOSP_PPRL with TDP_EMER_PPRL, where applicable, and use TDP_EMER_encoded.csv – as shown below).
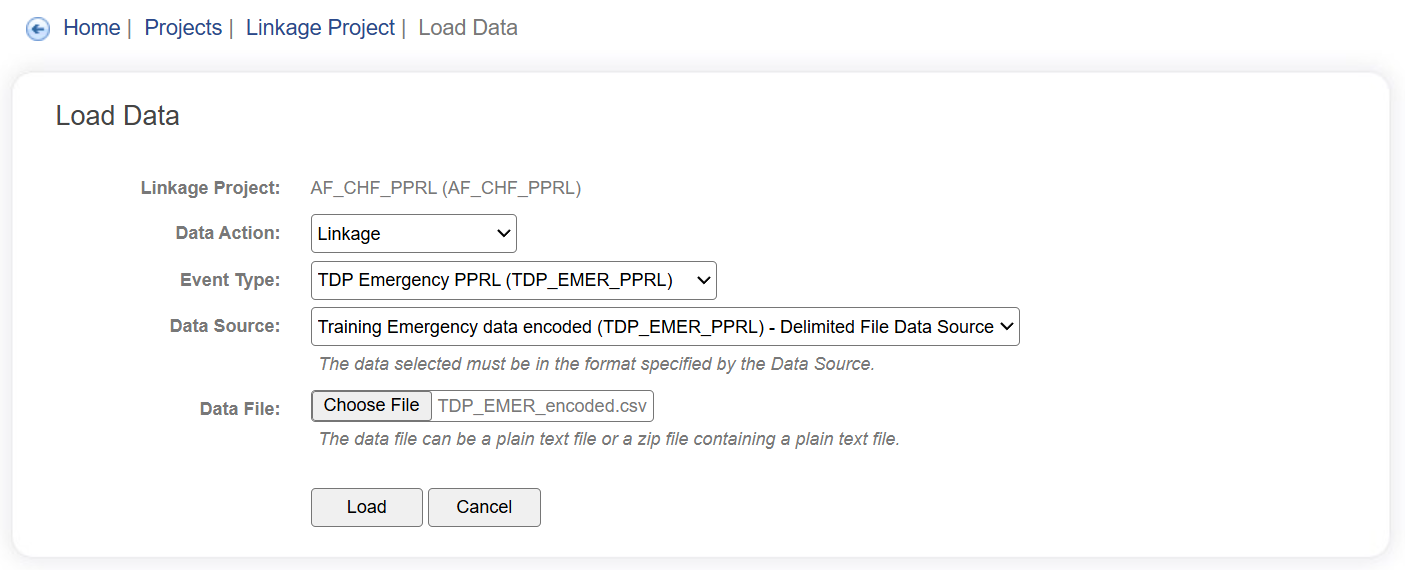
Once uploaded, monitor progress of the Linkage job through the ACTIVITY -> ENVELOPE screen.
Step 18: When the linkage job has completed, go back to the Project Dashboard and review the results from the linkage. Again, do this by clicking on the Report Icon associated with the Job that has just completed (as shown above).
PPRL Linkage continued: Adding encoded GP records
Finally, we are positioned to link the encoded General Practice data into this PPRL project.
However, before uploading the encoded General Practice data, we will change our Grouping configuration setting from Merge to Weighted best-link. Weighted best-link grouping essentially allows you to leverage the pre-existing quality in your already linked Secondary care data and it will NOT permit an incoming GP record to join two pre-existing groups in your Secondary care 'spine'.
Step 19: To modify the Grouping method, first navigate to the Project dashboard (PROJECTS -> select XX_CHF_PPRL), click on Settings, then Group Configuration.
Step 20: Edit the configuration, select the Weighted Best-Link method and Save your change.
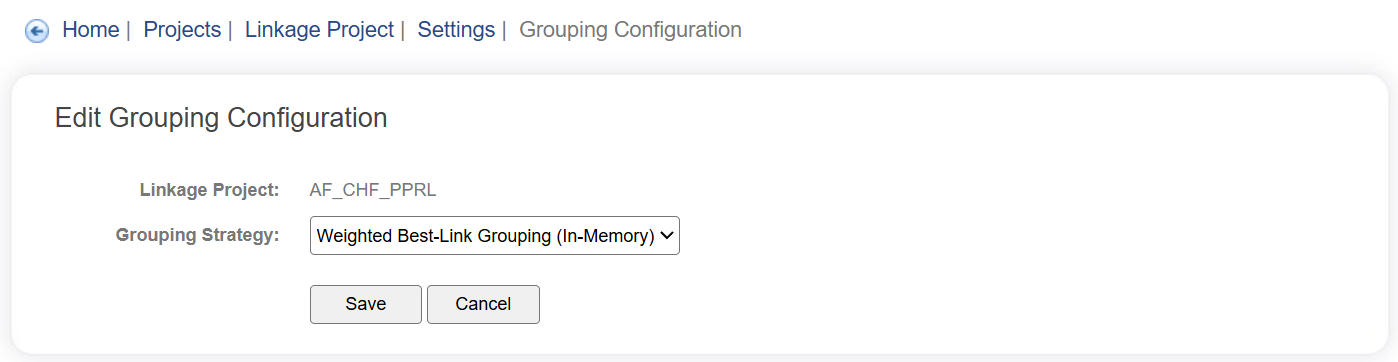
Now continue to the uploading of your encoded GP data.
The encoded datafile: TDP_GP_encoded.csv is found in the relevant Training Data folder (there are about 50,000 records in this file). The format of this file (called the Import Format) is identical to the format of the TDP_HOSP_PPRL data and uses the same EB_PPRL_Default import format.
Step 21: To upload the encoded data, first navigate to the Project dashboard (PROJECTS -> select XX_CHF_PPRL) and then click on Data Sources. Select the TP_GP_PPRL upload icon.
Step 22: Repeat steps to find and upload the encoded GP data (shown below).
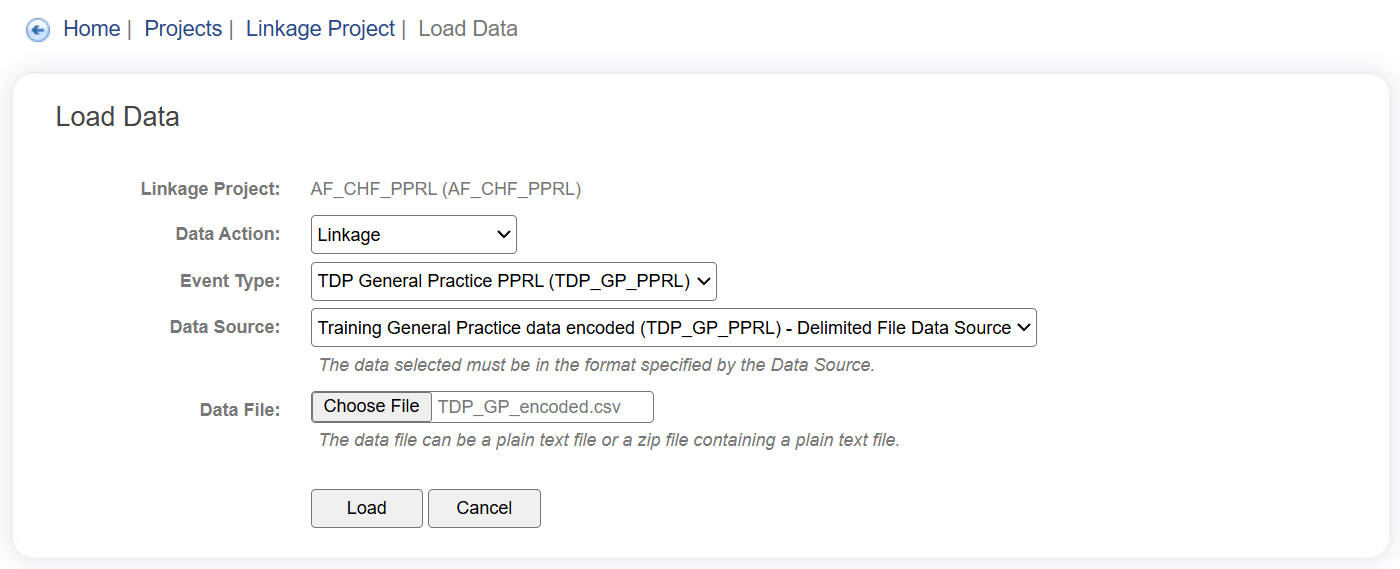
Step 23: Once again, monitor progress of the Linkage job through the ACTIVITY -> ENVELOPES screen.
Step 24: When the linkage job has completed, go back to the Project Dashboard and review the results from the linkage.
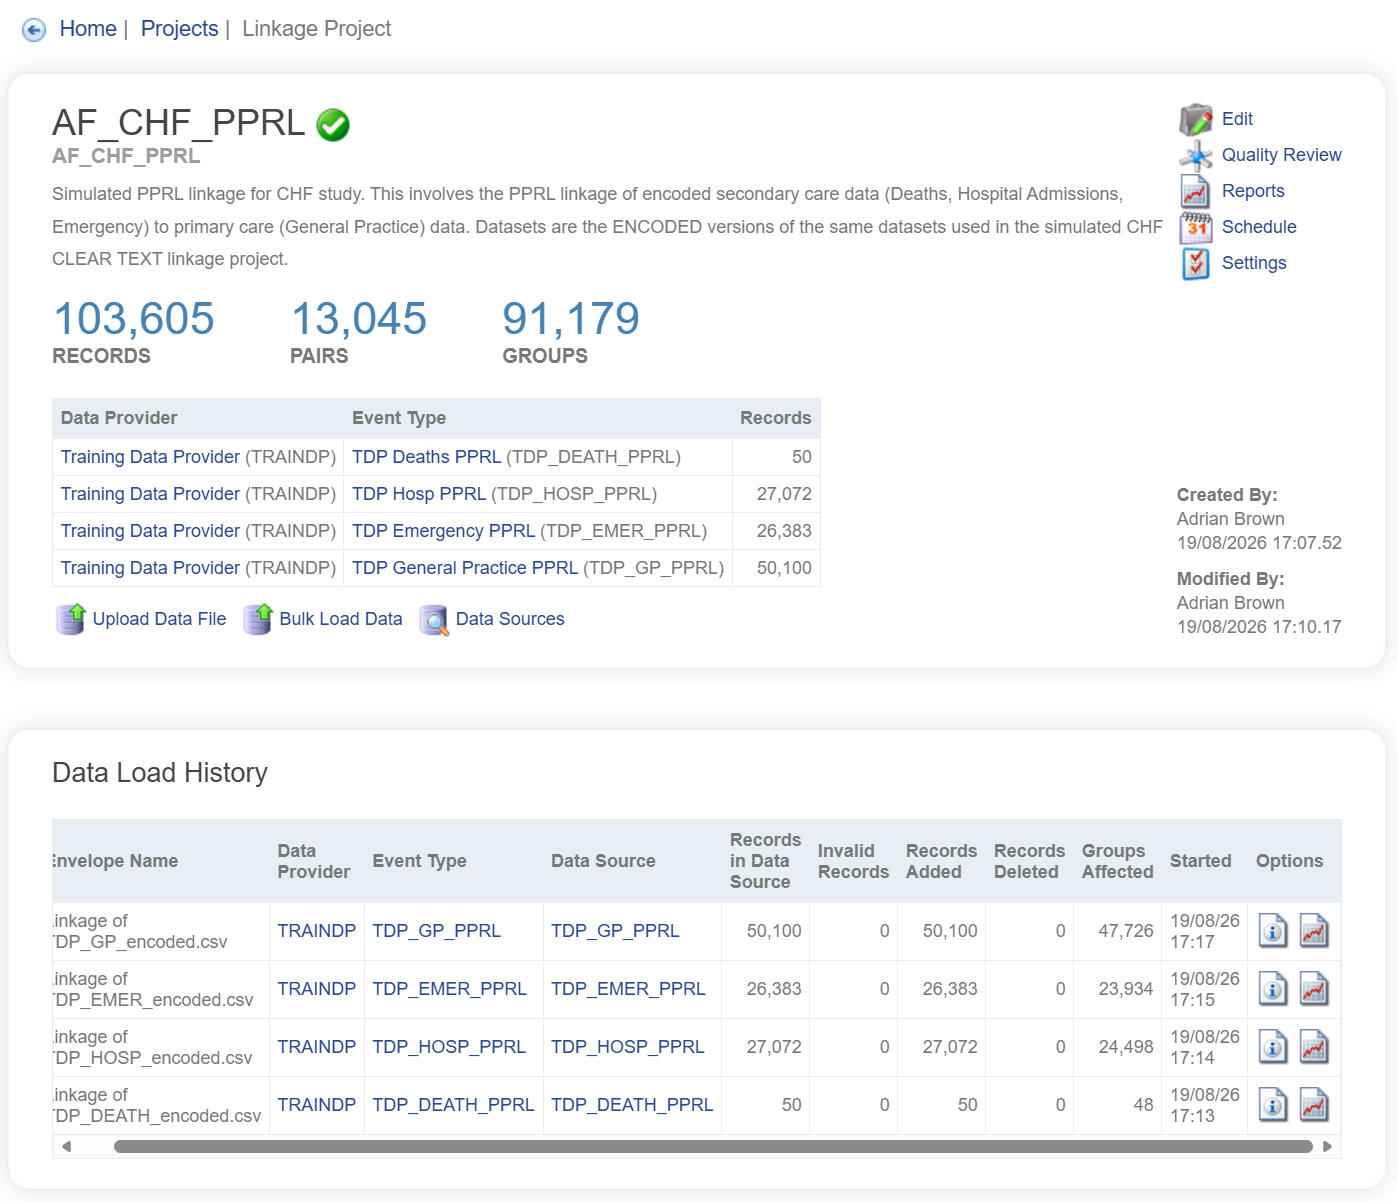
Should I vary my threshold or change weights?
Decisions about varying the threshold are typically made after reviewing Linkage Reports and by eye-balling matches that sit on or near the cutoff value (the current threshold value is 21). These review points can occur at the end of EVERY linkage job, or they can take place at certain progress points in the project, or both.
However, in PPRL linkage, reviewing quality is tricky and eye-balling matches is extremely difficult, so other approaches are needed to get feedback and to inform decisions on your linkage.
Remember that linkage is an iterative process – it is unlikely that you will achieve optimal linkage results on your first run, regardless of whether it is a Clear-text or PPRL linkage project.
Here are some ideas for refining your linkage and improving results:
- Look at the distribution of record-pairs in the linkage reports. Do these 'look' right? Are there some particular confidence levels with a high number of pairs? Might you be tapping into the distribution of True Non-Matches?
- Look at some groups with low saturation (view through Quality Review). Could setting a higher threshold, for example, eliminate wide diameter or bridge-type group structures?
- What would be considered a suitable threshold for linkage of this data in its raw PII state (i.e. NOT using PPRL)? Have you tried to do the CHF simulation using clear text data (before trying with encoded data)? What kind of decisions did you make re: matching strategies, thresholds, etc.? Can any of those decisions inform your decisions when tackling a PPRL linkage project?
Welcome to the art and science of data linkage!