Module 6 - Use of Envelope Builder for PPRL linkage projects
In this Module, we will demonstrate how to use the LinXmart Simple Envelope Builder (EB) to prepare data for a PPRL linkage project.
The linkage project we will use is a replication of the PPRL linkage project which was demonstrated through Module 8. It is a simulated linkage of Primary (GP) to Secondary health care data. Specifically, the project involves:
- Secondary health care data, which comprises three encoded, synthetic datasets of Death registrations, Hospital admissions records (HOSP) and Emergency department presentations (EMER).
- Primary care data, which is also simulated and supplied as encoded General Practice (GP) data.
This module is part of a series of training modules that can be used with any LinXmart deployment. However, the user will require permissions to create Linkage Projects, load data for linkage extract linkage map results.
All required data files are available from the main self guideded training page.
Getting started
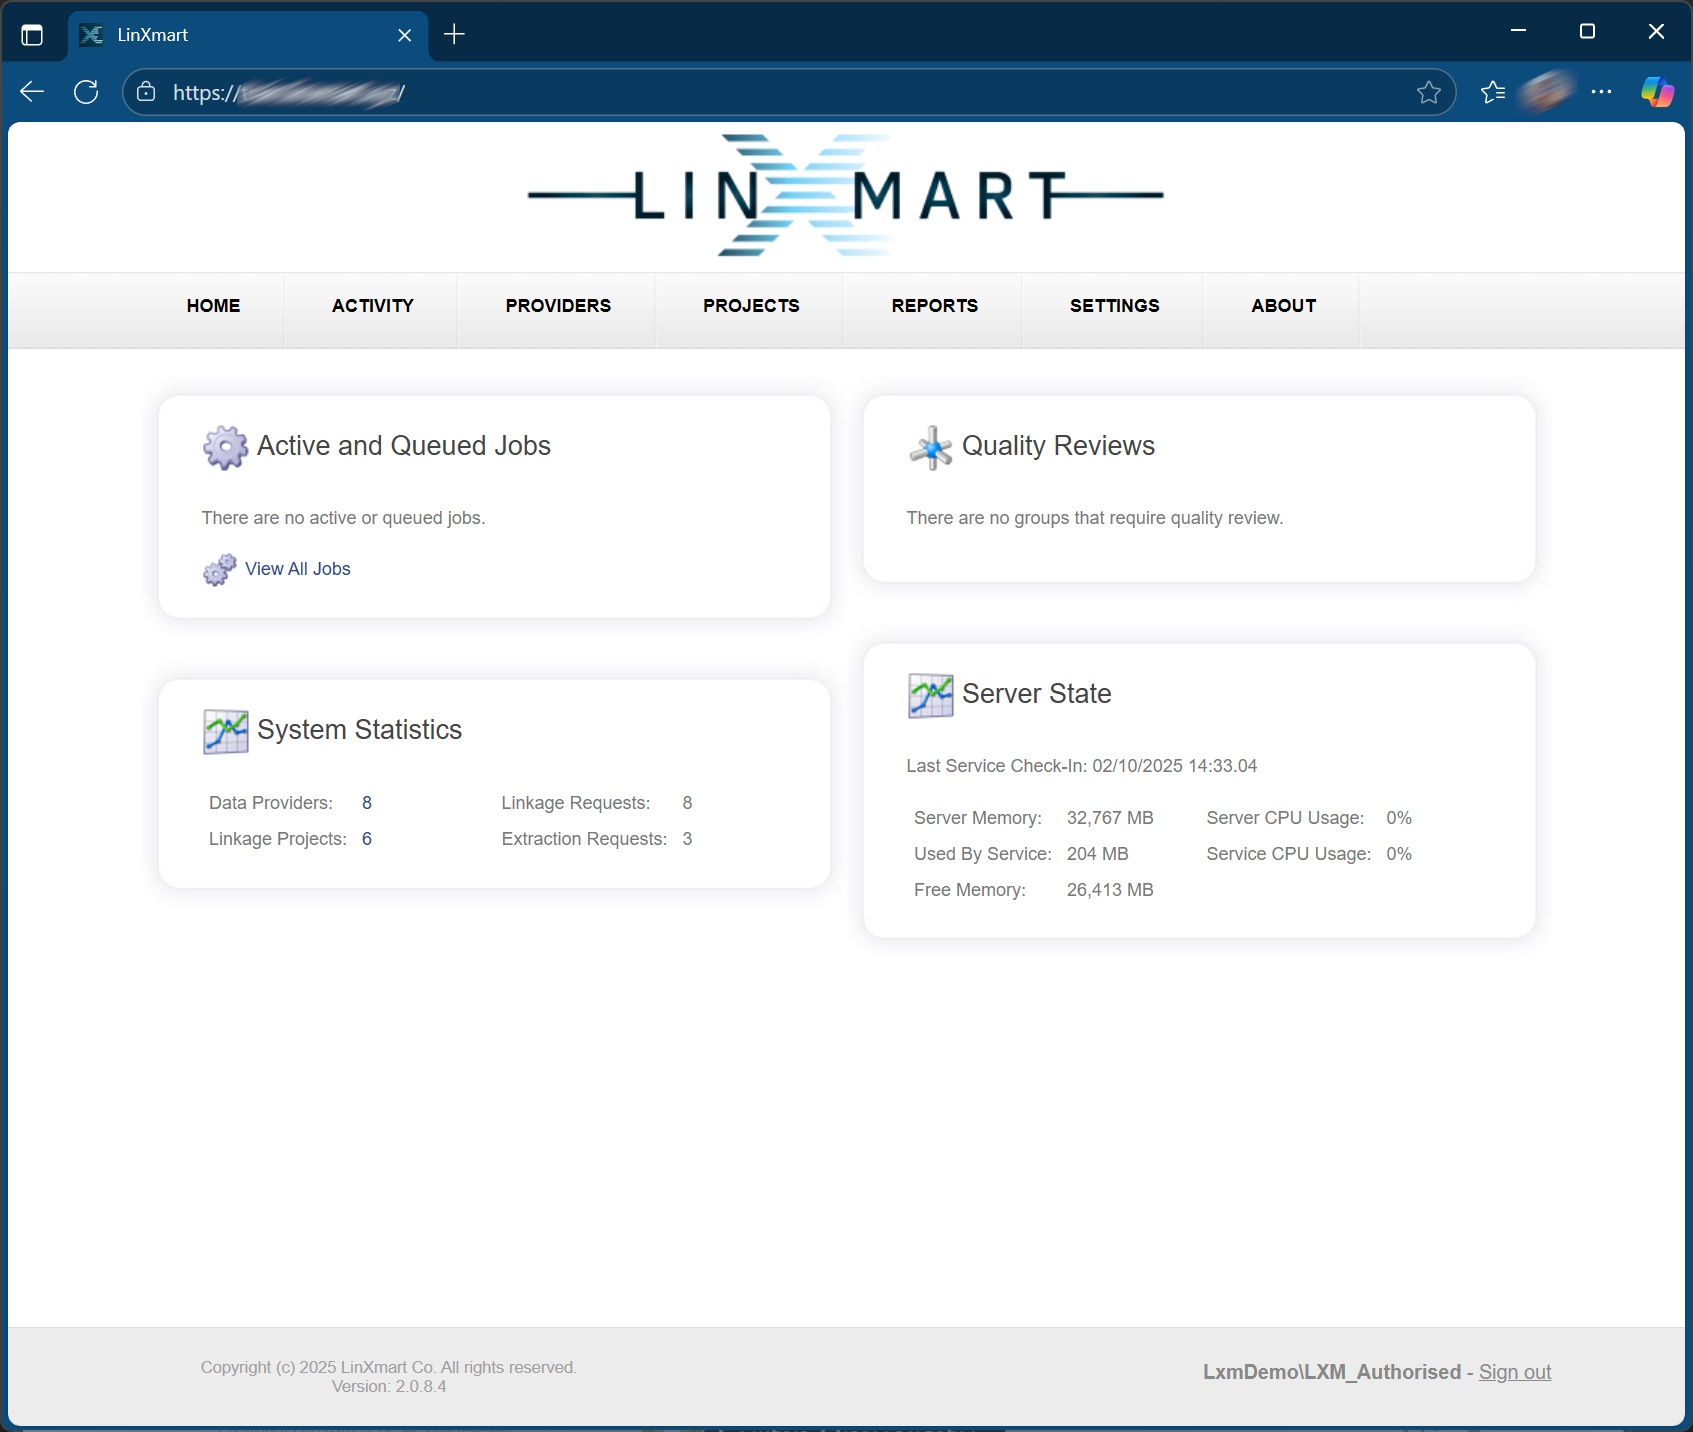
Step 1: Connect to the LinXmart web interface by typing in the LinXmart web address. You will see a screen similar to this:
Step 2: Ensure that your installation of LinXmart has a Data Provider called TRAINDP. To do this, click on the CATALOG tab at the top of the page.
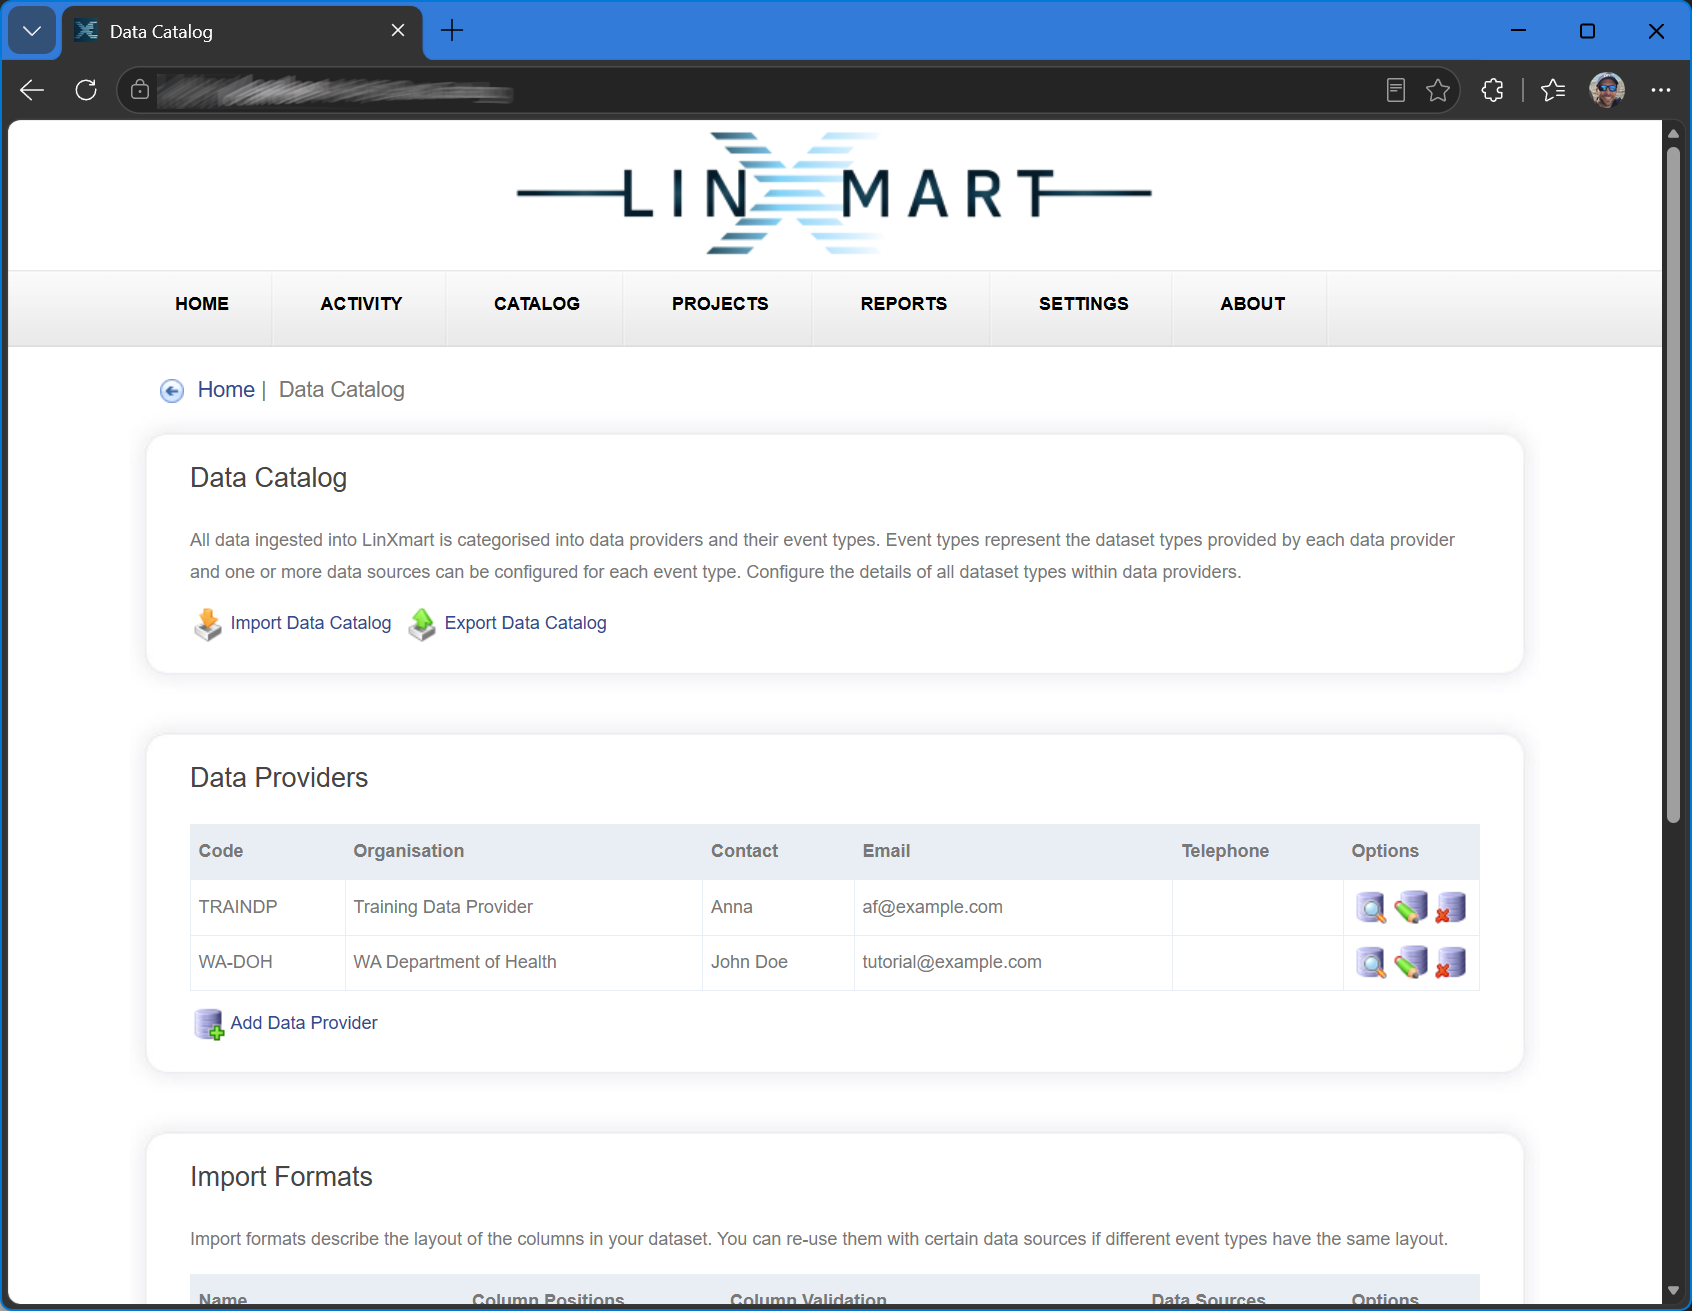

If this Data Provider is not displayed, please follow the setup instructions for this series of training modules before continuing.
If the TRAINDP Data Provider is displayed, click on the row it is on to view the details of the provider. You will notice that this Data Provider supplies you with several datasets (Event Types) – in both clear text and encoded forms (shown below). The import formats of these files have already been defined.
You will use these pre-defined formats as part of this Module.
Creating a Linkage Project
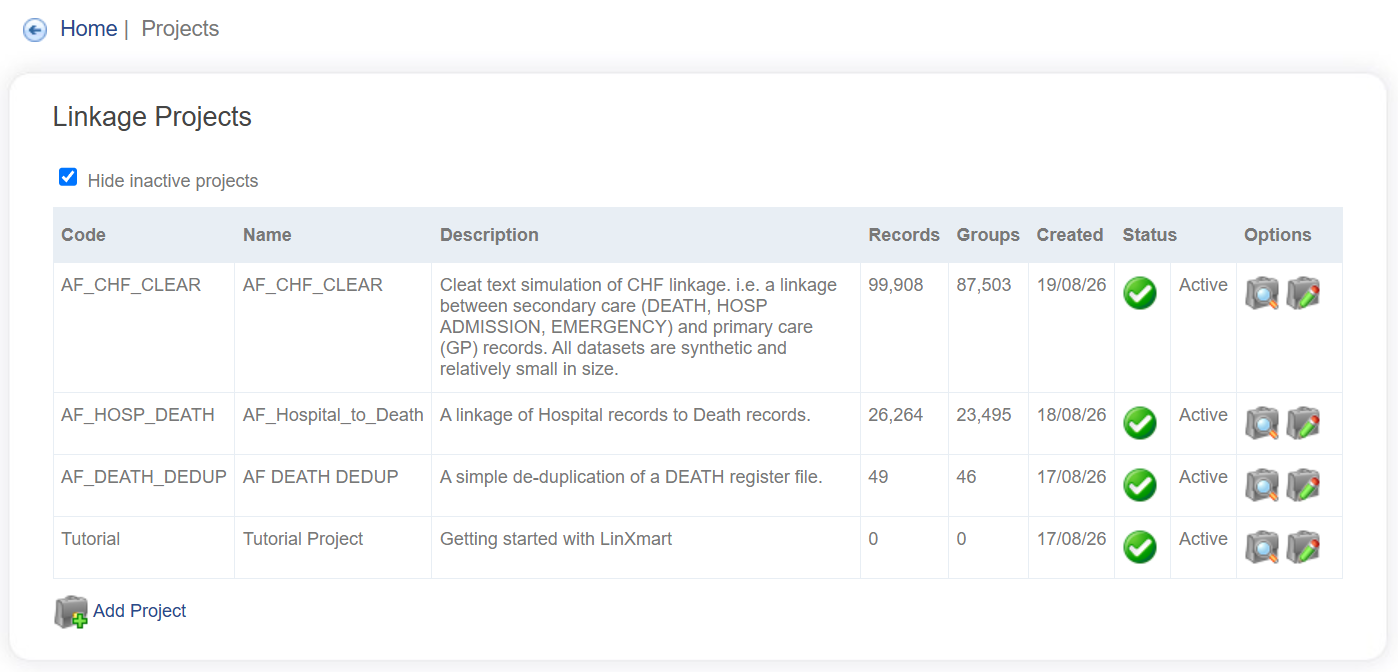
Step 3: Click on the PROJECTS tab at the top of the web page. This will present you with the dashboard of current projects (shown below). At the bottom of the list, click on Add Project.
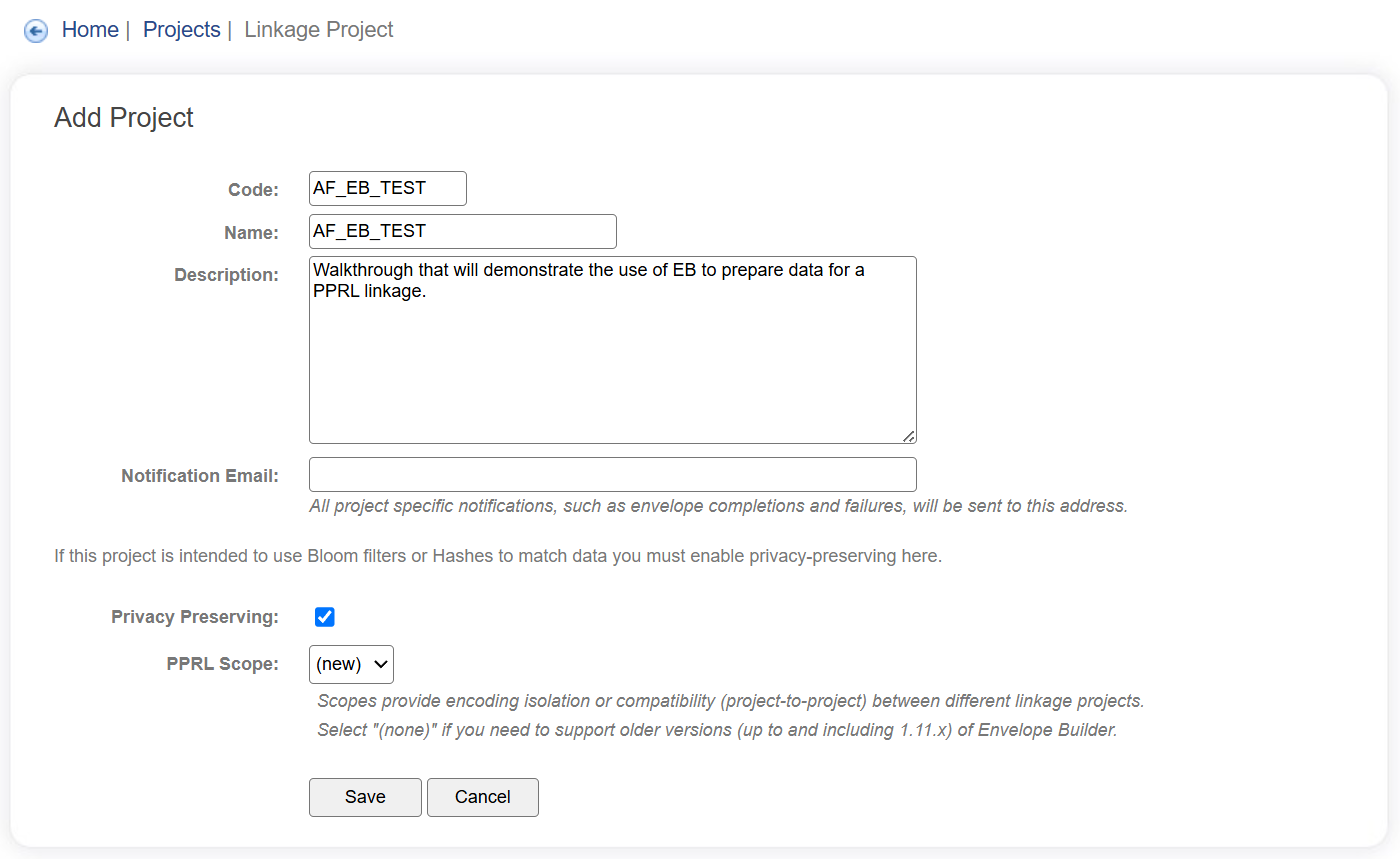
Step 4: Create your project (e.g. XX_EB_TEST) as shown below. Also tick the Privacy Preserving checkbox. Then click Save to finish.
Configuring your Linkage Project
Step 5: Click on your XX_EB_TEST project to bring up the Project Details page.
You are presented with an empty project (as shown below).
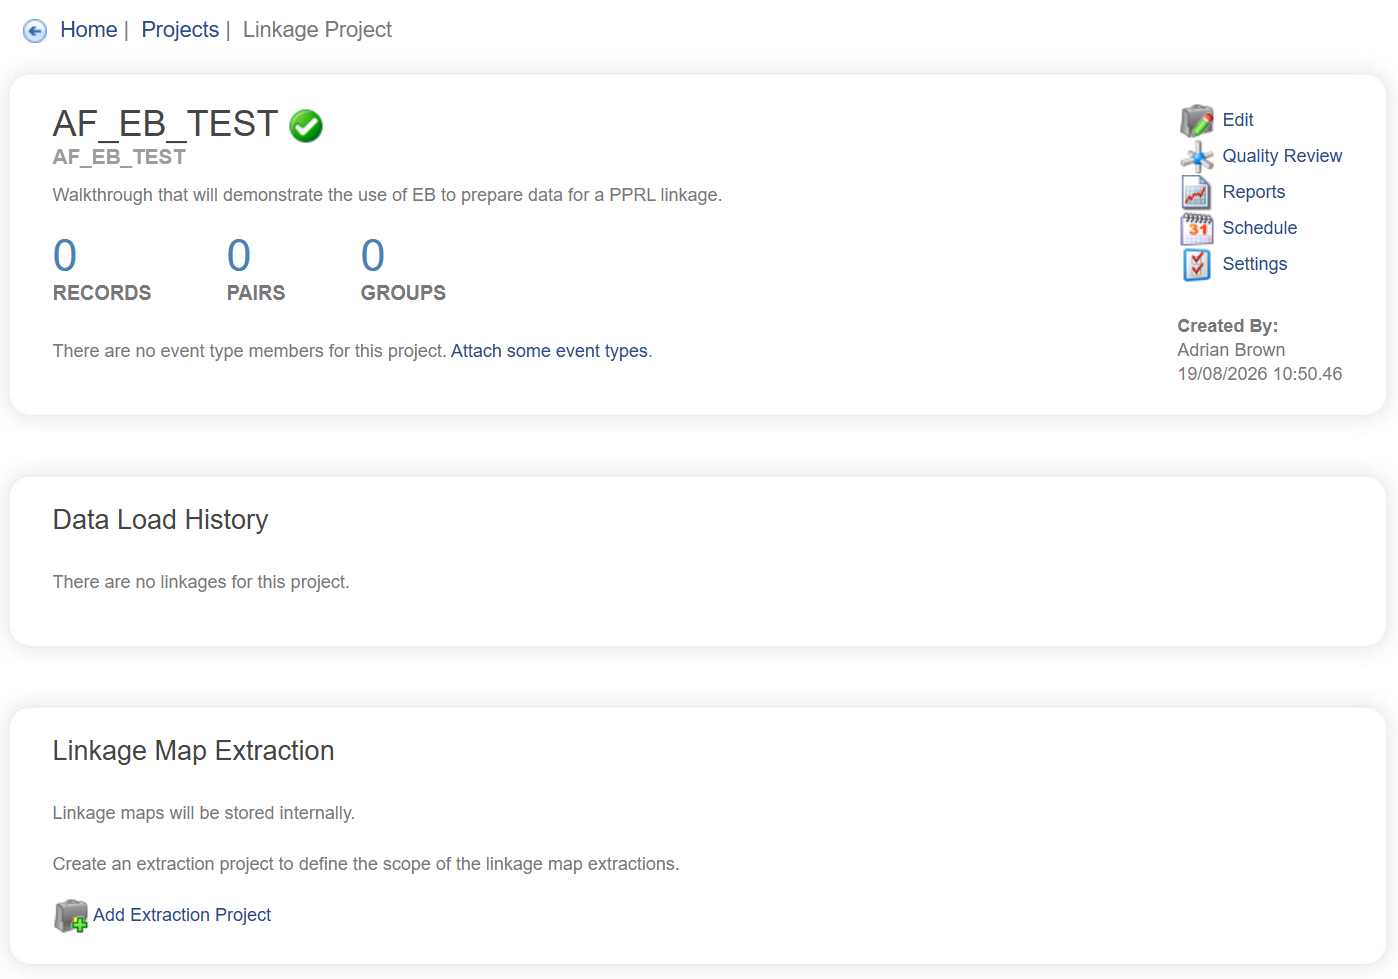
Before data can be loaded into this Project, one or more Event Types need to be attached to the Project and a suitable Match configuration needs to be defined. You can configure your project manually, as per previous Modules (Modules 1 thru 5).
However, if the project is intended to be a replication of a previous one (for example, if you are moving from a Proof of Concept project to a Production Linkage Project) then an alternative and arguably faster way of adding event types and configuring your PPRL project, is to import settings from a previous PPRL project.
We will show you the latter approach.
The settings of the PPRL project described in Module 8 have been stored in a JSON file which is available to you as part of your training package: LinkageProject_CHF_SIM_PPRL_config.json.
Let's import the linkage settings from that JSON file into your current project.
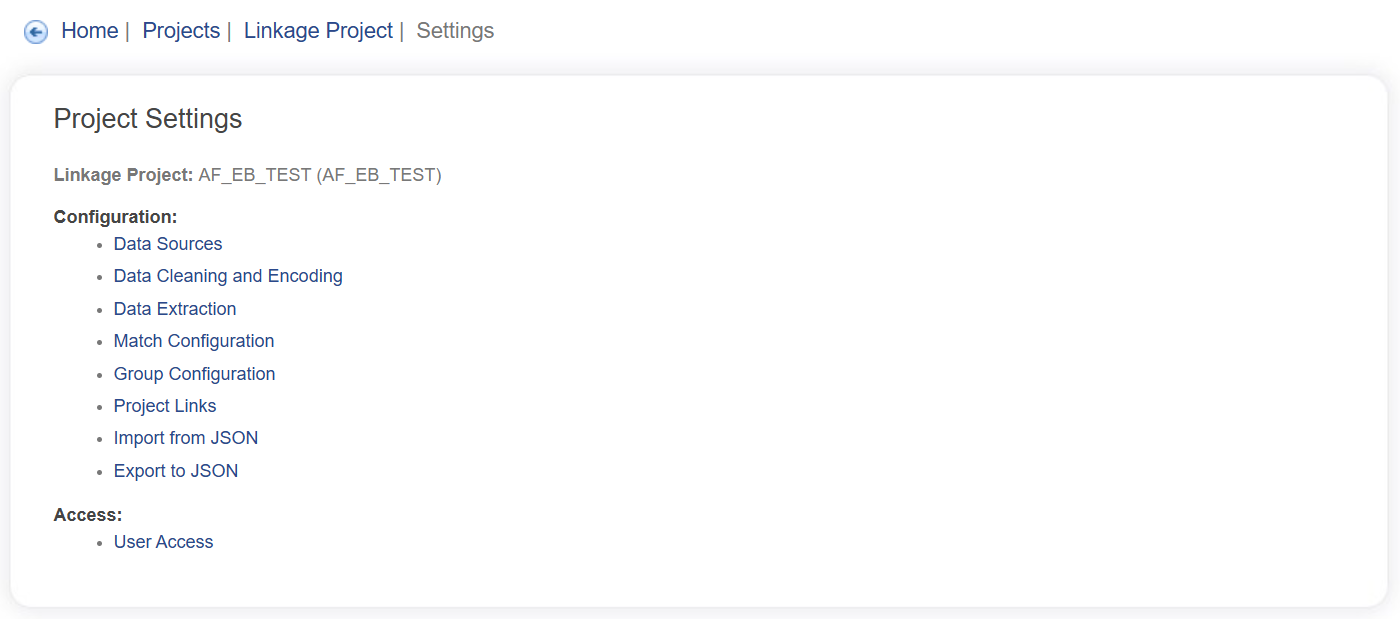
Step 6: Click on the Settings link (shown below).
Step 7: From the list of Project Settings, select Import from JSON (shown below).
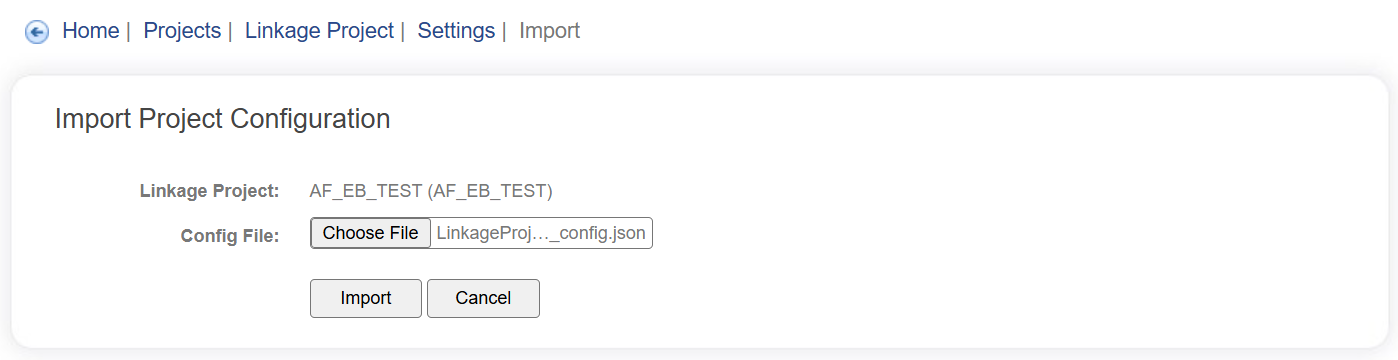
Click on Choose File, then locate and upload the LinkageProject_CHF_SIM_PPRL_config.json file. Click on Open, then click on Import.
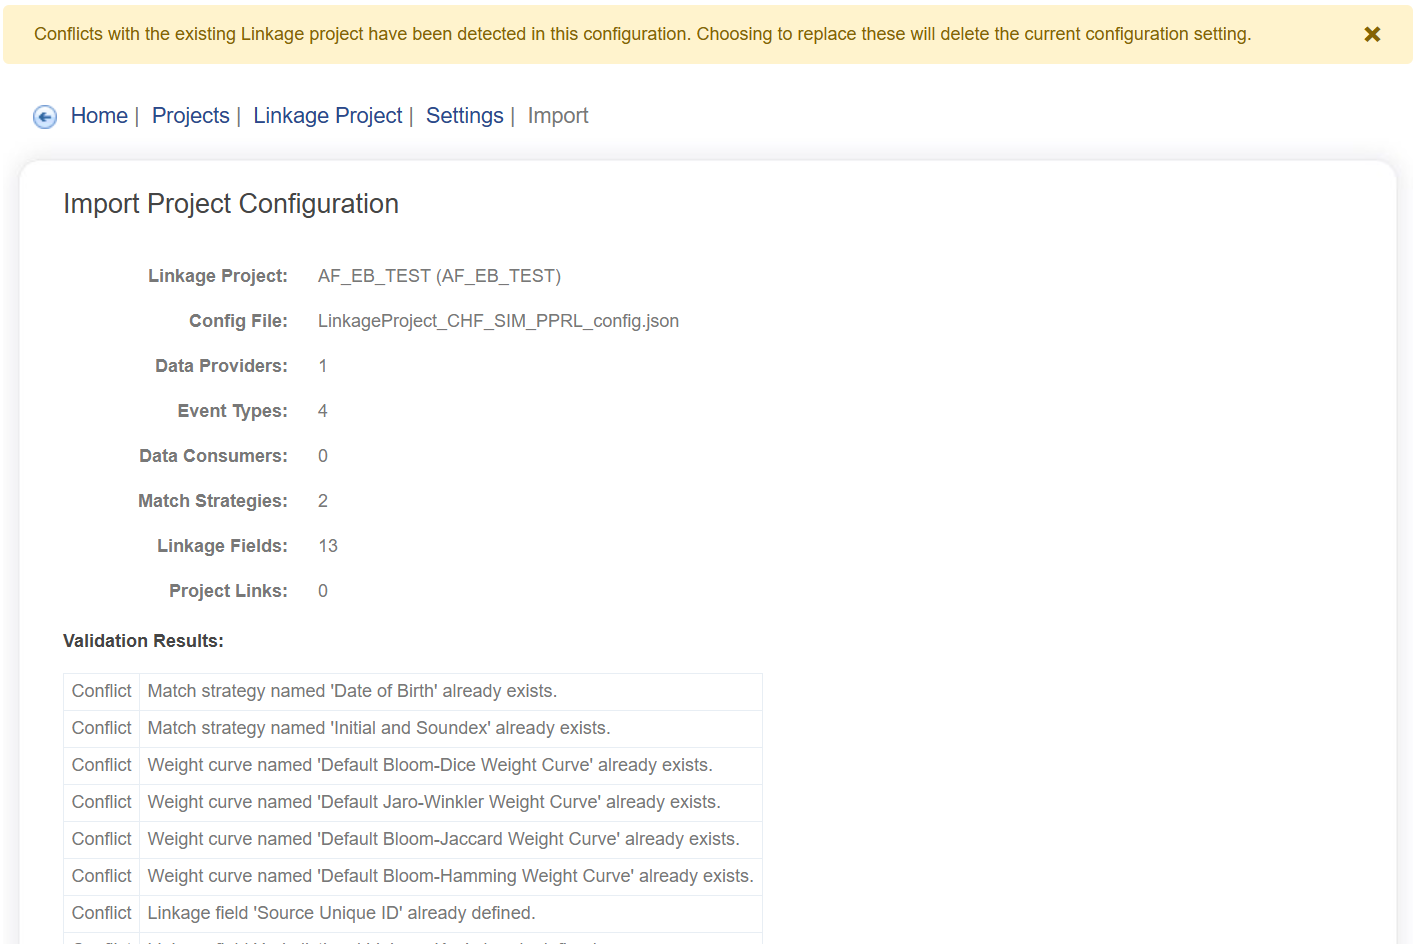
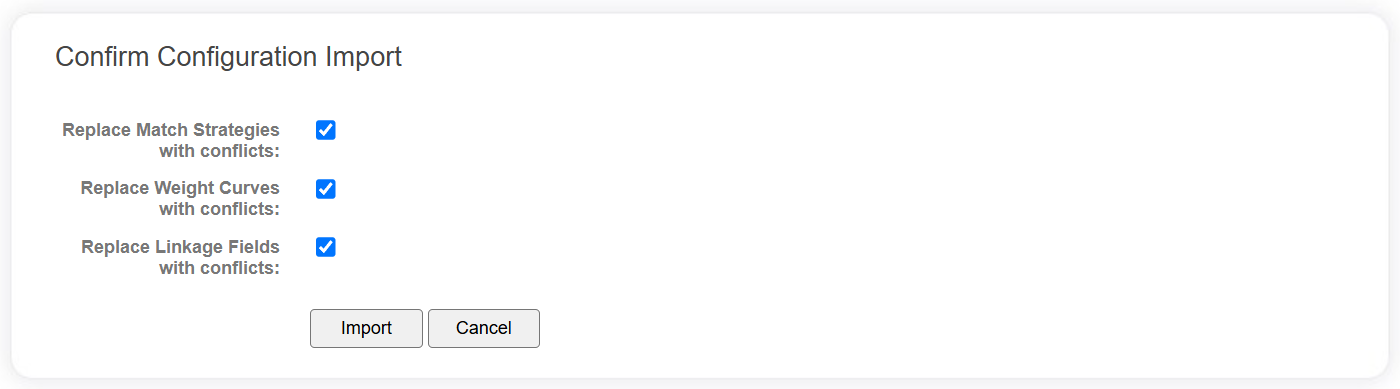
During the import, the system may notify you of some conflicts with settings that are (already) part of your project. If this is the case, then Replace the conflicts (also shown below).

Reviewing your Project settings
As a result of uploading project configuration settings from another project, your XX_EB_TEST project will 'inherit' the configuration settings from that project.
Your XX_EB_TEST project will be configured with parameters and settings that relate to:
- the Event Types that will form part of your project,
- the Linkage Fields that will be imported and used in matching (note, these will be mostly encoded or binary fields),
- the PPRL matching strategies (two of them) which will also operate on the binary or encoded fields that were defined as part of the project.
Take some time to review the configuration settings of your project.
Step 8: To do this, navigate to the Project dashboard and select your project (PROJECTS -> click on XX_EB_TEST).
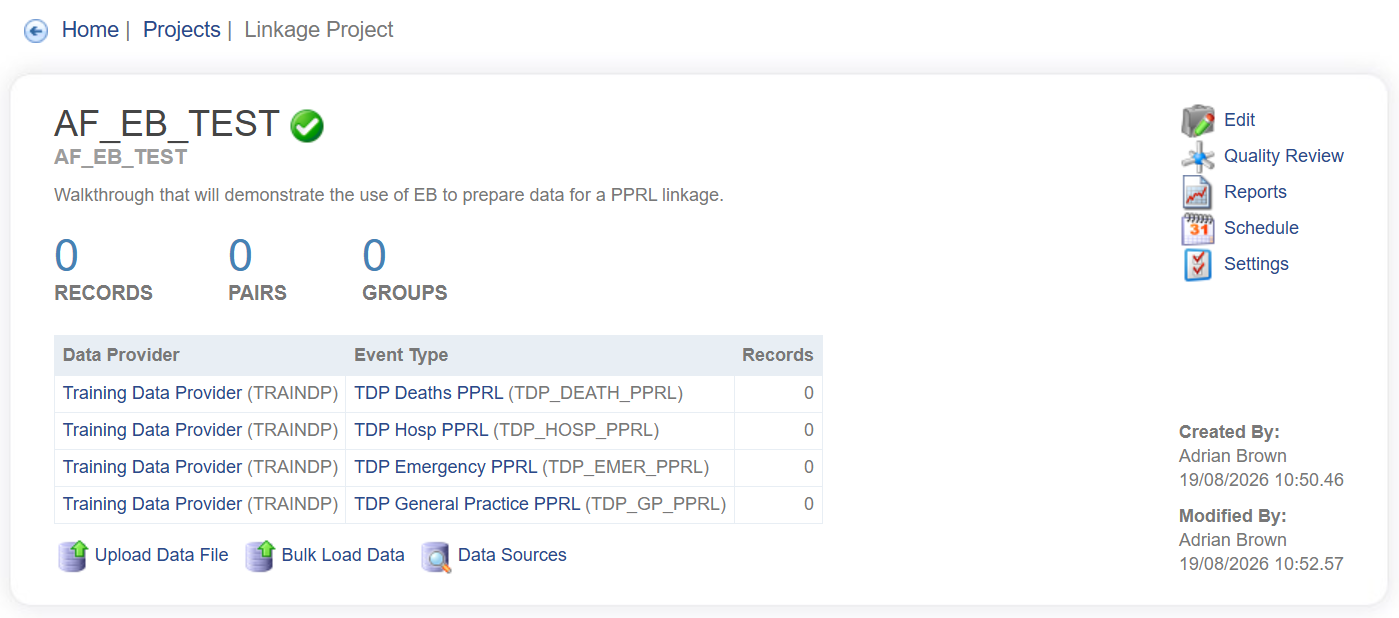
At this point, you can see the list of datasets (Event Types) that form part of your linkage project. Notice that there are four different datasets that will form part of your project and that all of them are encoded.
Drill further by clicking on Settings (as below).
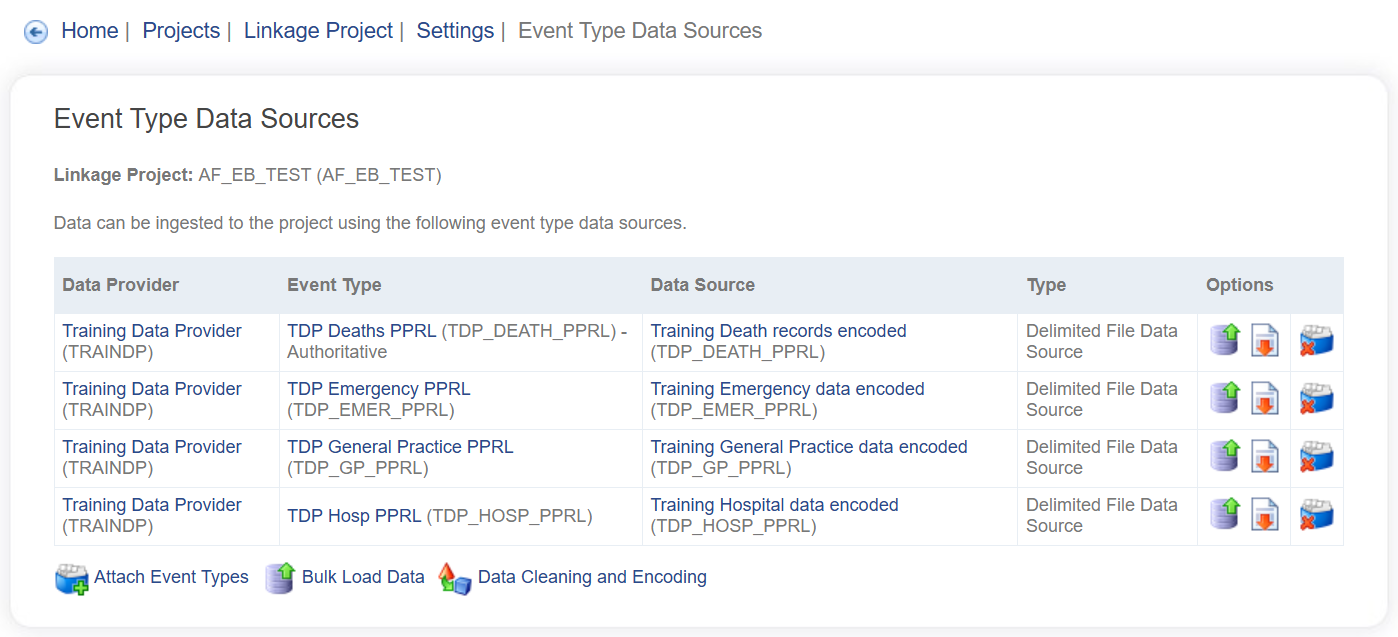
Step 9: Click on Data Sources so that we can take a closer look at the format of these datasets.
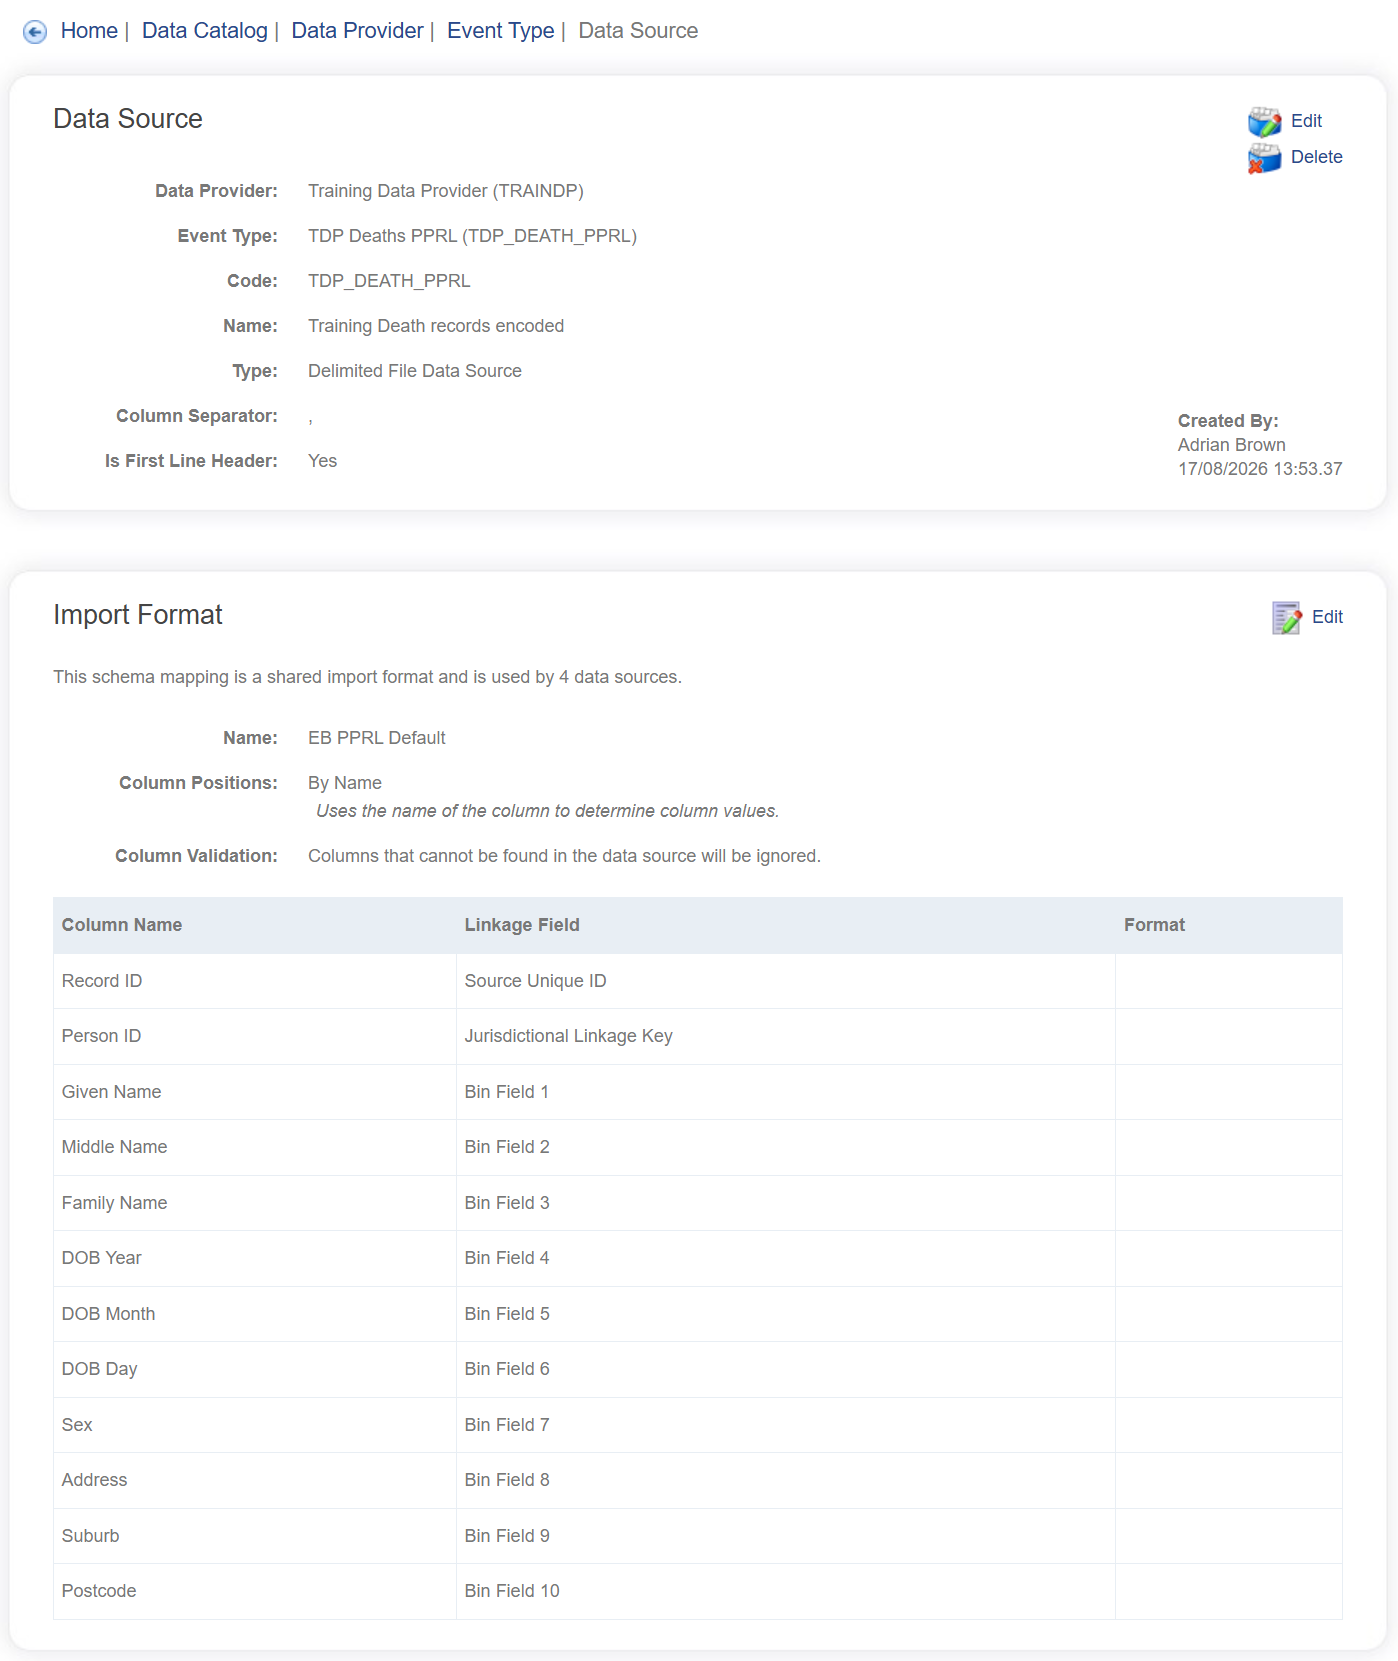
Step 10: Click on the first listed Data Source – Training_Death_records_encoded (shown below).
You will now see details of the Linkage Fields from this data source and their positional order at time of import. This is part of the Import Format for this data source.
Step 11: To find out more about the individual linkage fields, navigate to the Project dashboard and select your project (PROJECTS -> click on XX_EB_TEST), go to Settings again and click on Data Cleaning and Encoding (shown below).
Under the Linkage Fields section, you will see very detailed information about each Linkage Field including:
- if/how they are to be cleaned and standardised (transformed)
- if/how they are to be encoded
- which dataset (Event Type) they can be found in (not every incoming dataset will have every linkage field!)
- if/how they are to be used in matching.
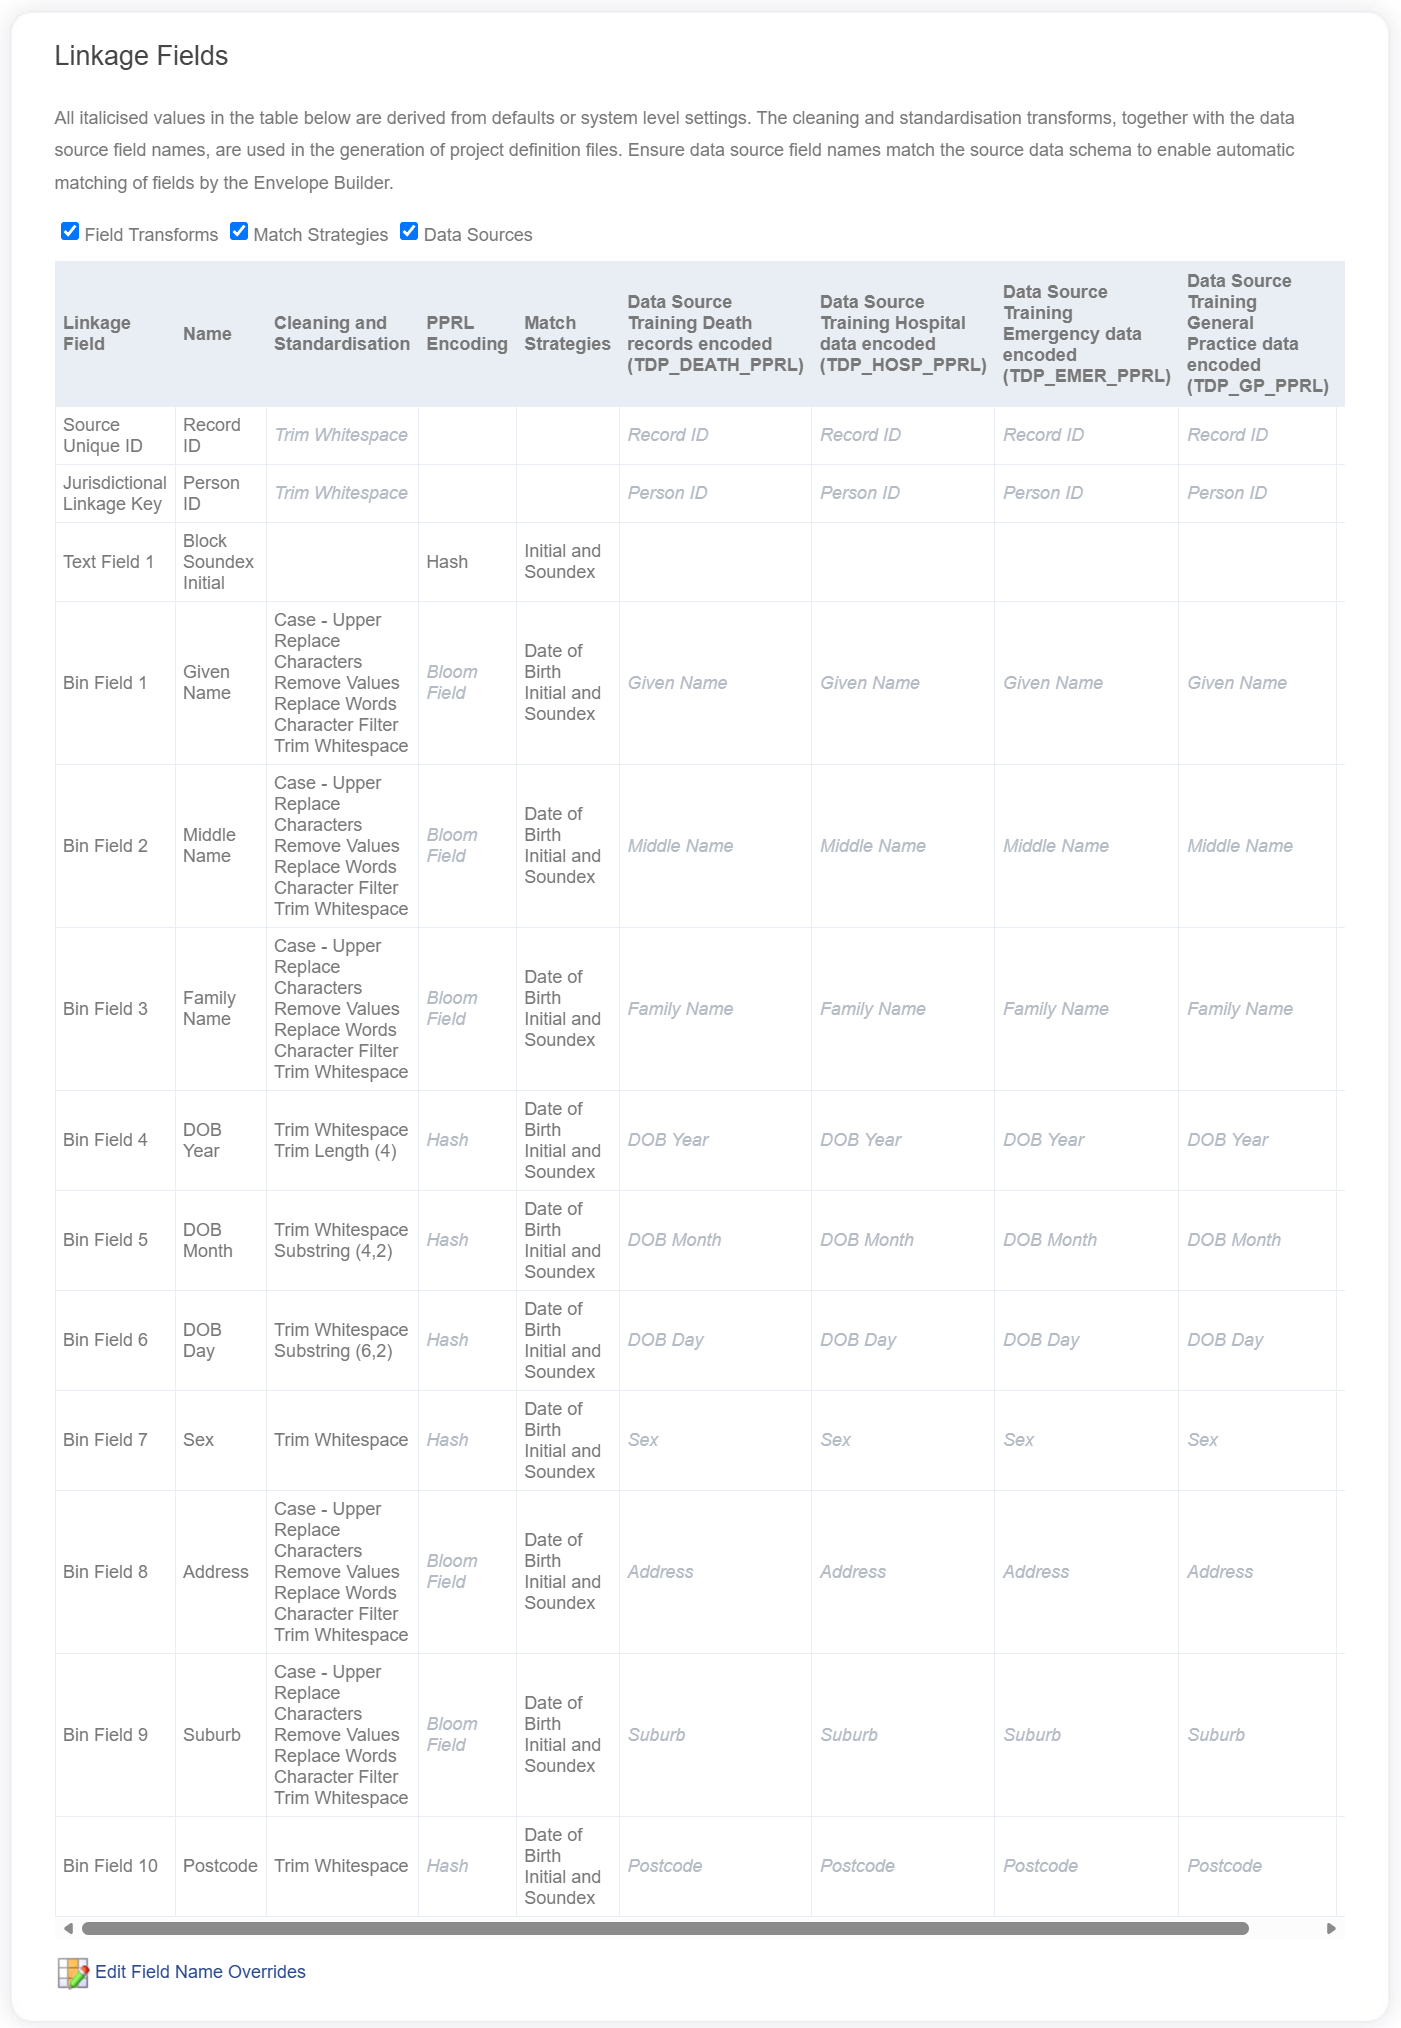
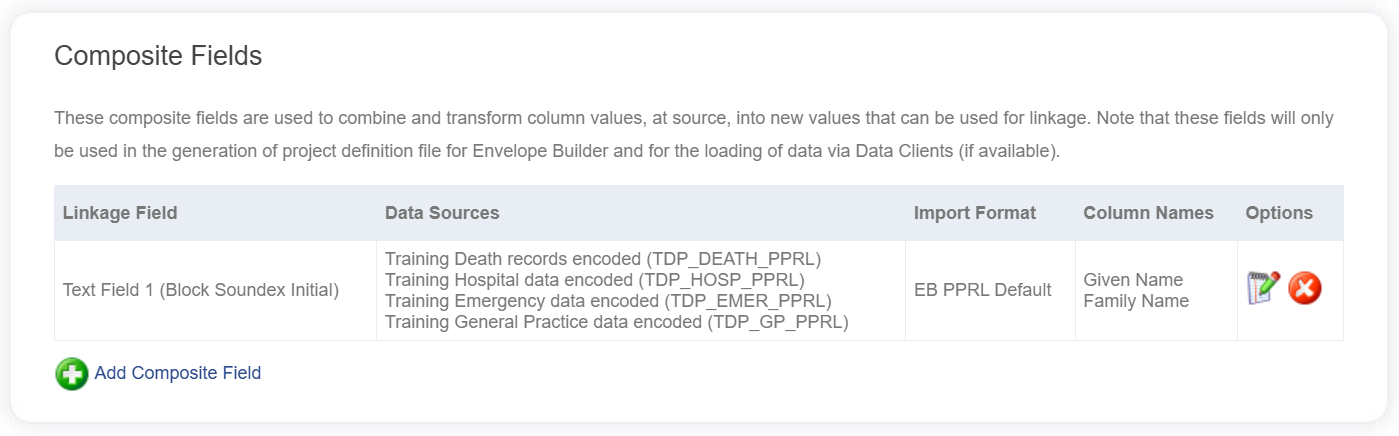
Take your time to review this information.
Once defined in LinXmart, this information will be used in the generation of project definition files which, in turn, will be used by the Envelope Builder. This ensures that data/fields from each Data Provider are correctly and consistently mapped to the Linkage Fields that you have set up for your project.
Creating Project Definition Files
In this section, we will create project definition files (.ebproj files) based on the configuration information of your Linkage Project. These .ebproj files will be needed by your Data Providers, using the Envelope Builder, to prepare data in readiness for the project.
Having defined each linkage field and specified how they are to be used in the project (described in the previous section), it is a relatively easy process to compile these "instruction sets" into project definition files which can then be passed on to and used by your Data Providers.
Step 11: Begin by navigating to the Project dashboard and select your project (PROJECTS -> click on XX_EB_TEST). Go to Settings again and click on Data Sources.
Then, for each Event Type, click on the Download icon in the Options section (shown below).
Save each of the four .ebproj files in a suitable folder. Note that the four .ebproj files correspond to the four Event Types that are part of your XX_EB_TEST project.
Having created these .ebproj files, they can be distributed to your Data Providers so that they can create the encoded files for the project and send them to LinXmart in a consistent way.
Note the naming convention used to label each .ebproj file:
<ProjectName>-<EventType>-<DataSource>-<DateCreated>.ebproj
Example: AF_EB_TEST-TDPDeathsPPRL-TrainingDeathrecordsencoded-20260616.ebproj
Thus:
- Linkage project = AF_EB_TEST
- Event Type = TDP_Deaths_PPRL
- Data Source = Training Death records encoded
- Creation Date of .ebproj file = 16/06/2026
Using the Project Definition Files with EB
In this section, we will assume that you are a Data Provider and that you have received the .ebproj files that are necessary for encoding data for the XX_EB_TEST project.
If you do not already have the Envelope Builder tool installed on your local machine, do that now.
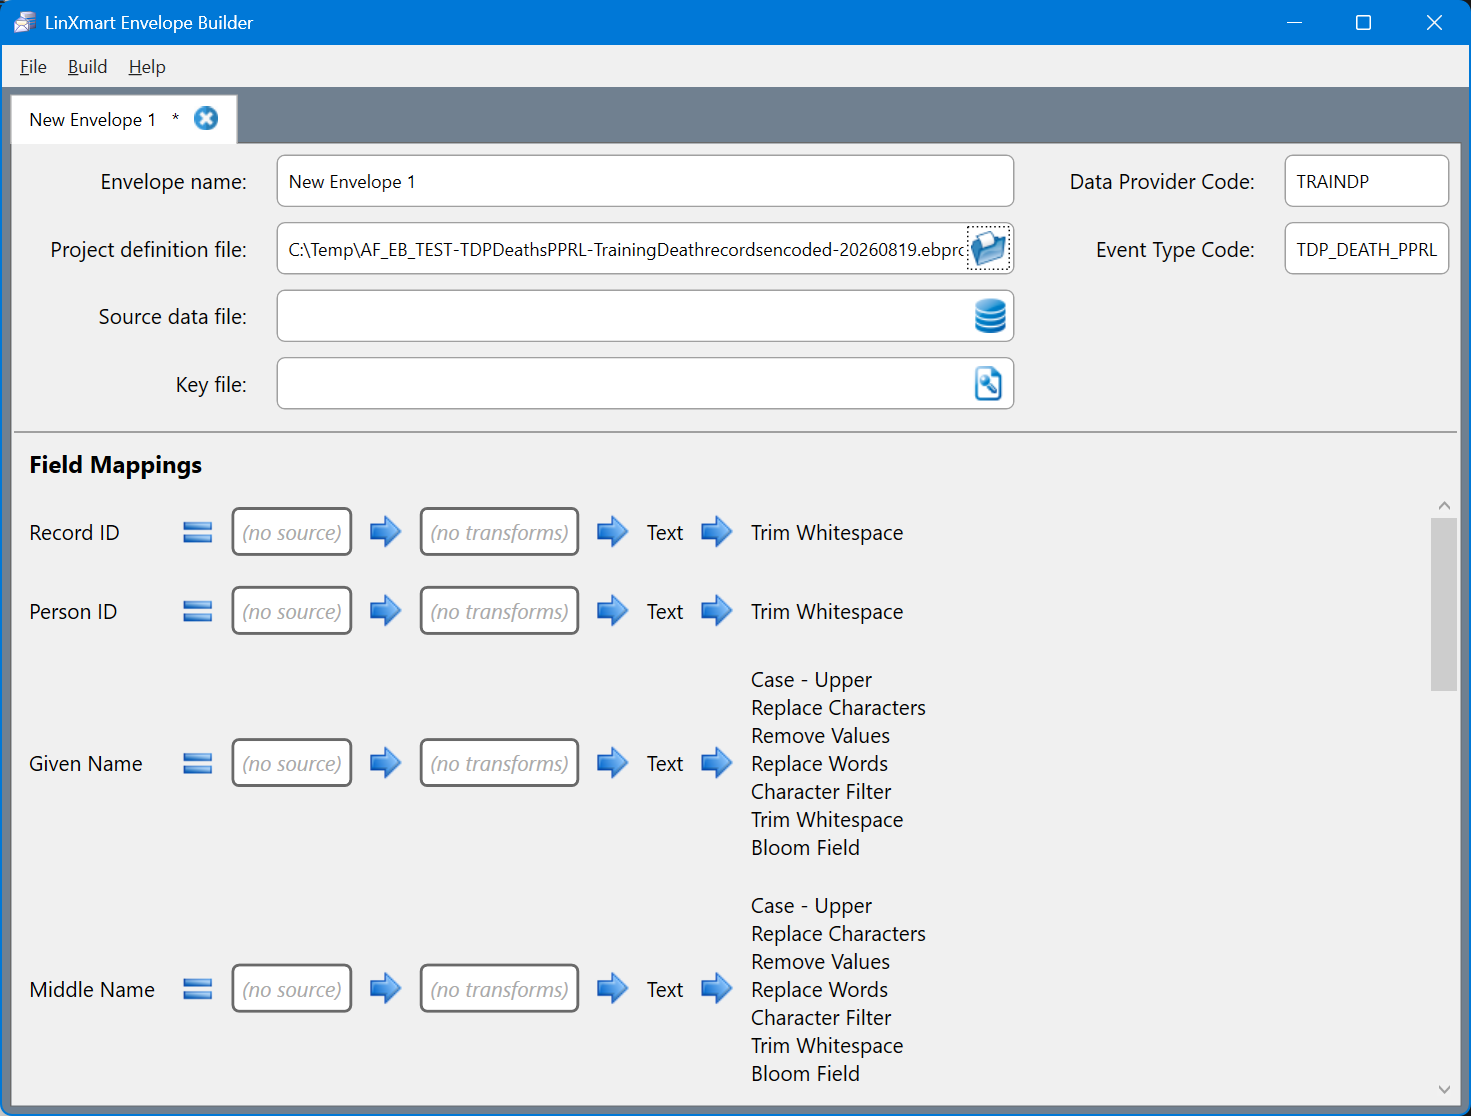
Step 12: Under Windows, fire up your Envelope Builder.
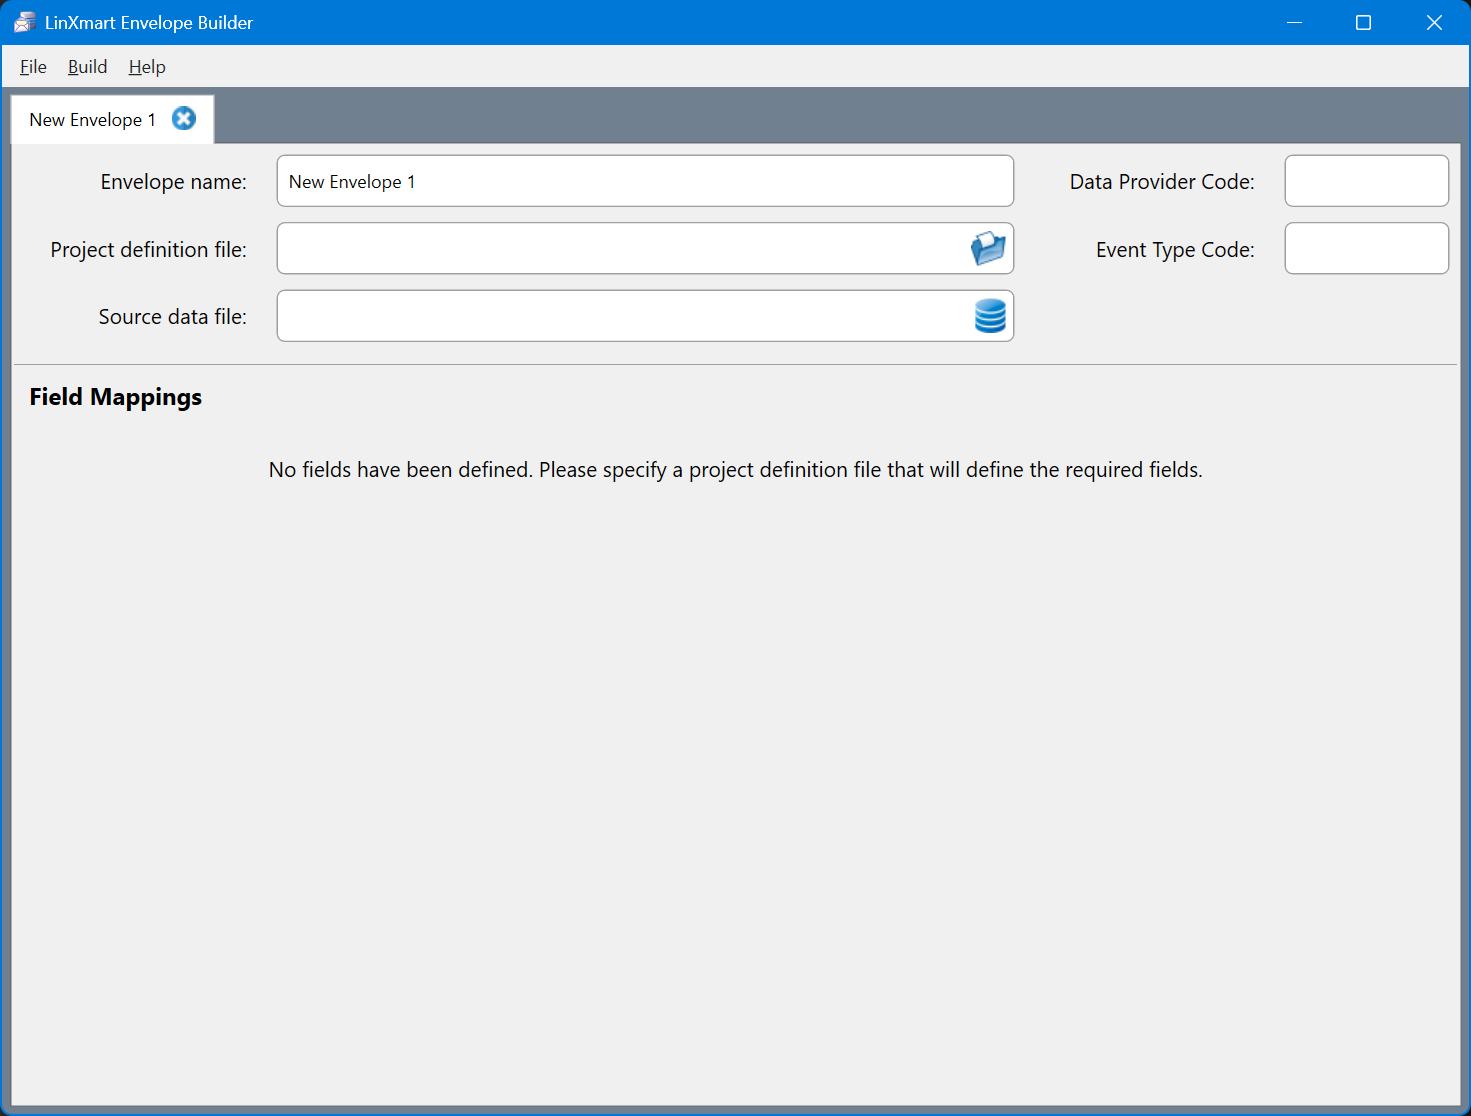
In EB, go to the Project Definition File Box and click on the Folder icon (shown below). Navigate to the folder where you previously saved your .ebproj files (as earlier).
Locate and upload the .ebproj file that relates to the TDP_DEATH_PPRL data: AF_EB_TEST-TDPDeathsPPRL-TrainingDeathrecordsencoded-20251118.ebproj.
Then click on Open.
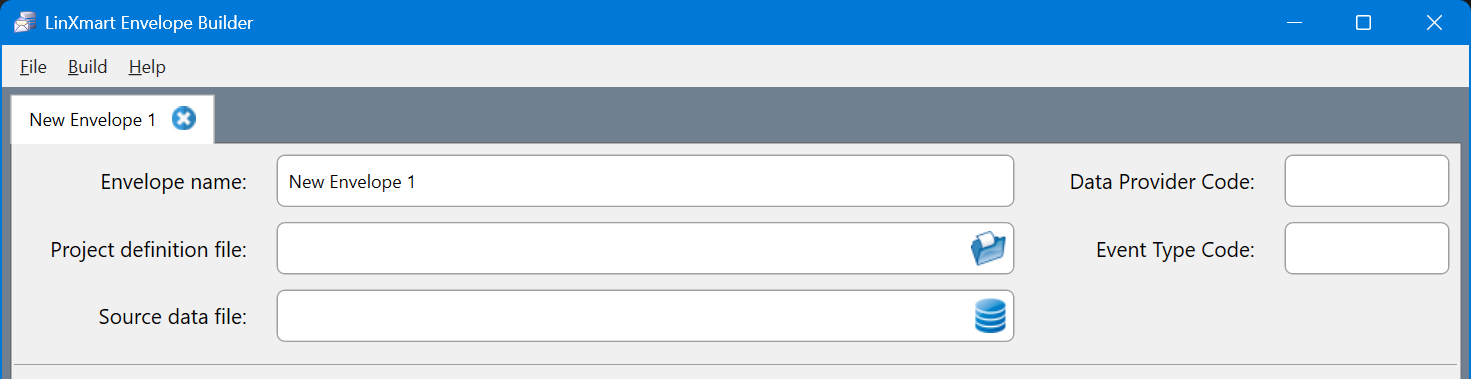
Step 13: Now go to the Source Data File box and click on the File Icon (shown below). Navigate to the folder where your UNENCODED data (i.e. find TDP_DEATH_clear.csv) is located and click Open.
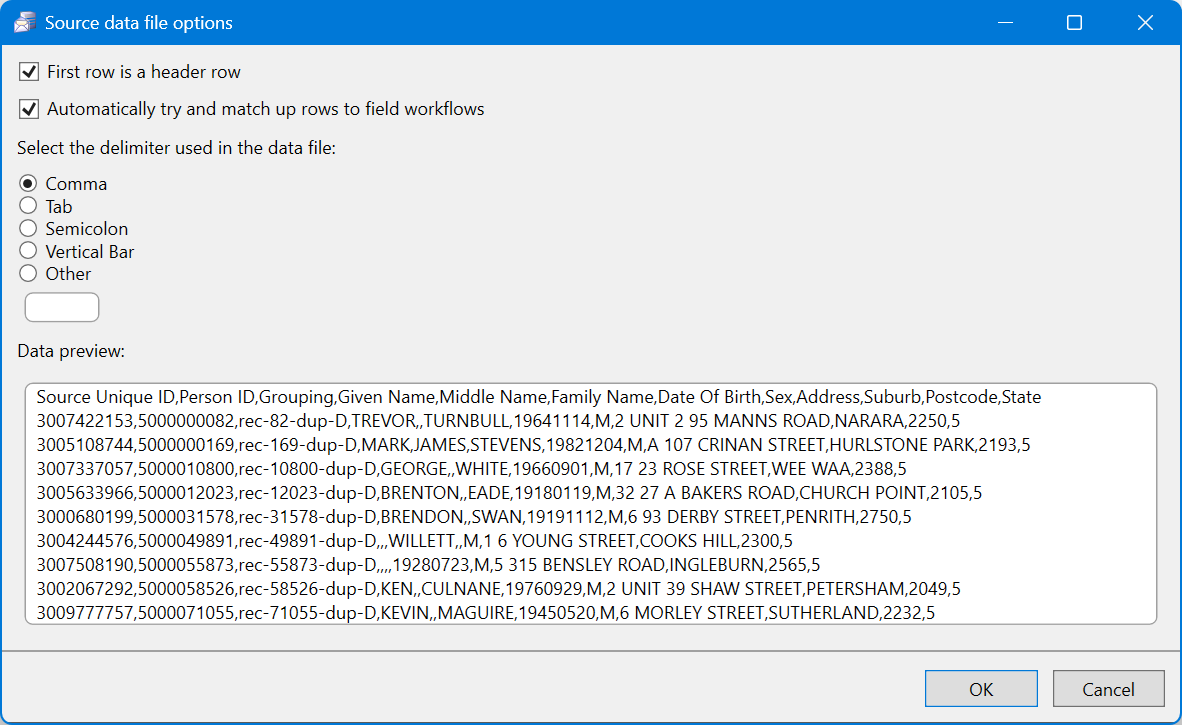
Accept these defaults, and click on OK.
Step 14: You will now see that almost all your field mappings are filled in (i.e. there is a direct mapping from data source items to LinXmart linkage fields).
However, three mappings are missing – DoB Year, DoB Month and DoB Day.
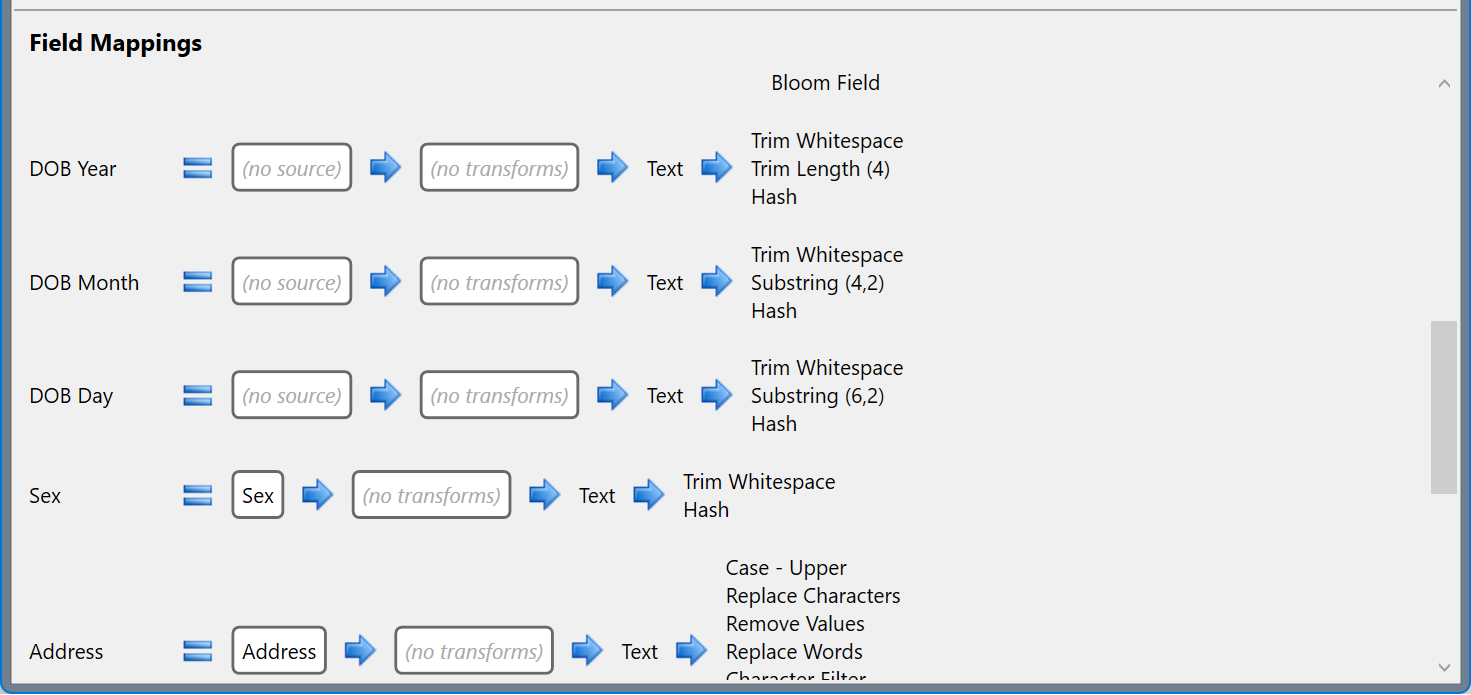
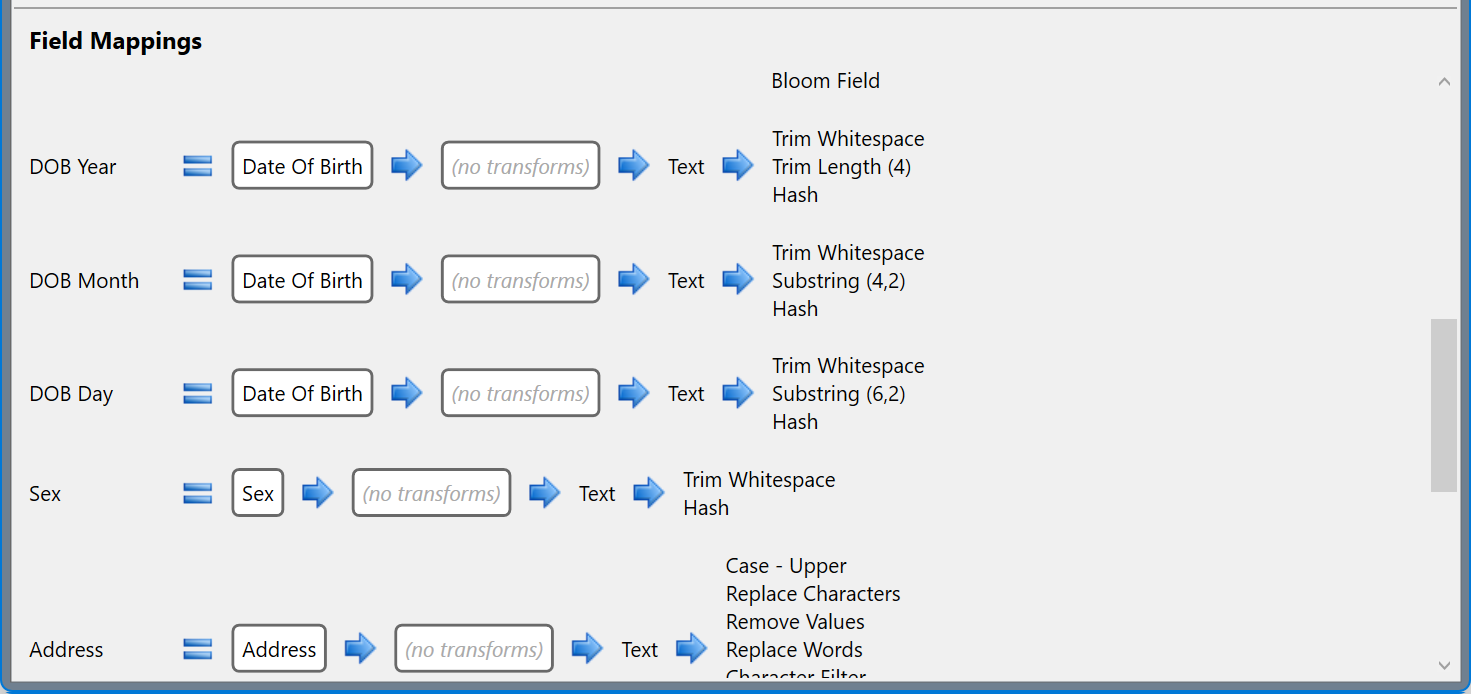
Step 15: Complete the Date of Birth mappings by clicking on each of the three boxes showing '(no source)' and map all of these to the single data source item: Date of Birth (as shown below).
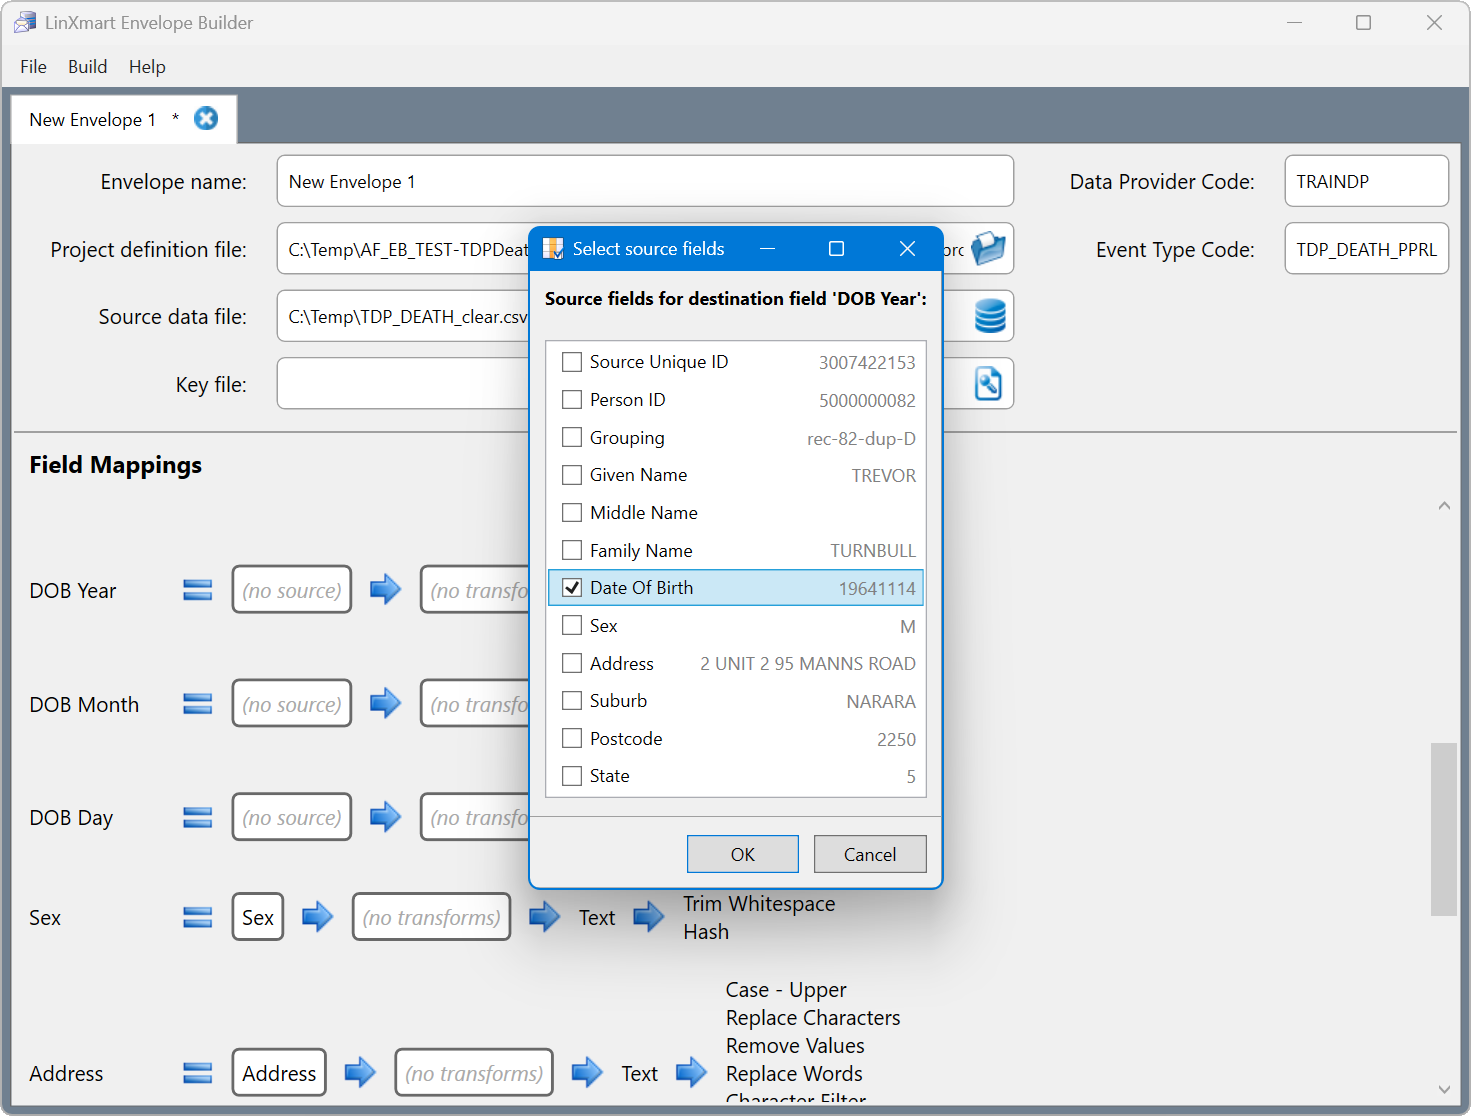
While all three fields are mapped to the single Date of Birth source field, the project definition file contains conversion functions that will extract the appropriate date component. These conversion functions are defined in LinXmart through the Linkage Fields page.
When you are done, all three of the DoB linkage fields should map to the same source field (Date of Birth) – as shown below.
Step 16: As a final step, let's rename the output (Envelope) to something that is more meaningful e.g. XX_EB_TEST_Deaths (shown below).
Let's also add a Key file. Click the icon on the right of the Key file field and select No when asked if you want to use an existing key file. Enter a password for the key file and click OK (see below).
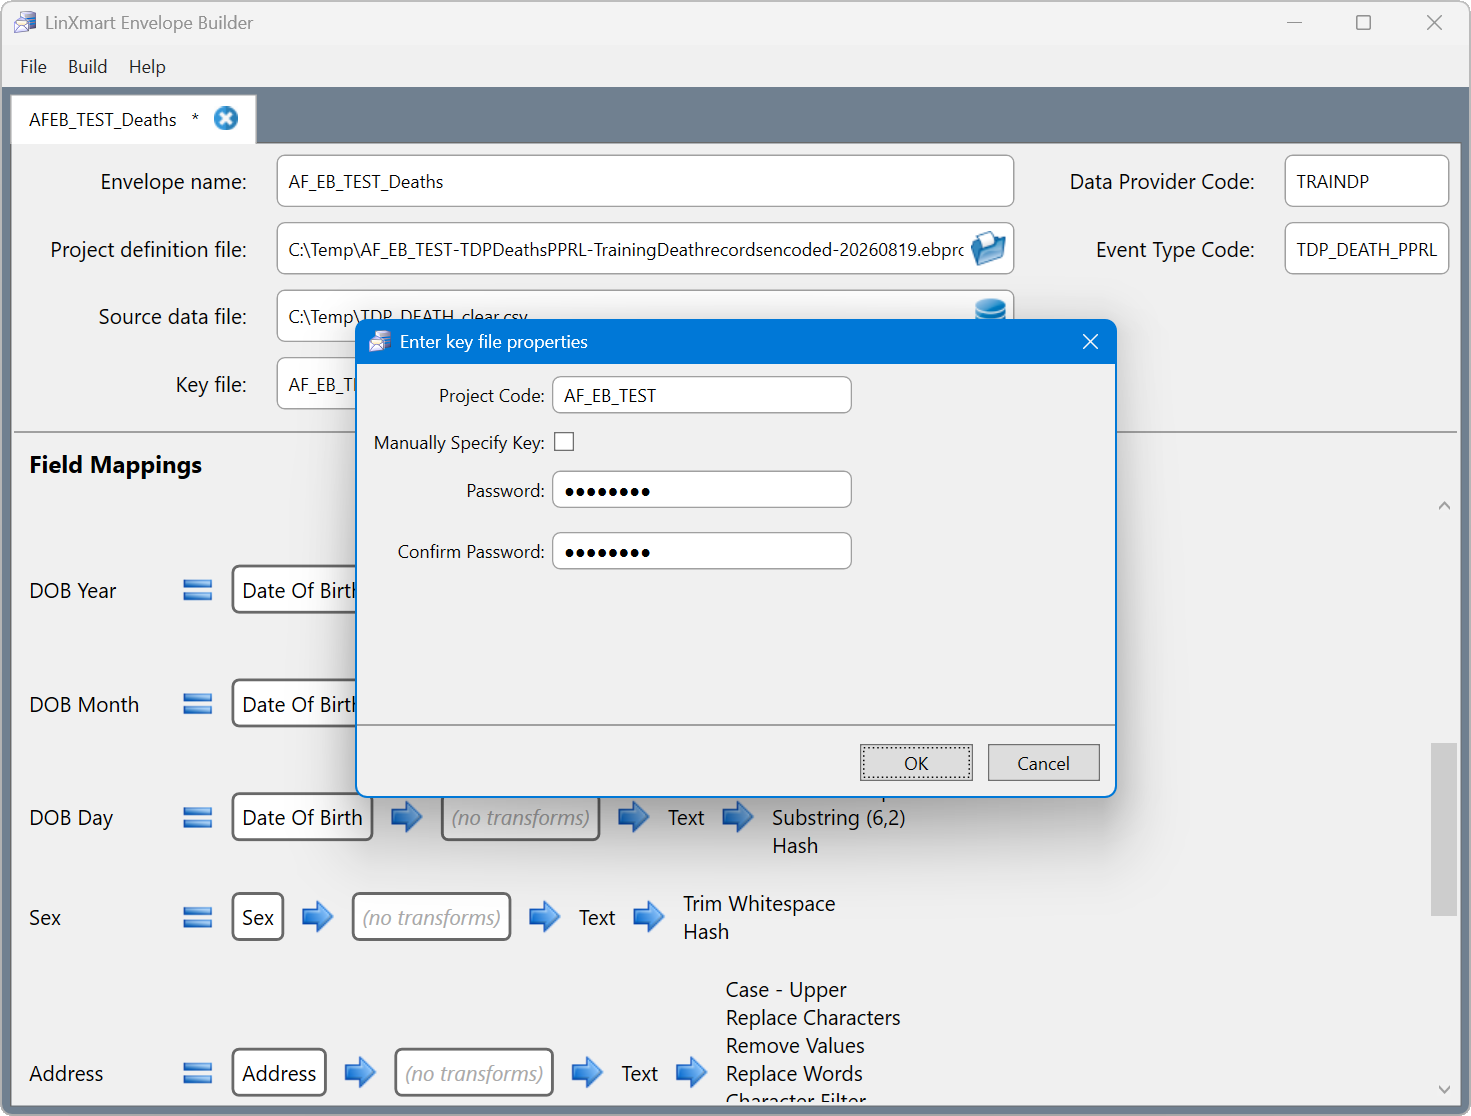
The key file stores the secret used in the cryptographic hashing process, ensuring the encoded data is different to/separate from data prepared for any other PPRL project. The password is used to encrypt the contents of the secret within the key file itself.
Step 17: You are now ready to create your encoded Death data. Navigate to Build on the main EB menu and, from the drop-down menu, select Create File…
Saving your data to an appropriate folder.
If all goes well, you should see a success message.
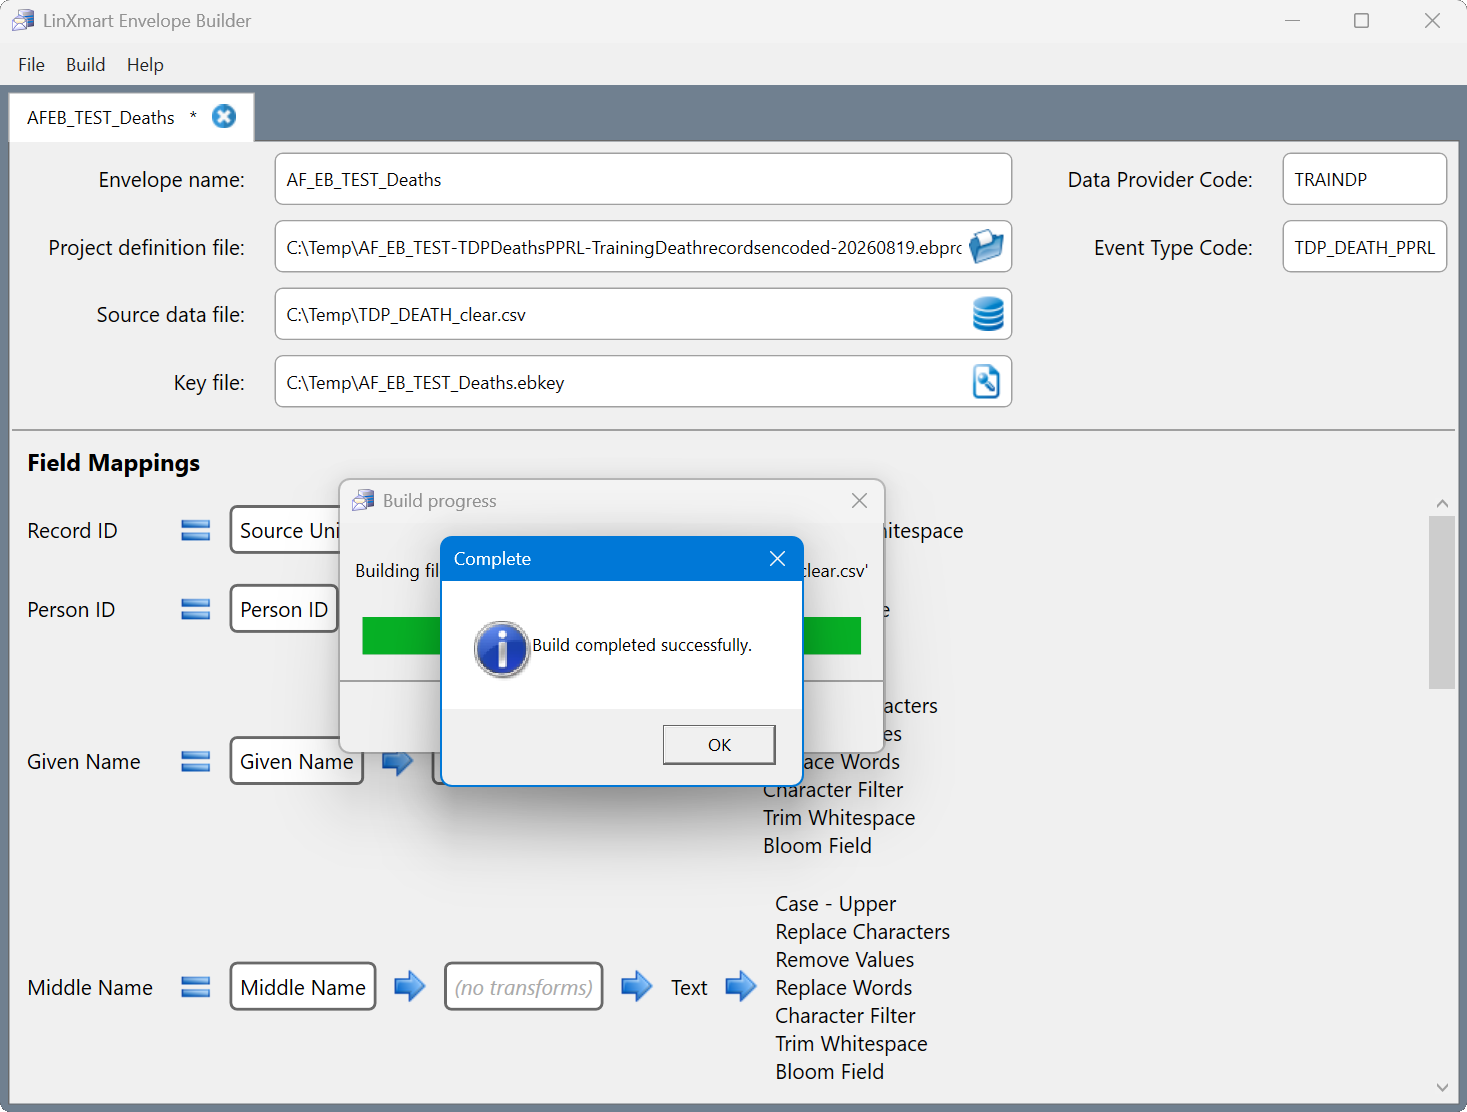
Step 18: Steps 12-17 can be repeated for each of the Event Types in your project.
The table below sets out the parameters to use for each Event Type.
| Envelope Name | Project definition file | Source data file | Key file | Encoded output from EB |
|---|---|---|---|---|
| AF_EB_TEST_Deaths | ~Training Data\TRAINDP PPRL\AF_EB_TEST-TDPDeathsPPRL-TrainingDeathdataencoded-20251118.ebproj | TDP_DEATH_clear.csv | AF_EB_TEST.ebkey (12345678) | AF_EB_TEST_Deaths.csv |
| AF_EB_TEST_Hosp | ~Training Data\TRAINDP PPRL\AF_EB_TEST-TDPHospPPRL-TrainingHospitaldataencoded-20251118.ebproj | TDP_HOSP_clear.csv | AF_EB_TEST.ebkey (12345678) | AF_EB_TEST_Hosp.csv |
| AF_EB_TEST_Emer | ~Training Data\TRAINDP PPRL\AF_EB_TEST-TDPEmergencyPPRL-TrainingEmergencydataencoded-20251118.ebproj | TDP_EMER_clear.csv | AF_EB_TEST.ebkey (12345678) | AF_EB_TEST_Emer.csv |
| AF_EB_TEST_GP | ~Training Data\TRAINDP PPRL\AF_EB_TEST-TDPGeneralPracticPPRL-TrainingGeneralPracticedataencoded-20251118.ebproj | TDP_GP_clear.csv | AF_EB_TEST.ebkey (12345678) | AF_EB_TEST_GP.csv |
At completion, you will have encoded four datasets which can now be delivered to LinXmart and uploaded into the XX_EB_TEST project (as per steps described in Module 8).
Congratulations, you have now learnt to use the Envelope Builder to create encoded datasets for PPRL linkage!