Tutorial - Getting started
This tutorial-style introduction to LinXmart focuses on the basic features LinXmart requires to link one or two files together and only briefly touches on the more complex features that are useful to a linkage unit.
The Tutorial is aimed at new operators, outlining key concepts and guiding through a series of linkages.
This Tutorial can be used with any LinXmart deployment but requires a user with permissions to create Data Providers, Event Types and Linkage Projects, as well as loading data for linkage and extracting the linkage map.
Before you begin using LinXmart, you will need access to:
- LinXmart via the web interface
- Tutorial datasets - download the tutorial data
Part 1 – First Linkage
This first part of the Tutorial will guide you through setting up and conducting a linkage.
Step 1: Connect to the LinXmart web interface by typing in the LinXmart web address. You will see a screen similar to this:
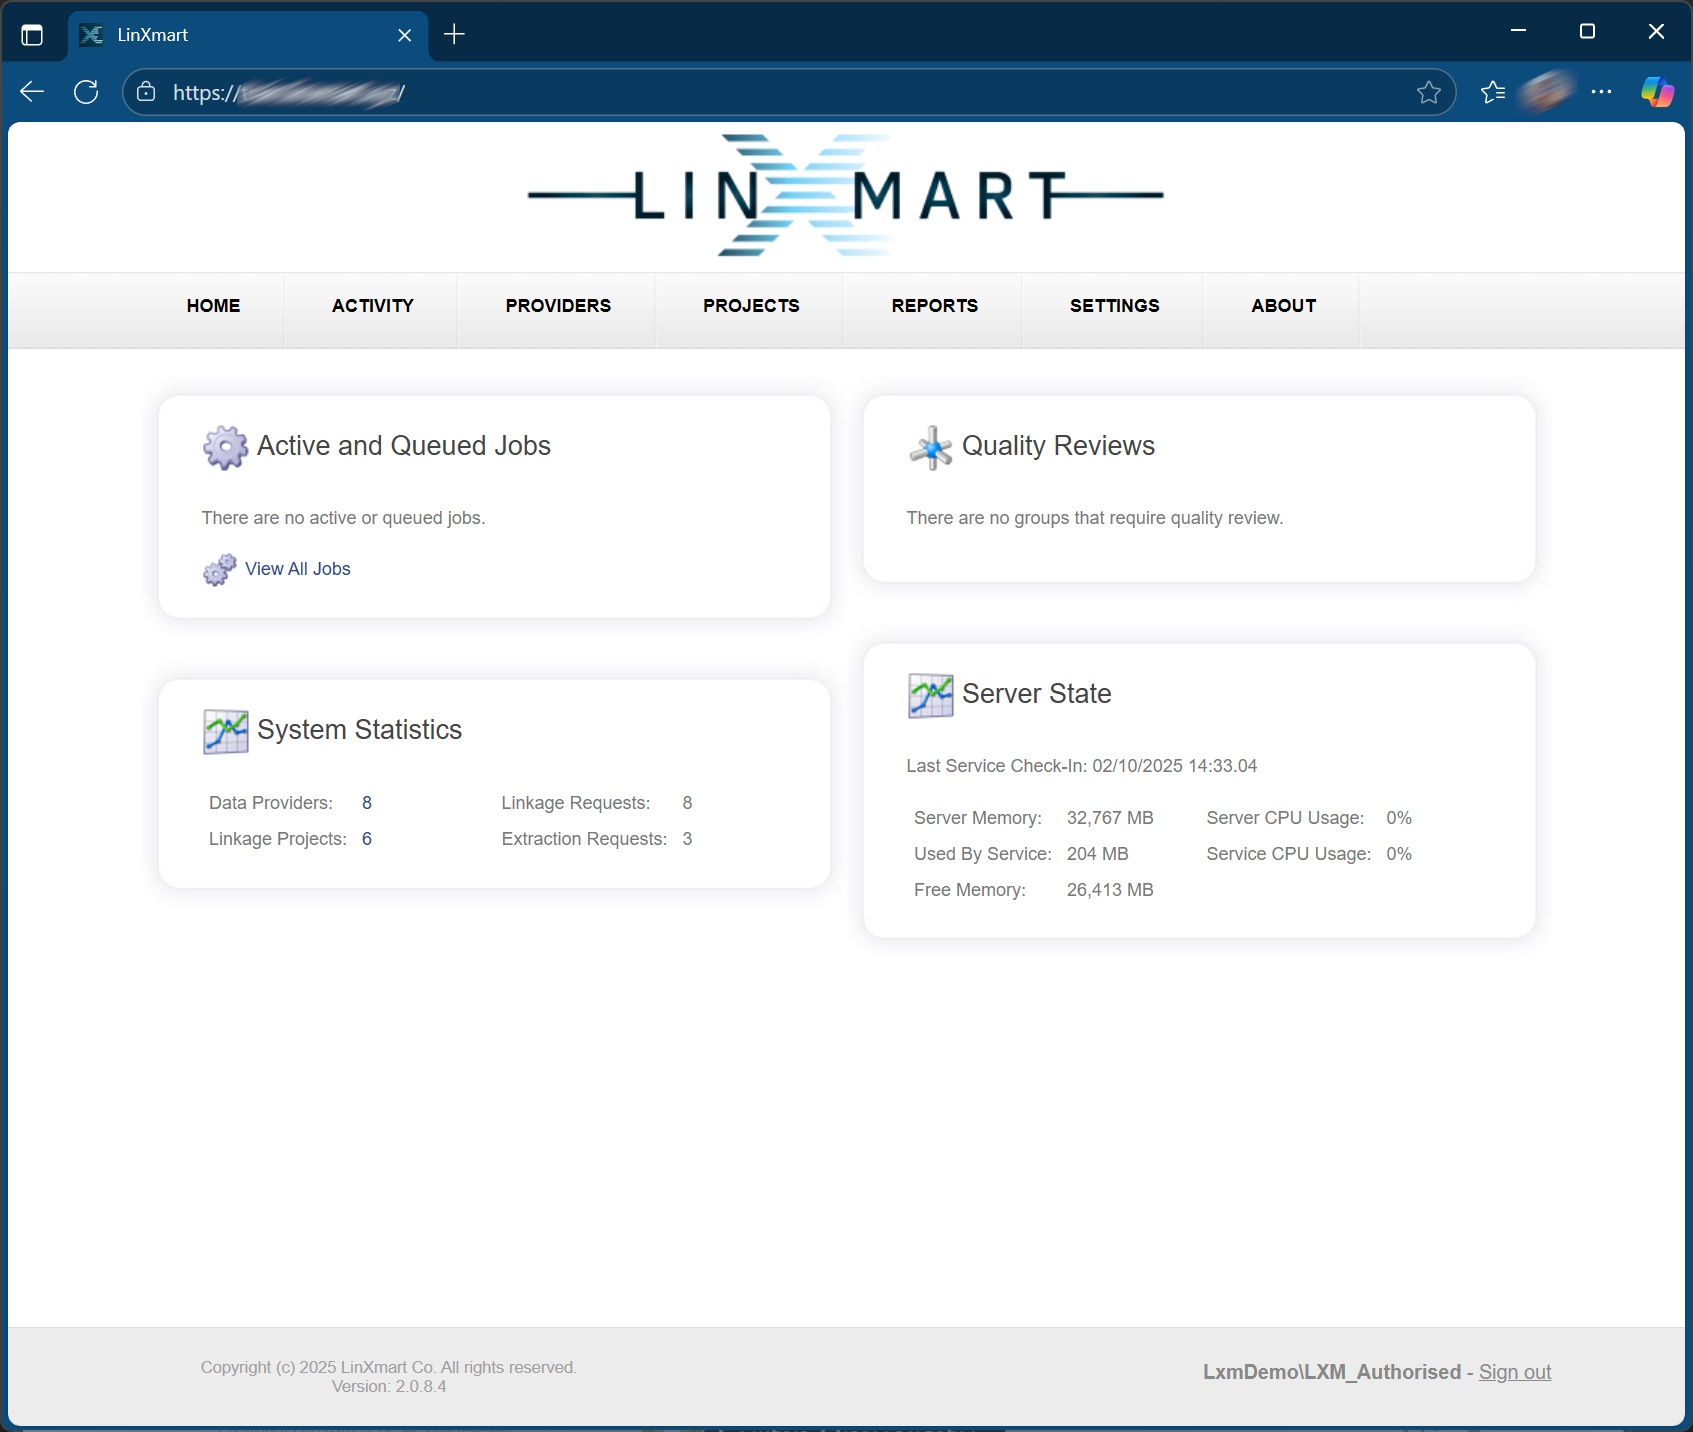
The LinXmart web interface is used by operators of LinXmart to:
- Enter and manage information about the datasets being provided for linkage
- Set the linkage strategy or strategies
- Submit data for linkage and other operation
- Determine the current status of the system and the job queue
- Run reporting
- Perform manual quality checks.
By using the tabs across the top of the page, we can navigate the web interface.
Creating a Linkage Project
Before data can be linked, we first have to define some metadata in the system – i.e. information about the data to be used and the linkages we wish to conduct.
Step 2: Click on the PROJECTS tab at the top of the web page.
This screen lists all the Linkage Projects that have been created in the system. Each Linkage Project specifies which datasets will be linked. We will now create a new Linkage Project.
Step 3: Click on the Add Project link at the bottom of the page.
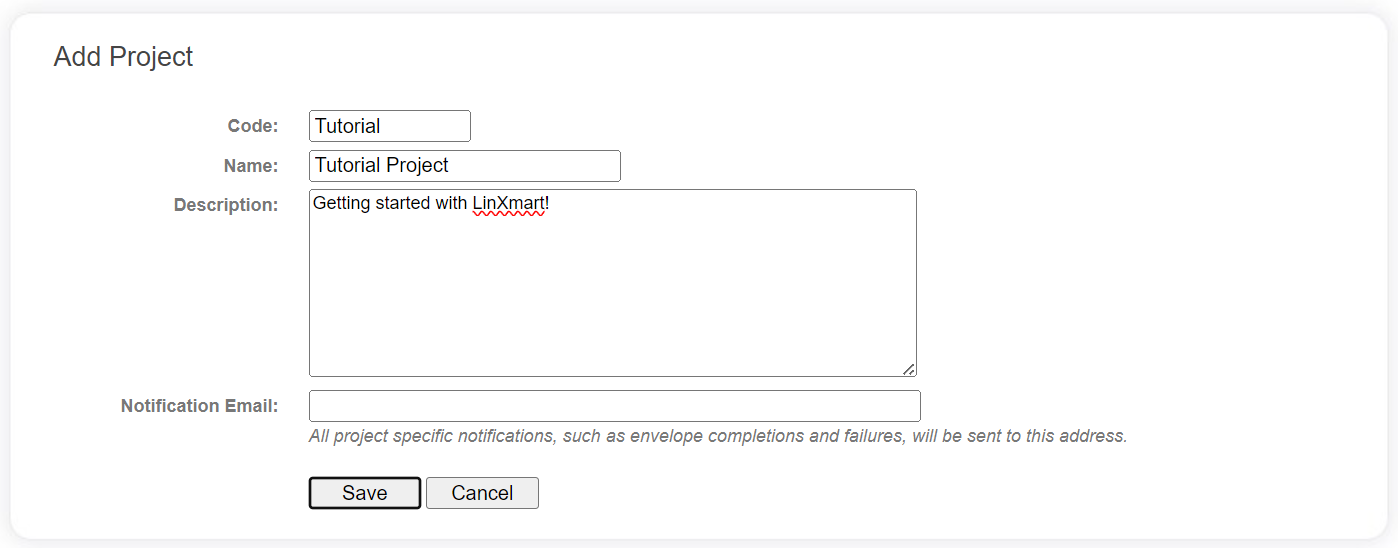
Enter the Linkage Project details in the fields provided. For the purposes of this Tutorial we will assume the Project`s Code is Tutorial. As the value for Code must be unique in the system, another value will need to be used if Tutorial has already been used.
Adding data to a Linkage Project
The next thing we need to do before we can link our data is to add a data collection to this newly created Linkage Project. Data collections are called Event Types in LinXmart, and they belong to a Data Provider. A single Data Provider can supply multiple Event Types to LinXmart.
Step 4: Click on the Tutorial project to bring up the Project Details page.
You are presented with an empty project. Before data can be added, one or more Event Types need to be attached to the Project.
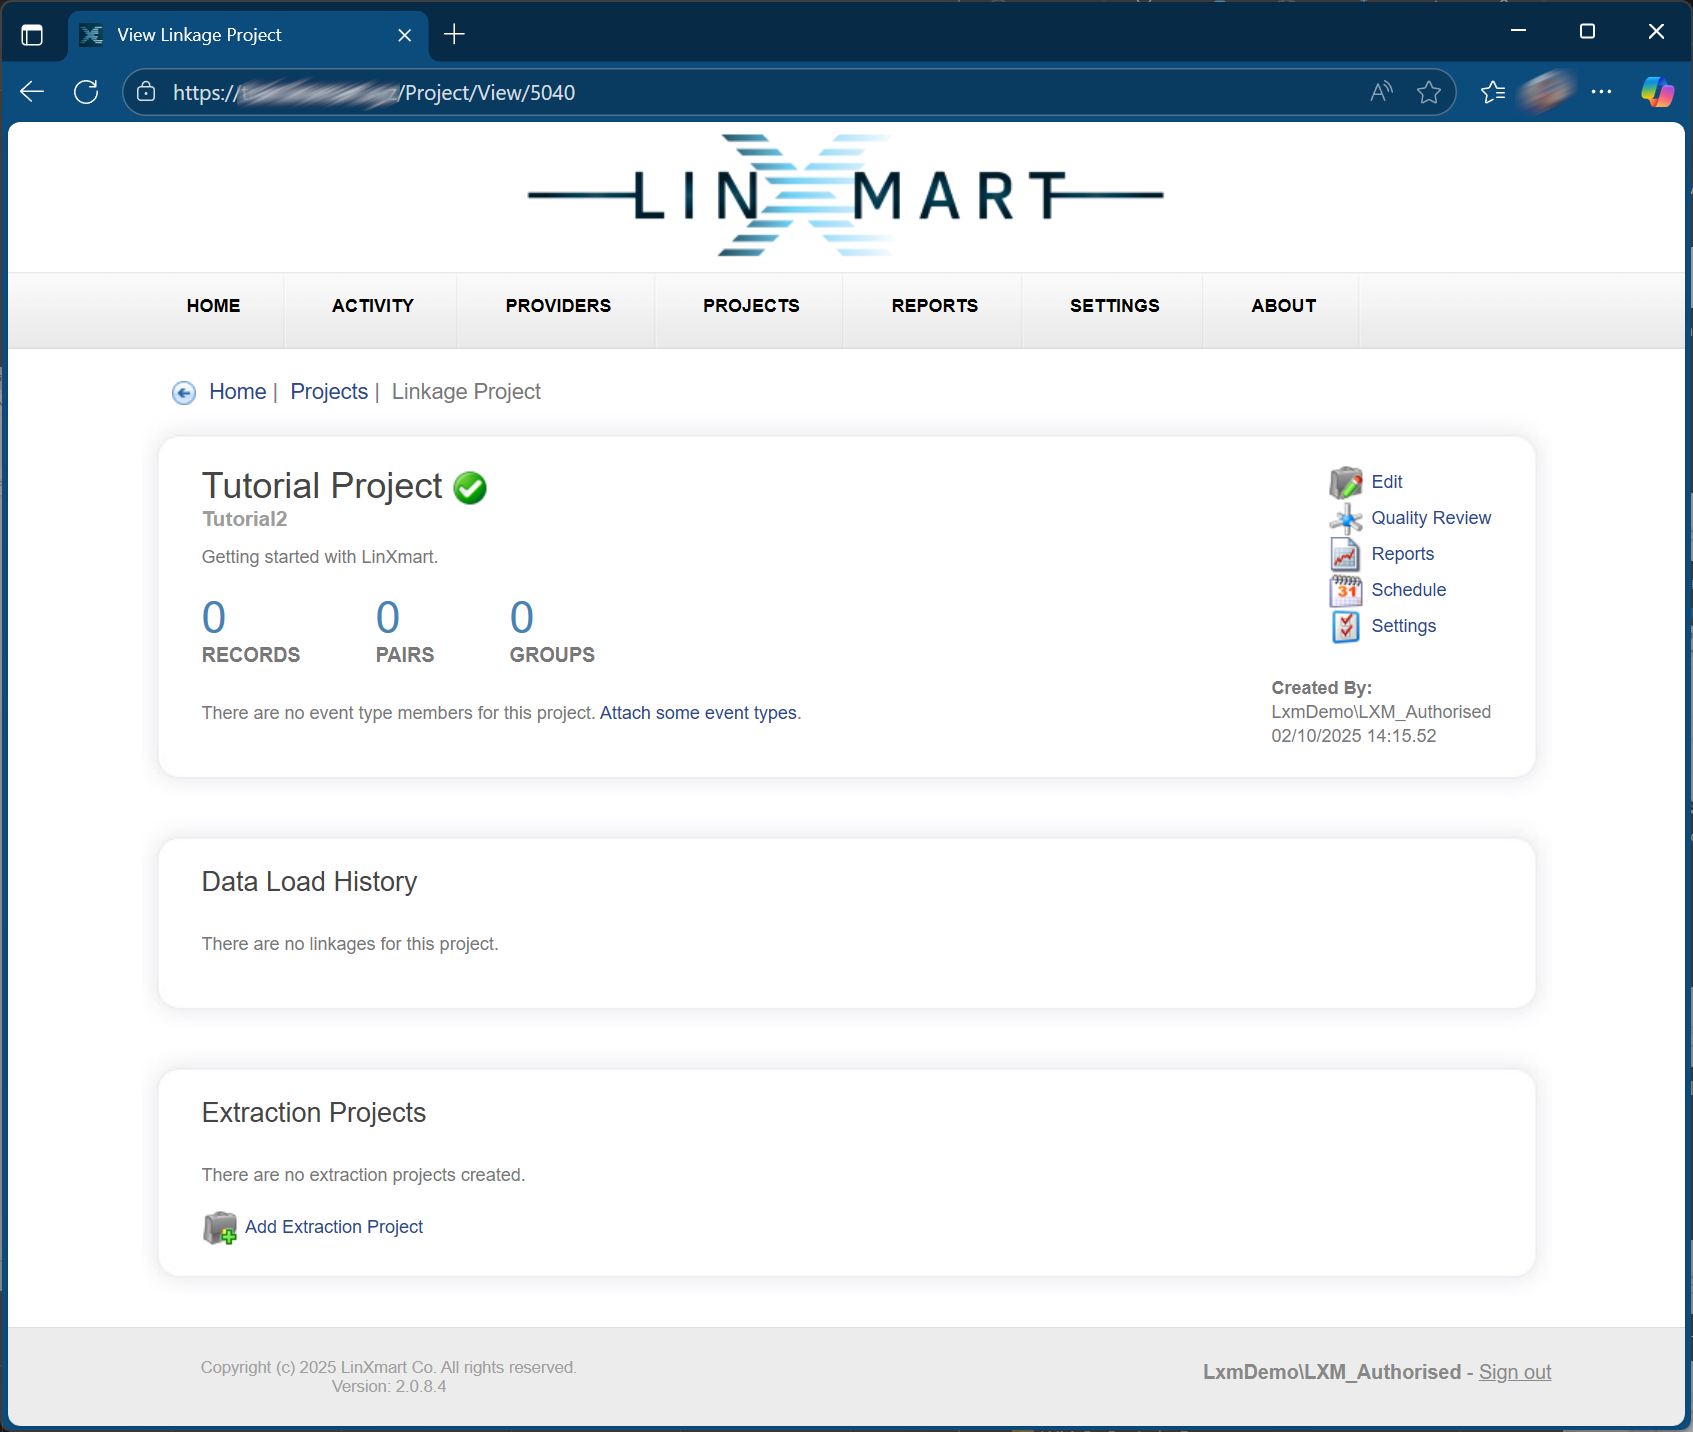
Step 5: Click on the Attach some event types link presented to you below the record stats for the empty project. Check the tickbox next to Data Provider WA Department of Health (WA-DOH) and Event Type WA Hospital Records (WAMORB) and click Attach. Note that this Data Provider and Event Type have already been defined within the system for this tutorial.

Linking your first file
We have now added sufficient information into LinXmart to perform our first linkage. We will link the WAHospital.txt dataset found in the Tutorial Data folder. You may wish to view this file in a text editor to see its contents. It is a comma delimited file contains personal identifiers and a unique record identifier. The format of this file (called the Import Format) has already been defined within the system.
Step 6: Click the Load icon on the WA Hospital Records row on the Event Type Data Sources page. (To reach this page if you are not already on it, select Data Sources under the list of event types on the Tutorial Linkage Project main page.) Select the Choose File icon, and select the WAHospital.txt file from the Tutorial Data folder. Click Load. This may take a minute while the dataset is uploaded to the LinXmart server from your local machine.

Step 7: On the Load Data Confirmation screen select Load. This will begin the linkage process; its process can be monitored in real-time through the Jobs screen.
Step 8: Select the JOBS tab at the top of the screen. Next select the All Jobs sub-tab.
The jobs tab shows all the jobs that have been carried out in the system. Each linkage will result in a series of jobs being carried out, corresponding to the different stages of the linkage process. The All Envelopes sub-tab groups these jobs together for each linkage or other task, while the All Jobs tab shows these separately.
As the linkage is conducted, information regarding the current job's status will be updated here.
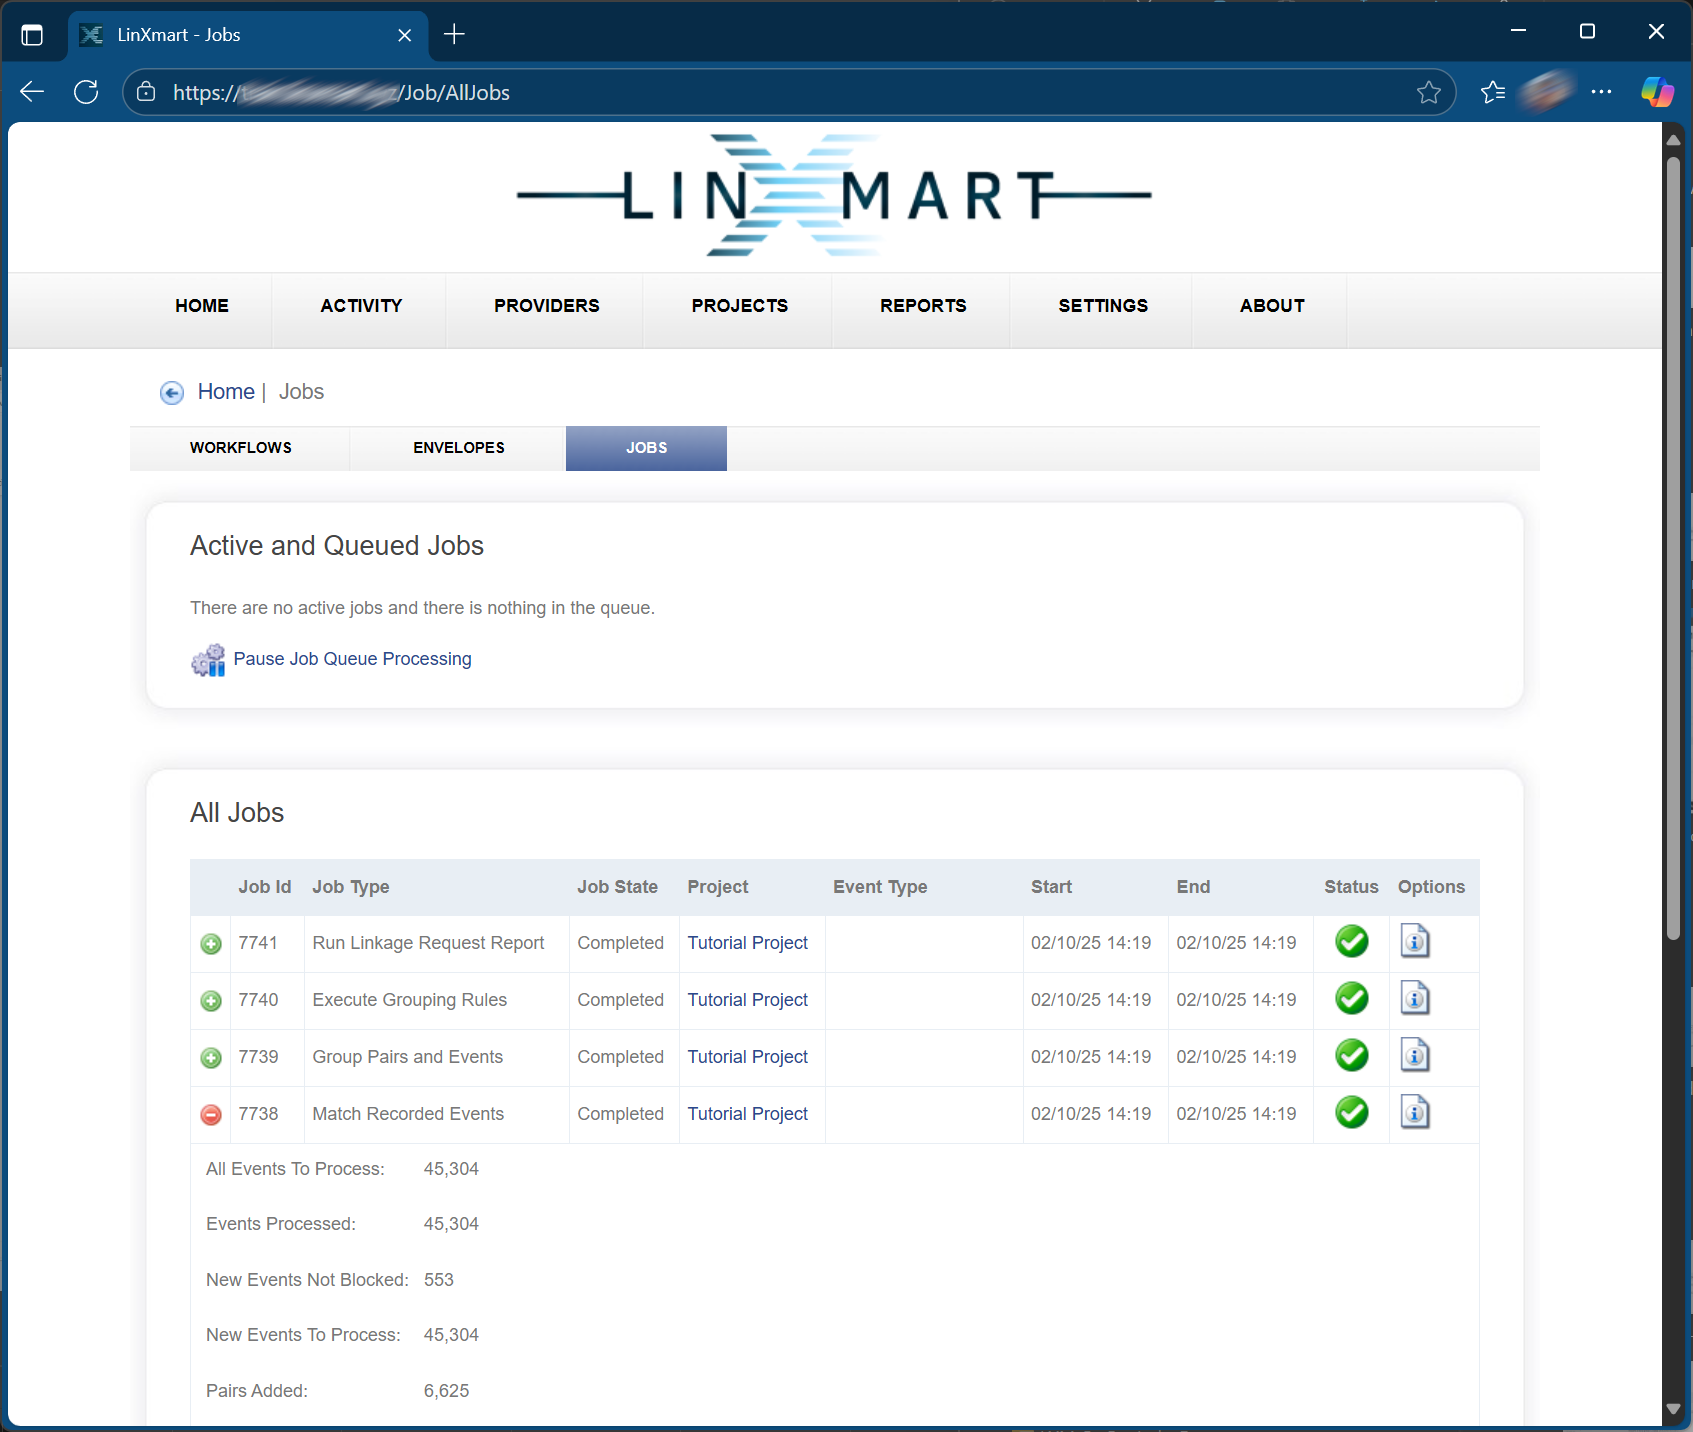
This data in this file was internally linked or de-duplicated, identifying records within the file belonging to the same person. As there were no other datasets in the Project, this is the only linkage that took place.
Step 9: Click on the PROJECTS tab and go back to the Linkage Project that was created.
The dashboard will now reflect the new data, showing you the records that were added, pairs created and groups (unique individuals) that were found.
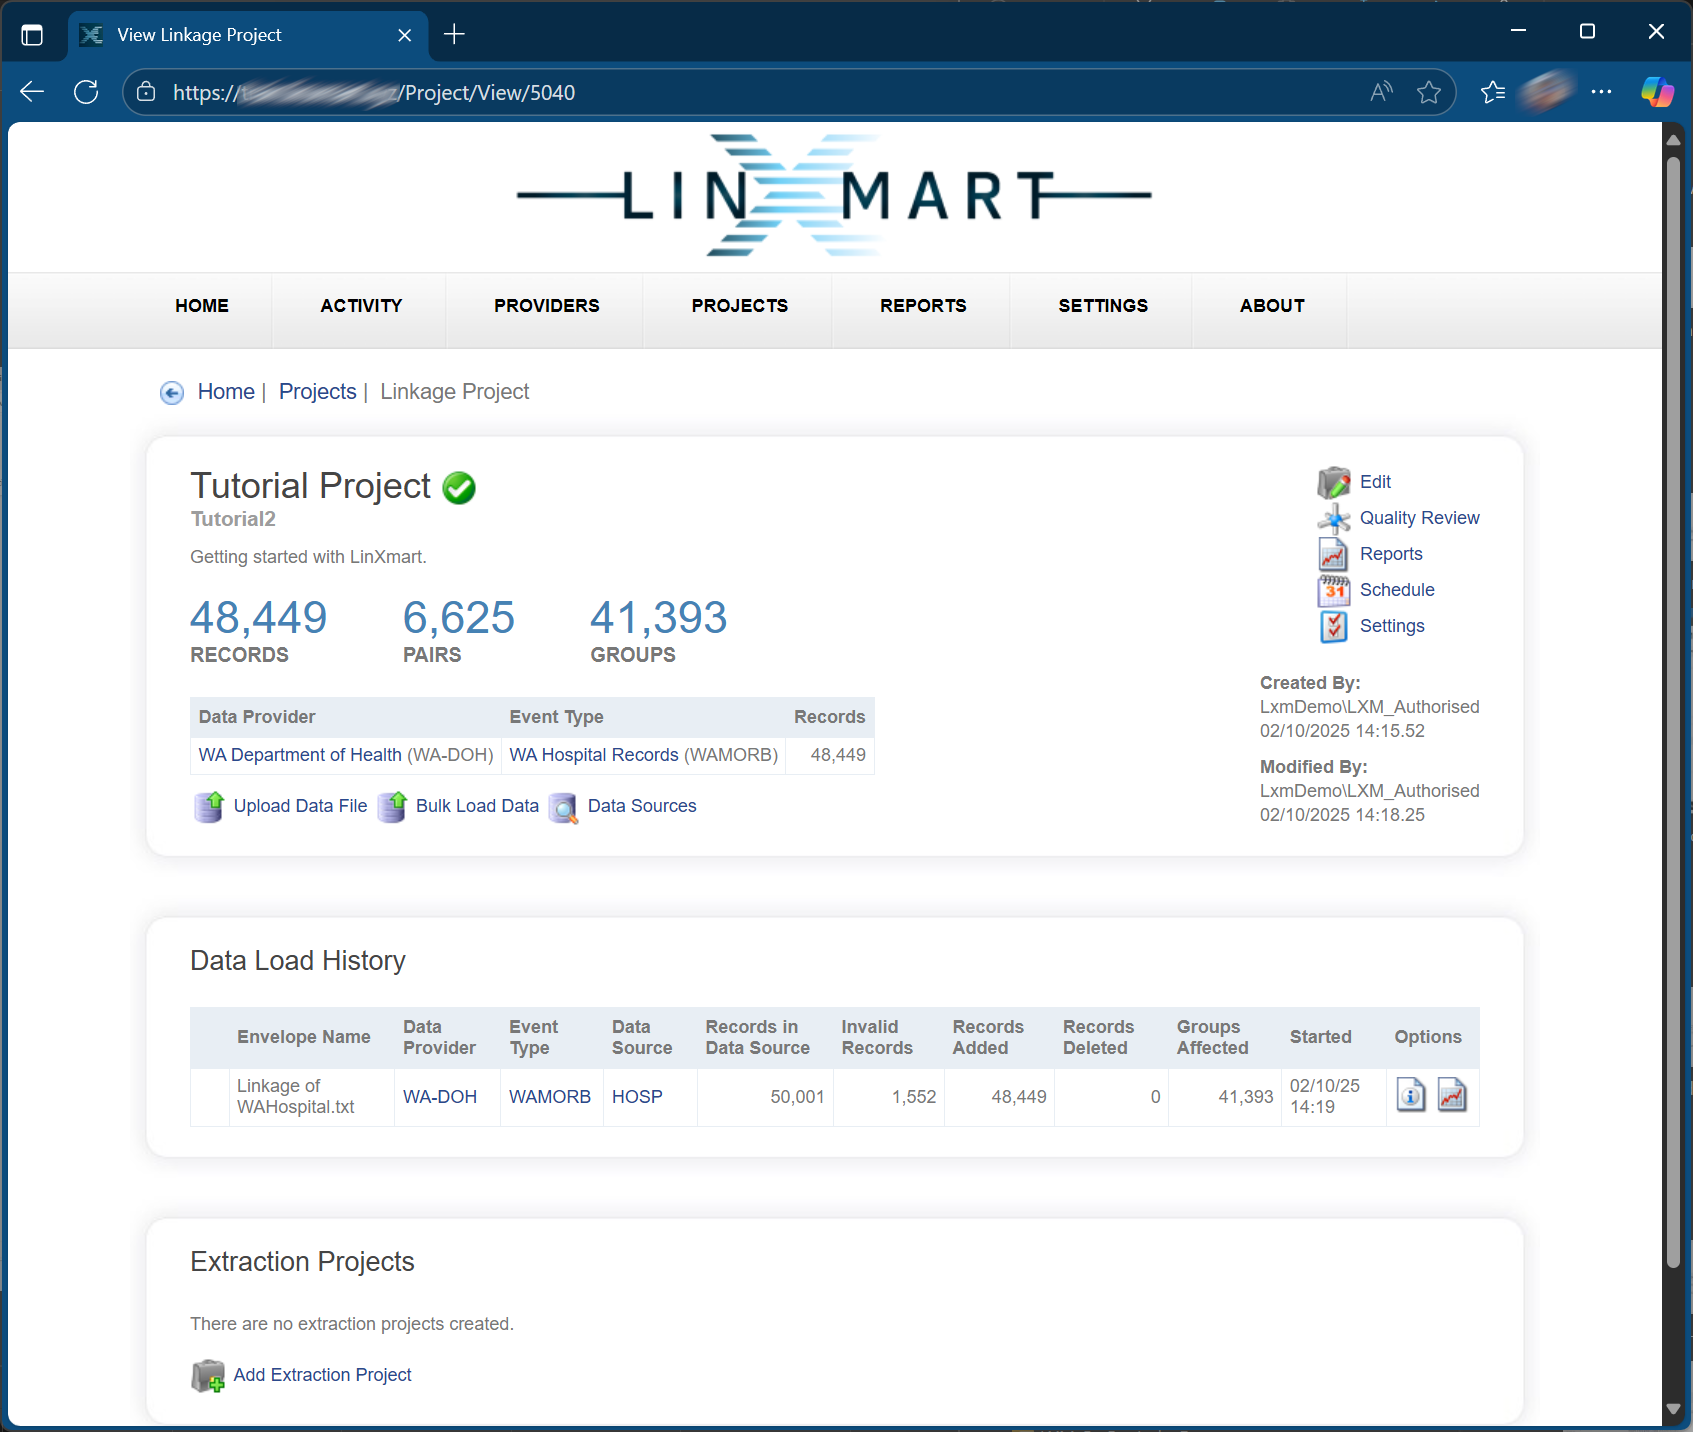
Step 10: In the Linkages section below the dashboard click on the report icon in the Options column for the linkage you just ran.
The Linkage Report details information on the changes made to the system for this particular Envelope, including storing a snapshot of the configuration used.
Take your time to read through the report.
Congratulations, you have just completed your first linkage!
Part 2 – Second Linkage
We are now going to link another dataset, this time from a new Data Provider. This dataset is not currently recognised by the system. Before LinXmart can process data from a Data Provider, that Provider must be registered in LinXmart. In the first part of the Tutorial, we had already completed that task for you.
Registering a Data Provider
Step 1: Click on the PROVIDERS tab on the LinXmart web interface.
You will see that the Data Provider listed in the Envelope's manifest file for your first linkage job appears here.
Step 2: Click on the Add Data Provider button at bottom of screen. Enter the Data Provider details as shown below, clicking Save when completed.

The Code field is used by LinXmart to identify this Data Provider. It must be unique.
Registering an Event Type
Along with registering a Data Provider, details of the data collections they will provide also need to be registered. These are called Event Types in LinXmart.
Step 3: To add an Event Type for the Data Provider NSW-DOH previously created, click on the Edit button for the NSW-DOH data provider on the LinXmart Providers screen.
The Edit Data Provider Details screen will be displayed as below.
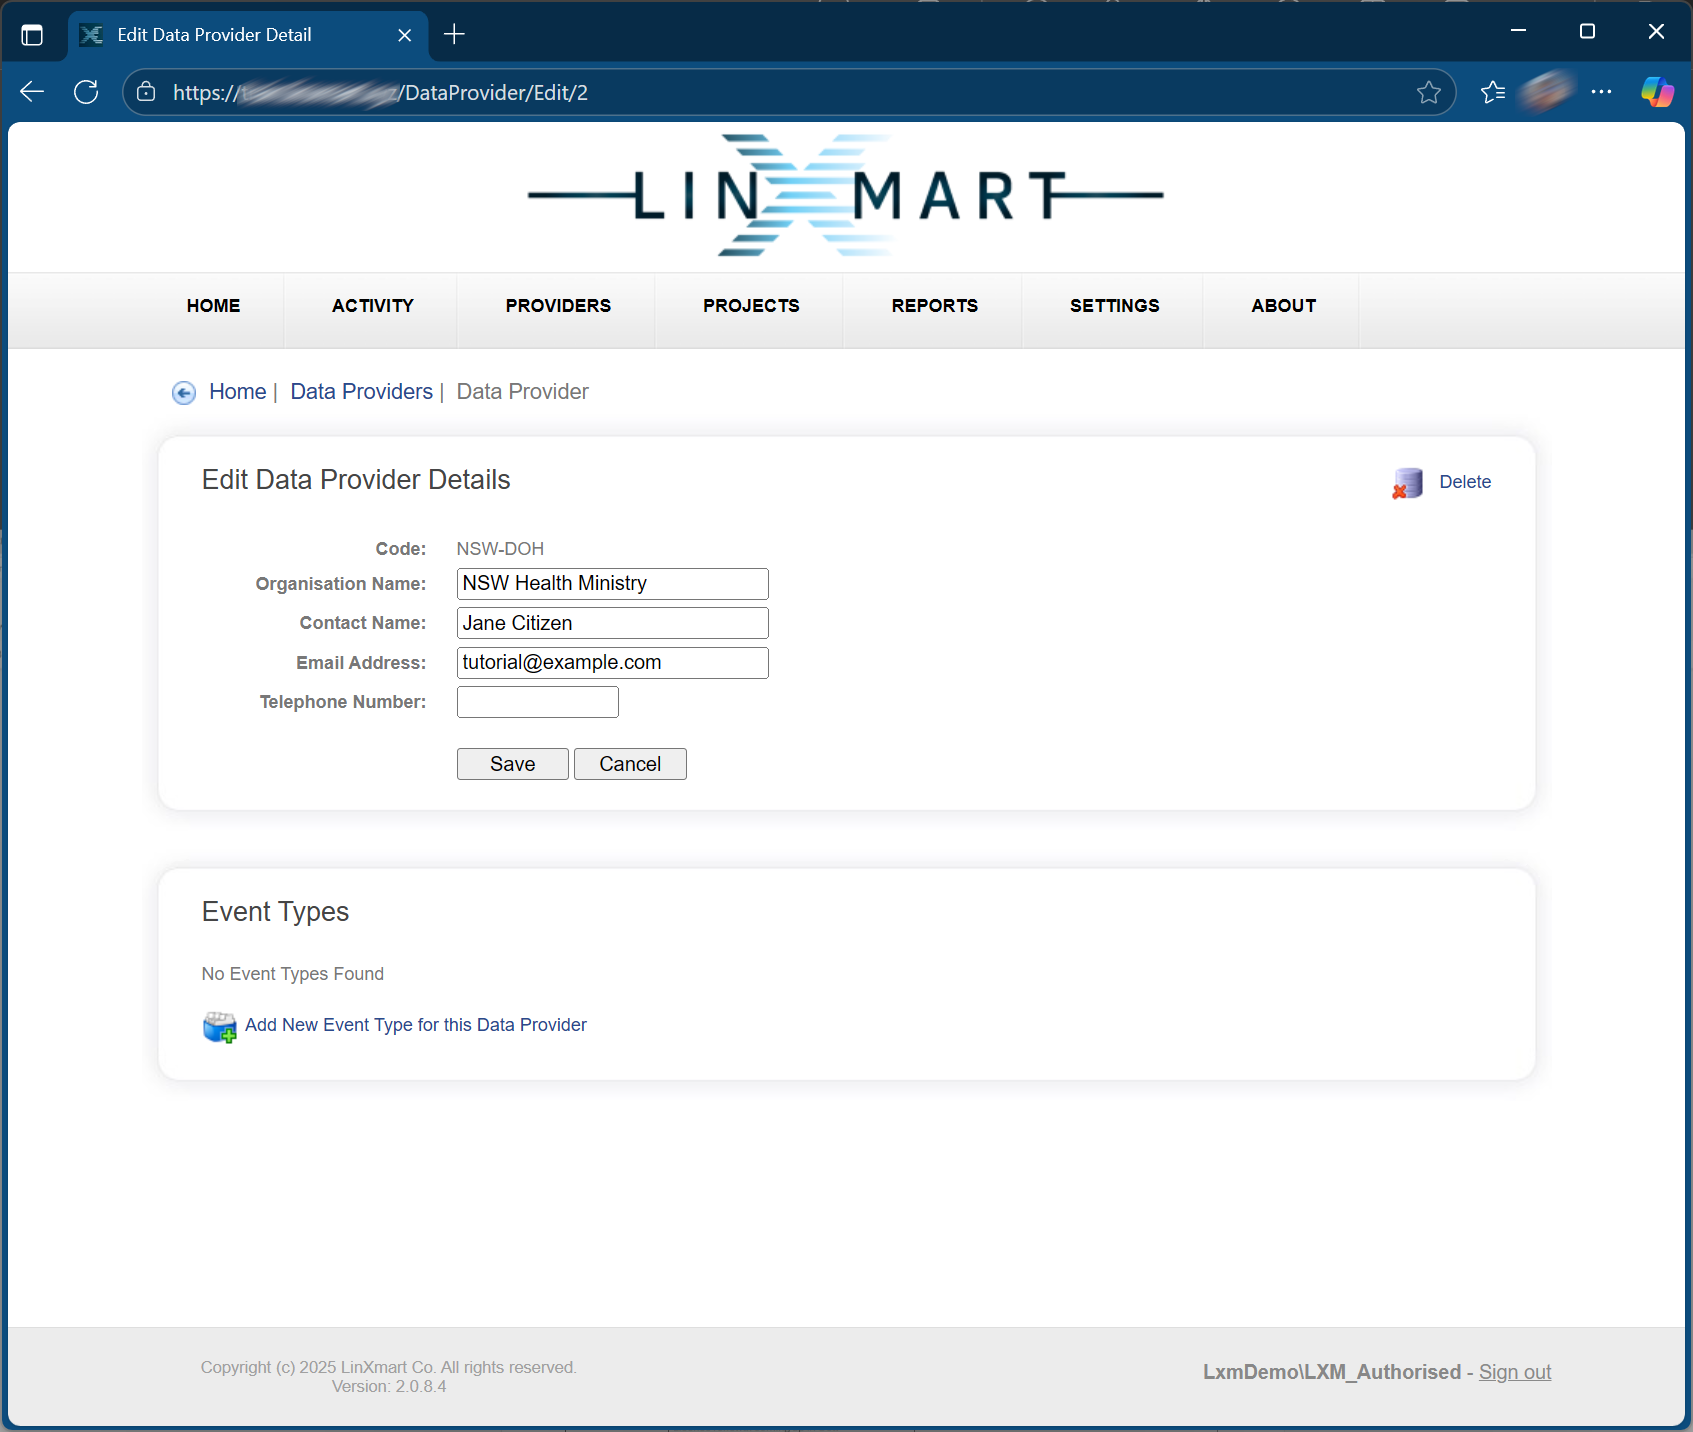
Step 4: Click on the Add New Event Type for this Data Provider link at the bottom of the page.
Enter the fields as shown below and click Save when completed.

The next step is to add a Data Source to this Event Type. A Data Source describes where the data files come from and what the data file looks like.
Step 5: Select Add New Data Source for this Event Type from the Edit Event Type for Data Provider screen.
Enter the fields as shown below.
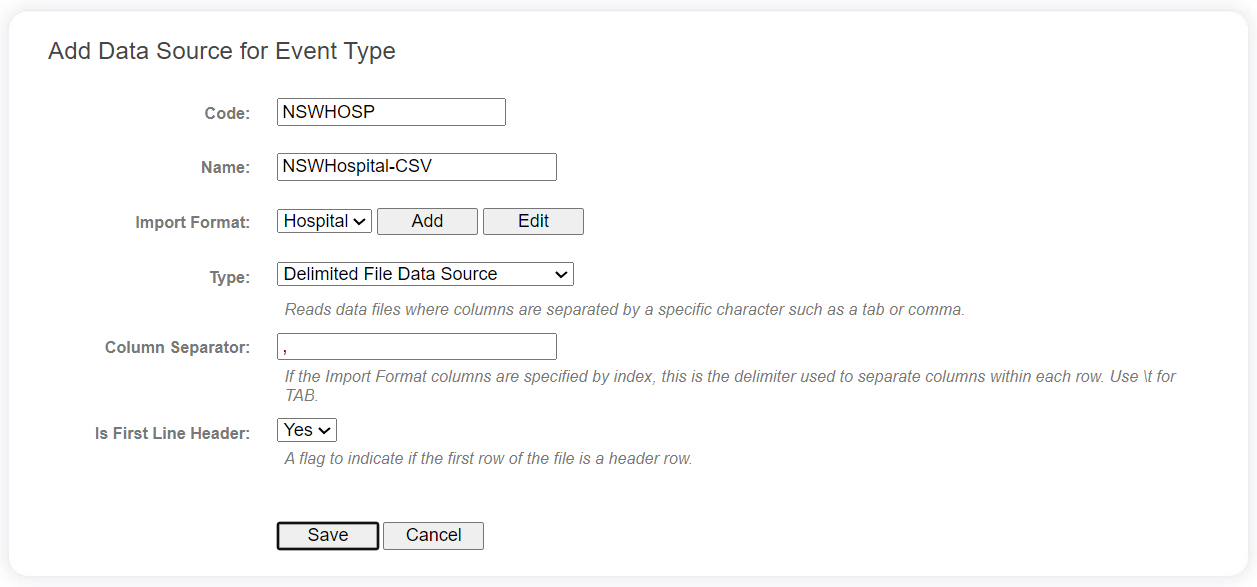
LinXmart has two data source types; data can be read from delimited text files, or it can be read directly from SQL tables. For this tutorial data is read from a text file (Delimited File Data Source).
The Import Format selected here tells the system about each field found within the data file and their position (Index) within the file. The selected Import Format has already been created for this Tutorial. When linking our own data, you will most likely need to create a specific import format, which can be done by clicking the Add button on this screen.
Step 6: Click Save to complete. The Data Source details and Import Format will be shown.
Adding data to a Linkage Project
The last step before we can link a file from our new Event Type is to add this Event Type to our Linkage Project. The Tutorial Linkage Project created in Part 1 is where we will add our new Event Type.
Step 7: Click on the PROJECTS tab at the top of the LinXmart web interface. Then click on the Tutorial project to bring up the Project Details screen.
Step 8: Click on the Data Sources link below the list of Event Types. Then click Attach Event Types. Select the NSW Hospital Records (NSWMORB) row and click Attach.

We have now set up the metadata for our second Envelope. Any future requests to link records from this dataset will not require any more metadata changes.
From the Tutorial project screen we can also change the match configuration – the settings used by our linkage engine to link records. Each linkage project has its own match configuration which can be modified through the Web Interface. LinXmart uses a probabilistic linkage approach, and associated parameters (blocks, comparison fields, weights, thresholds) can all be modified here. A default match configuration is provided for every Linkage Project that is created in the system.
Linking our second file
It is now time to link our second data file.
Step 9: As previously, click the Load icon on the NSW Hospital Records row on the Event Type Data Sources page. Select the Choose File icon, and select the NSWHospital.txt file from the Tutorial Data folder. Click Load. This may take a minute while the dataset is uploaded to the LinXmart server from your local machine. On the Load Data Confirmation screen select Load. This will begin the linkage process; its process can be monitored in real-time through the Jobs screen.
This linkage will both internally link (de-duplicate) the incoming dataset and link it to all other datasets in the chosen linkage project. In this case, it will link it against all records in the WA hospital dataset we previously added. The linkage map, outlining which inputted records belong to the same person, will automatically be updated as a part of this linkage.
Where is the data stored?
The linkage map, as well as the input records and the pairs created through linkage, are all stored in the LinXmart database. The metadata information we have added to the system is also stored here. Some of the information stored in the LinXmart database is not directly accessible through the Web interface. The next part of the Tutorial will explain how to extract the linkage map to supply to researchers.
There are situations where access to the raw data by operators would be useful. This includes validating consistency, performing specific home-grown quality checks, and generating custom reports. Direct access to the database can be provided by your administrator. Standalone programs such as SQL Server Management Studio can be used to directly query the database; and, if your institution uses a statistical package such as SAS or SPSS, these can also access the data directly, with LinXmart database tables appearing as datasets within these products.
Part 3 – Data Extraction
Now that we have linked two datasets, we are going to extract data from the system.
LinXmart has been built to service researchers with linked data. To do this, a method of extracting linked data information (i.e. linkage maps) has been built into LinXmart. LinXmart maintains a complete historical record of all data, allowing linkage maps to be extracted consistently at specific points in time. This is achieved through Extraction Projects which will extract linkage maps as they were at the date and time the Extraction Project was created.
In LinXmart an Extraction Project is defined within a Linkage Project. A Linkage Project (a container for linking data sets) can have multiple Extraction Projects.
Now we are going to create an Extraction Project.
Creating an Extraction Project
Step 1: Click on the PROJECTS tab on the LinXmart web interface. Then click View Details on the Tutorial as before. Next click Add Extraction Project near the bottom of the screen. Then type in the details below, and click Save.

Data can be extracted using this Extraction Project at any time. As we have not specified 'enduring' linkage keys, even if additional datasets are added to the Linkage Project, any requested extractions that refer to this Extraction Project will revert back to how the linkage map looked at the moment this Extraction Project was created - a snapshot of the linkage map. If you were to specify the Extraction Project to use 'enduring' linkage keys, they would be consistent across the life of the Linkage Project.
Requesting the linkage map
Step 2: Click on the Request New Data Extraction link at the bottom of the Extraction Project page.
You are shown a list of Event Types that have been attached to the Linkage Project. While you can request the linkage map for all data at once, the extraction results are separated based on Event Type and will be available in different files.
Step 3: Select the checkboxes next to each Event Type, then click the Request button.

This will add a job to the queue for the extraction of each Event Type selected. You can see the progress of these on the All Jobs page. When the jobs are completed, the Extraction Project Details page will display the results in a table.
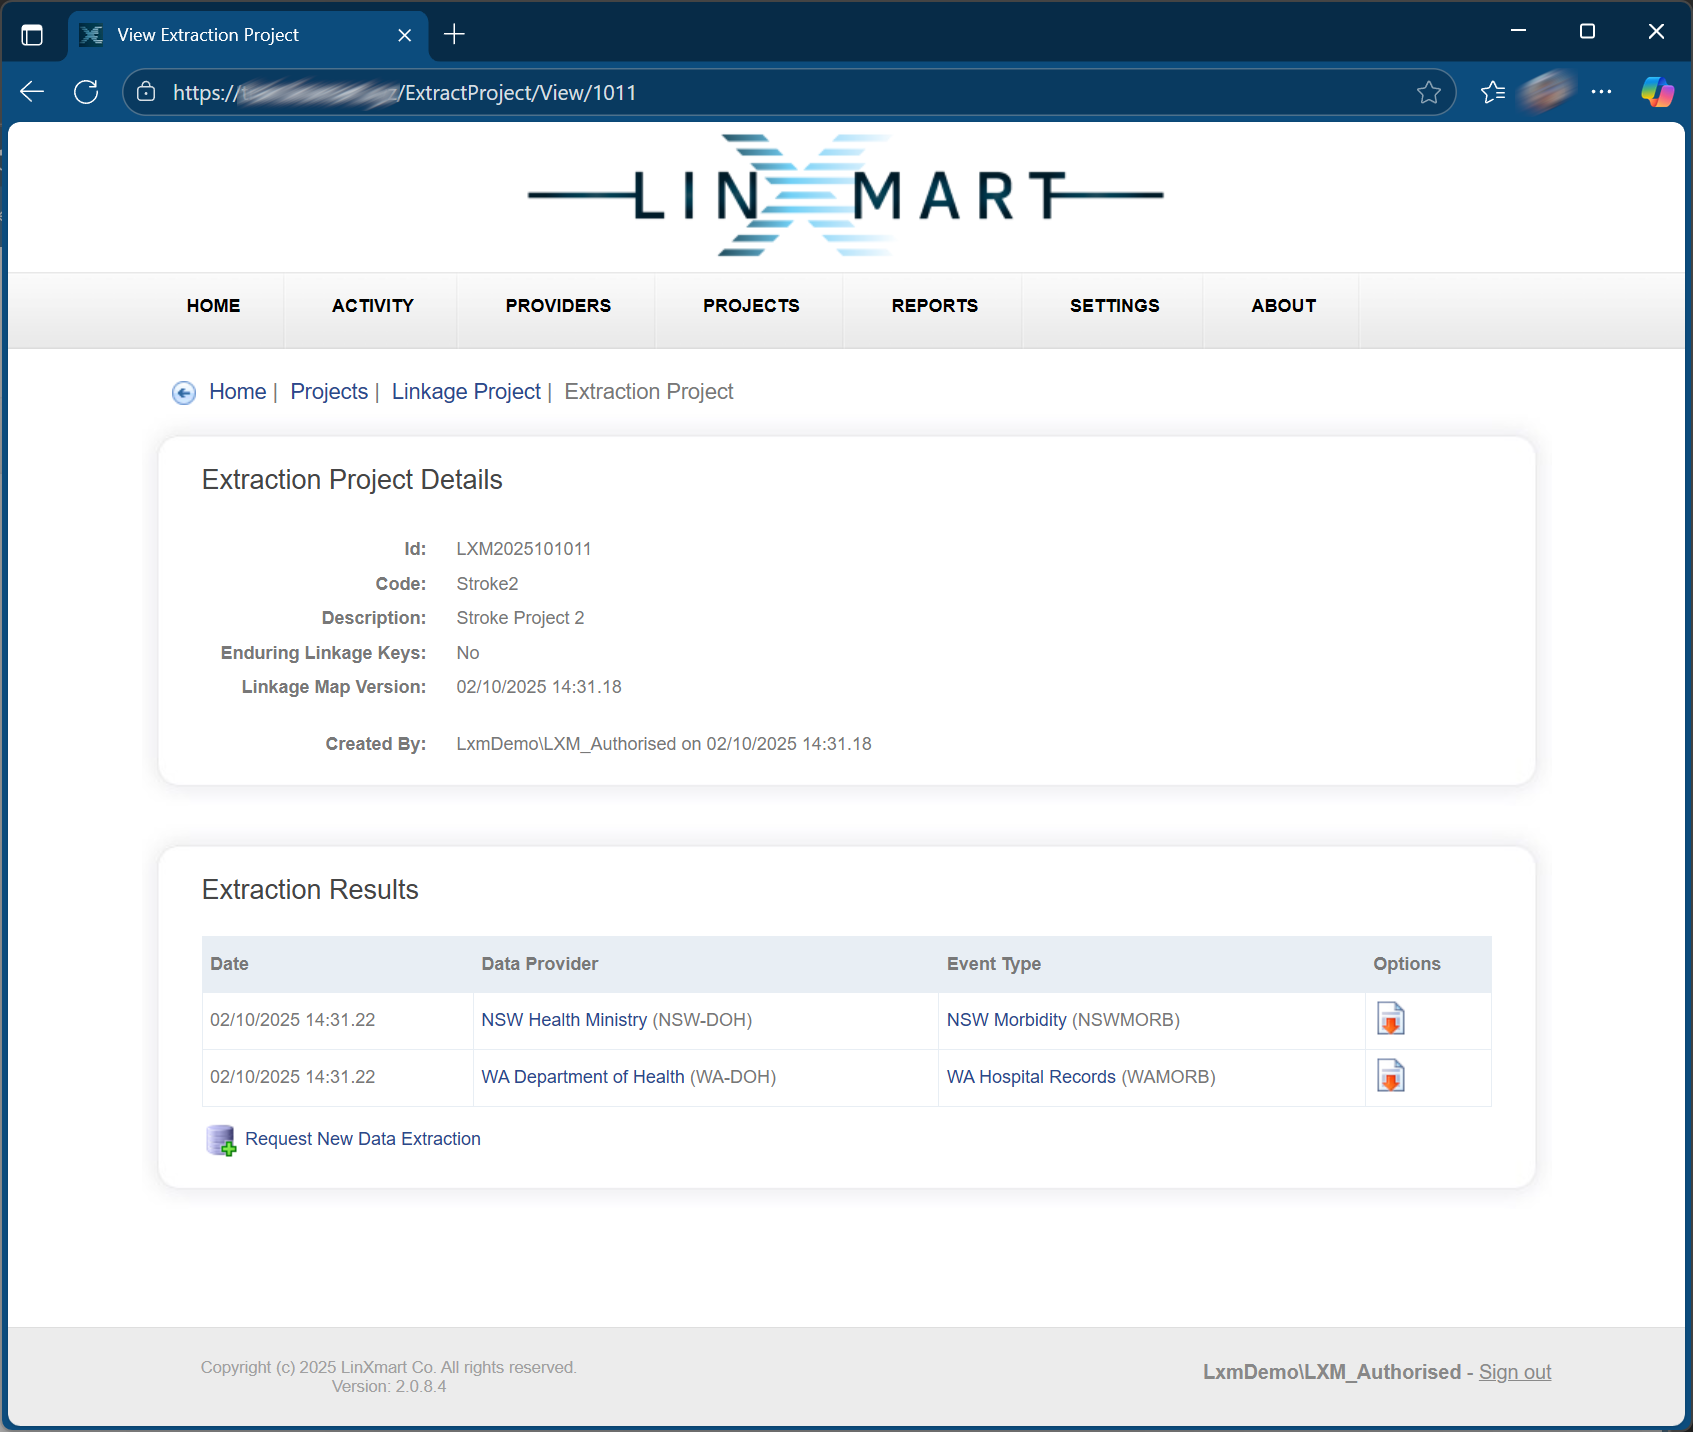
Step 4: Click the Download Results button in the Options column of one of the extraction results. Open the downloaded zip file and view the file named data-extract.csv.
Inside this file, you will see five columns. The first column is the linkage project code – in this case, it will be Tutorial. The second column is the unique record identifier. These are the same identifiers found in the file that was originally loaded into LinXmart. The fourth column is the generated person identifier created by LinXmart. LinXmart does not release the person identifiers used internally within the system. Instead, LinXmart gives out different person identifiers for each Extraction Project. This provides an additional layer of security, allowing only recipients of linkage maps from the same Extraction Project to join their datasets together. The fifth column is only applicable for Project to Project linkages and can be ignored for now.
This concludes the Tutorial – you have just linked your first datasets with LinXmart. Well done!