Module 7 - PPRL De-duplication of a single file
In this Module, you will learn how to undertake a de-duplication of a single, encoded dataset using the PPRL features of LinXmart. The Module will help you gain confidence in working with encoded data using LinXmart.
Please note that the data used in this Module is synthetic (meaning that it is fake, although it looks real) and has already been encoded for you using the Envelope Builder tool.
A separate Module can assist you in learning to use the Envelope Builder tool.
This module is part of a series of training modules that can be used with any LinXmart deployment. However, the user will require permissions to create Linkage Projects, load data for linkage extract linkage map results.
All required data files are available from the main self guideded training page.
Getting started
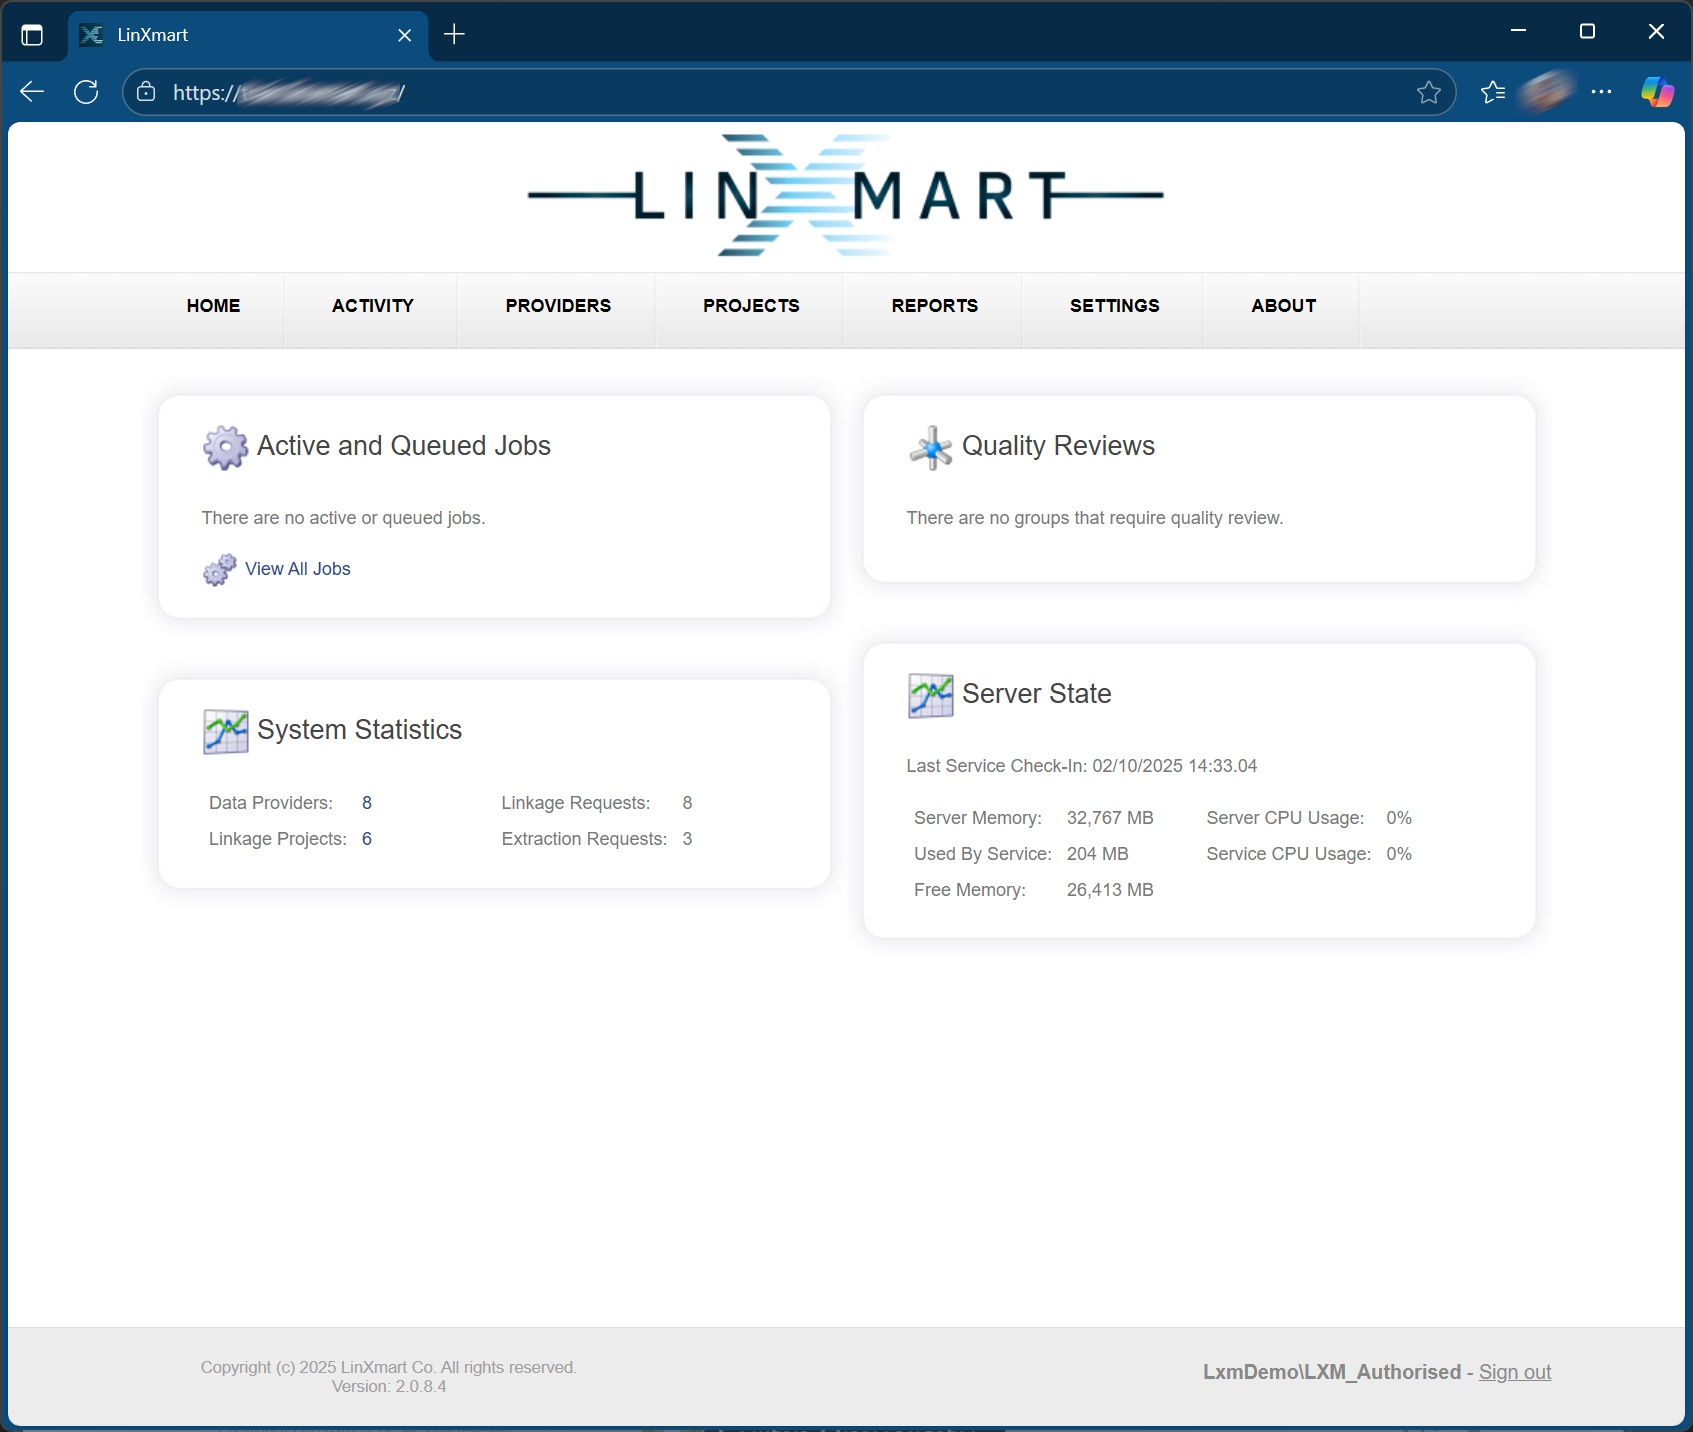
Step 1: Connect to the LinXmart web interface by typing in the LinXmart web address. You will see a screen similar to this:
Step 2: Ensure that your installation of LinXmart has a Data Provider called TRAINDP. To do this, click on the CATALOG tab at the top of the page.
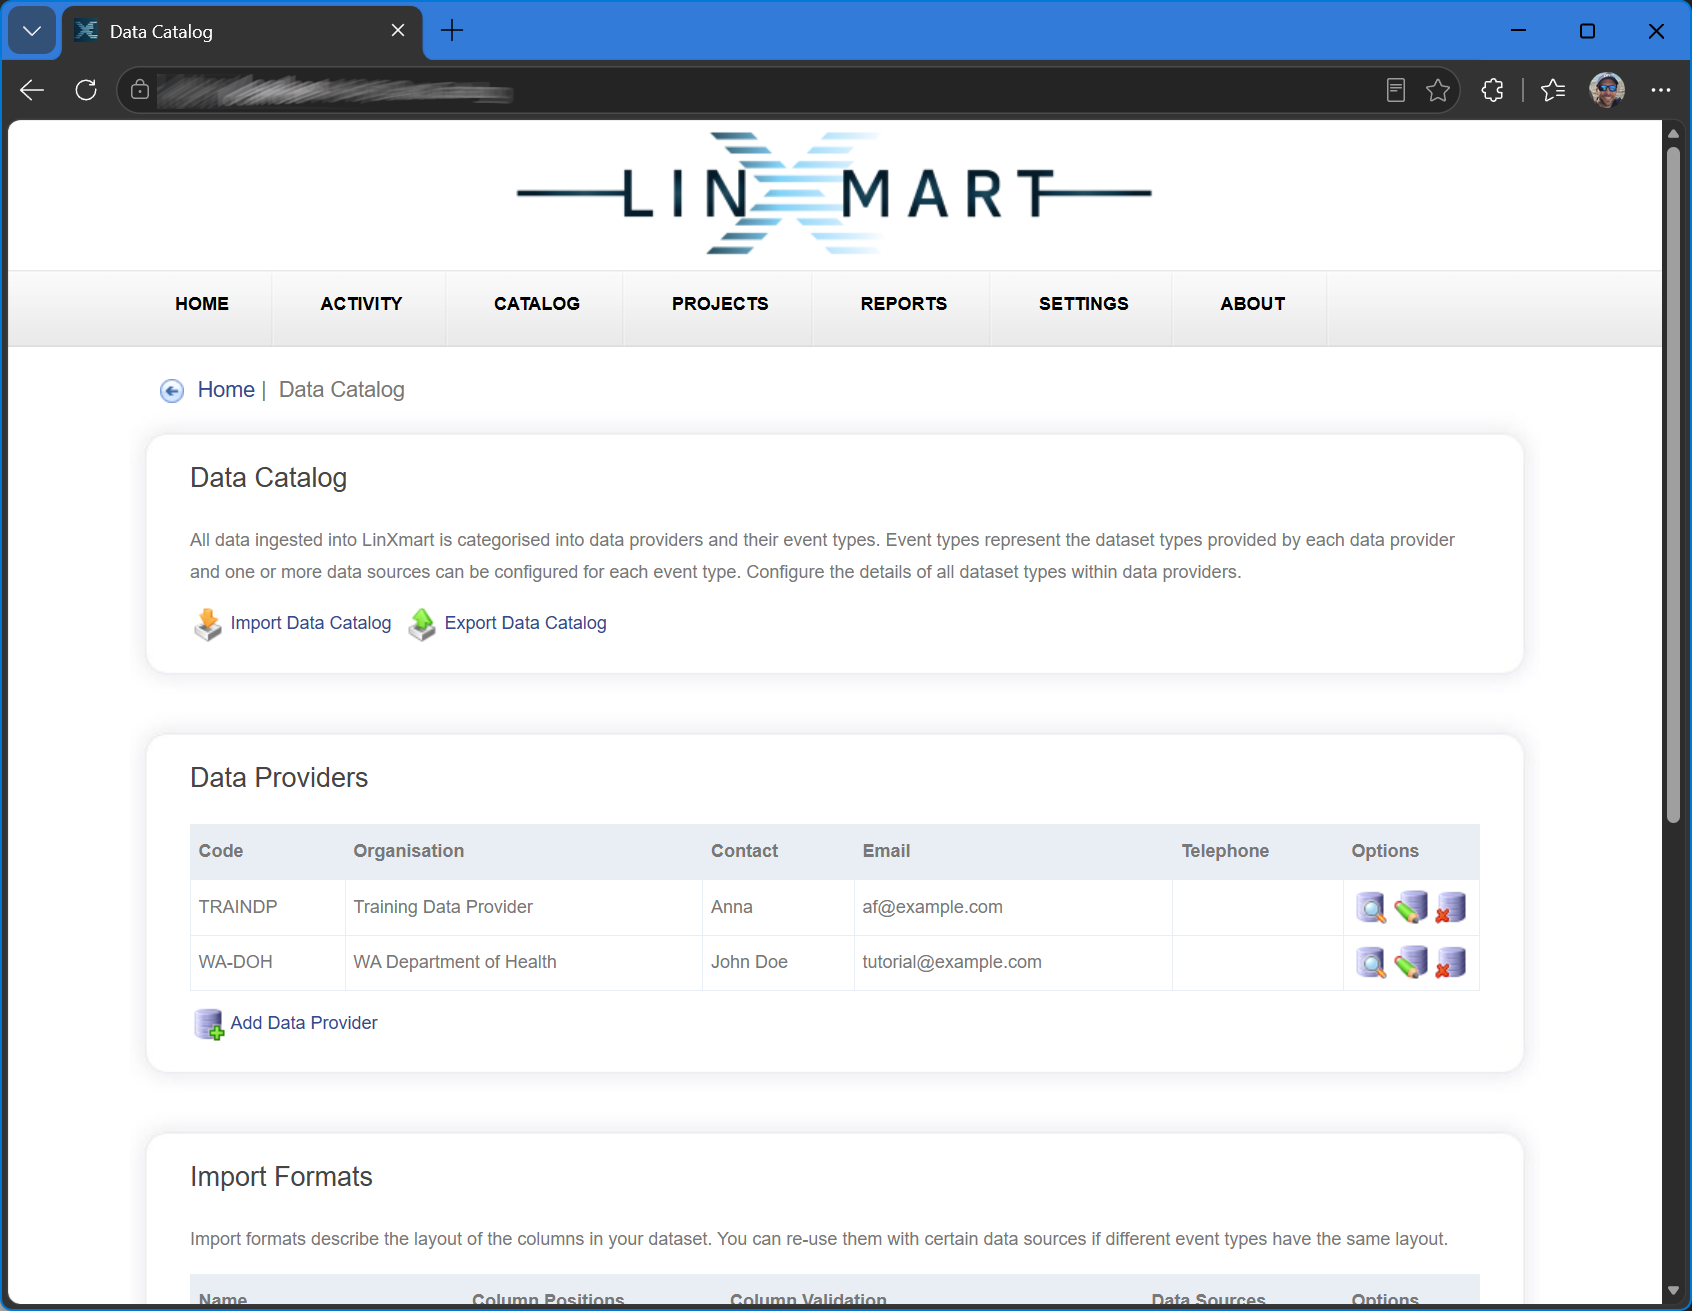

If this Data Provider is not displayed, please follow the setup instructions for this series of training modules before continuing.
Creating a Linkage Project
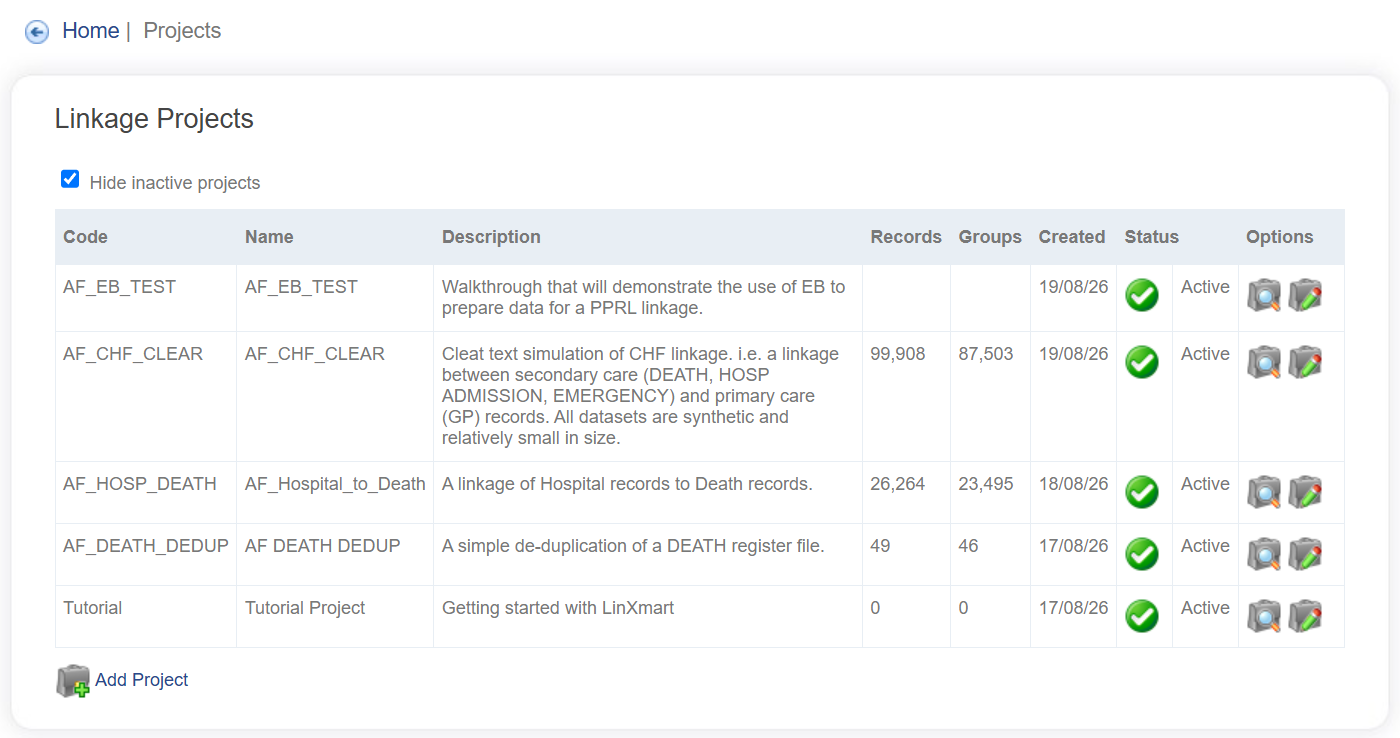
Step 3: Click on the PROJECTS tab at the top of the web page. This will present you with the dashboard of current projects (shown below). At the bottom of the list, click on Add Project.
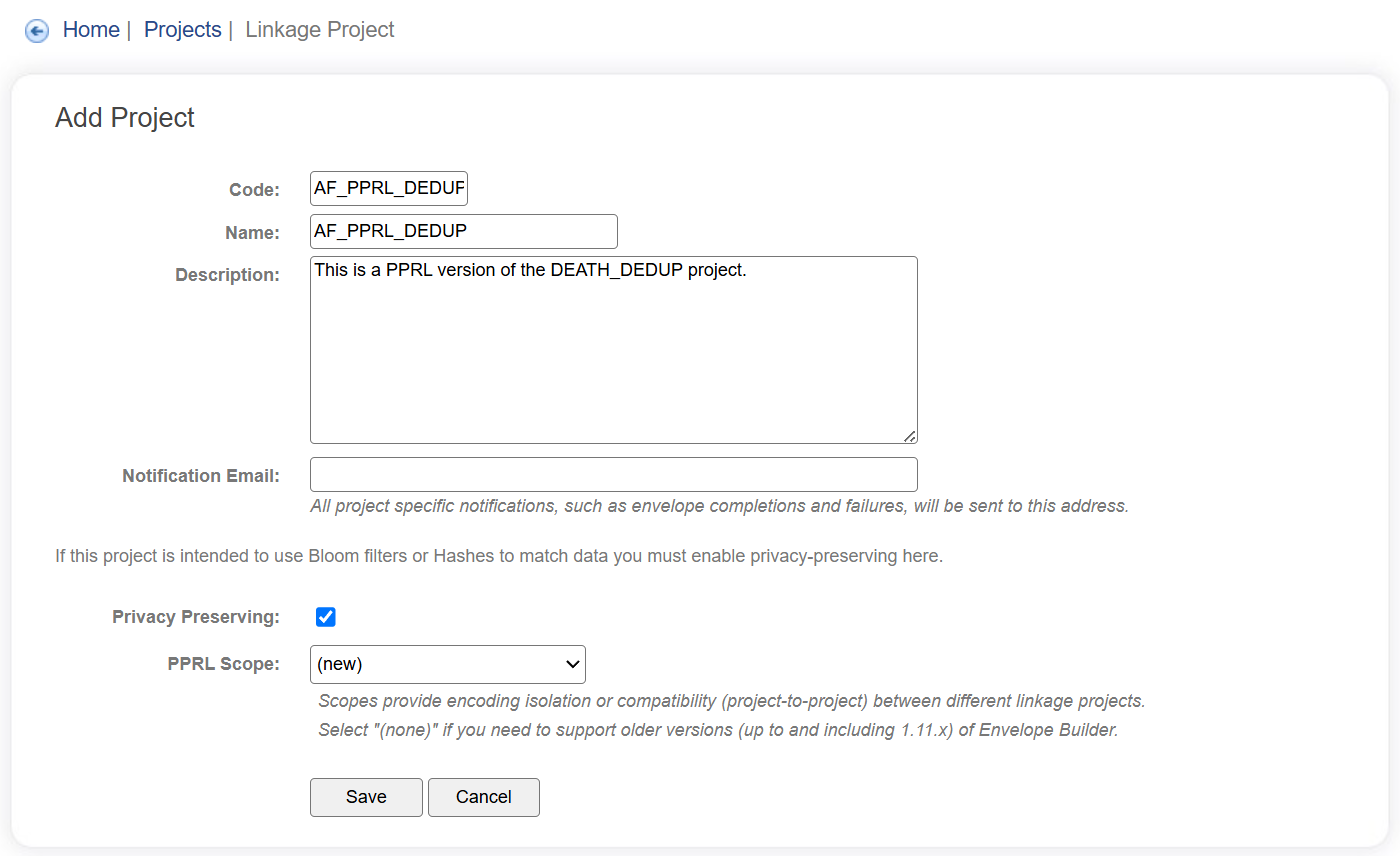
Step 4: Create your PPRL project (e.g. XX_PPRL_DEDUP) as shown below.
Enter the Linkage Project details in the fields provided. For the purposes of this Module, we will use XX_PPRL_DEDUP.
As the value for Code must be unique in the system, change XX_ to something else (e.g. your initials) to create your Linkage Project. Click on SAVE when you have finished (see below).
Adding data to a Linkage Project
Step 5: Click on your XX_PPRL_DEDUP project to bring up the Project Details page.
You are presented with an empty project (as shown below).
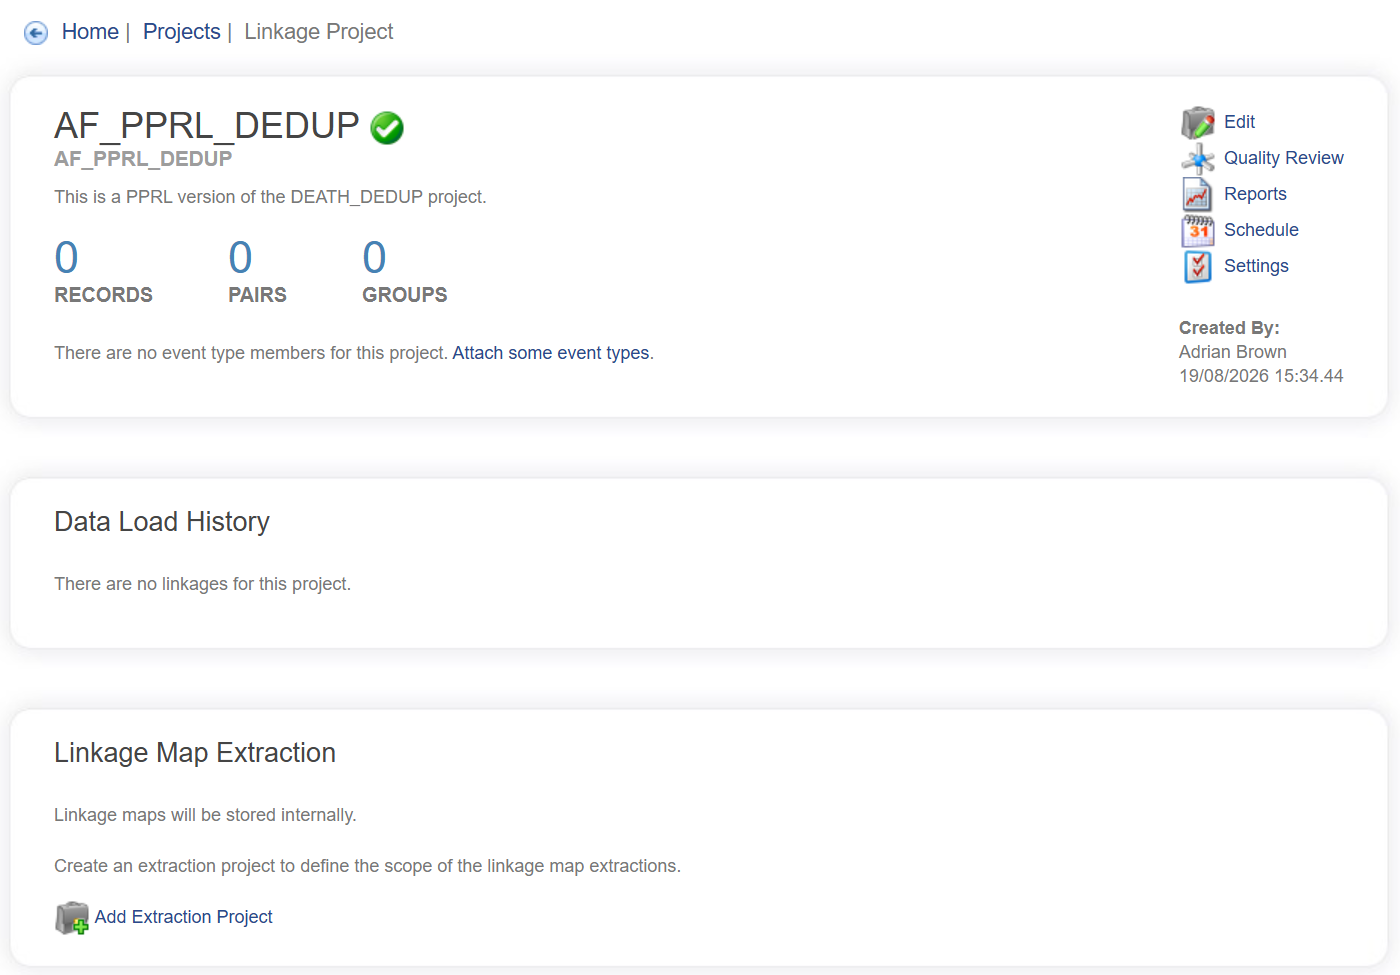
Before data can be loaded, one or more Event Types need to be attached to the Project.
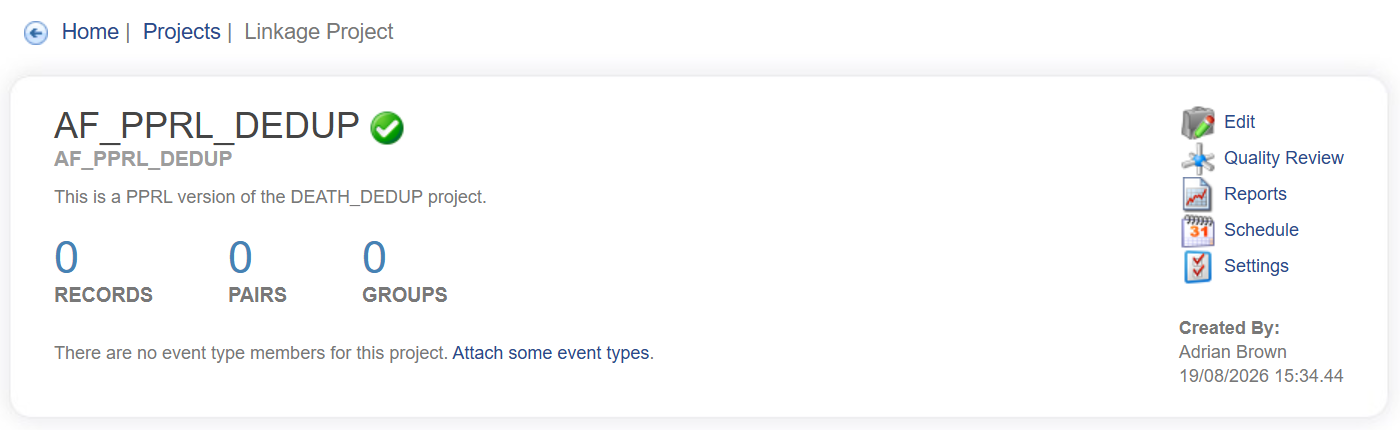
Step 6: Click on the Attach some event types link presented to you below the record stats for the empty project (shown below).
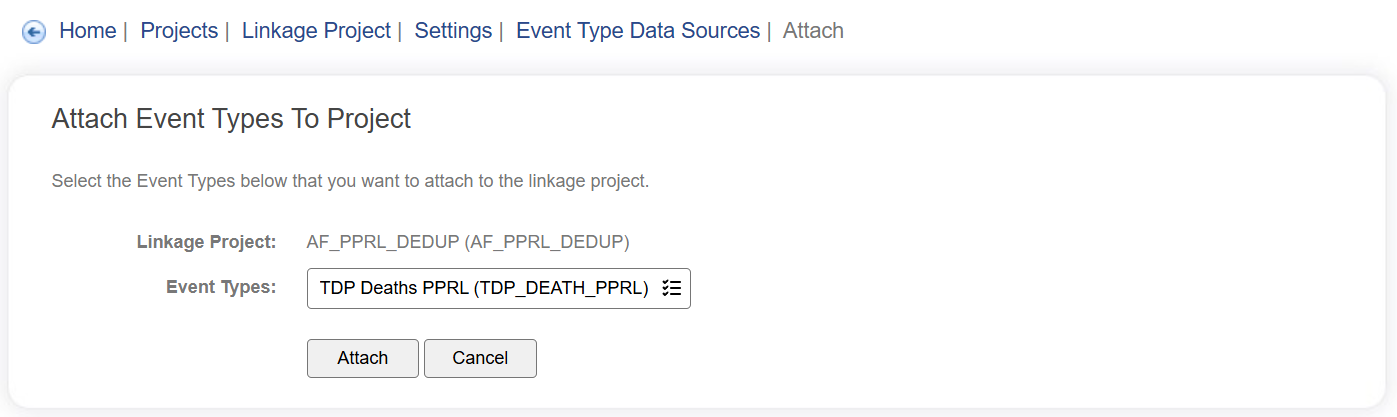
The Attach Event Types page is displayed. Click on the Event Types field.
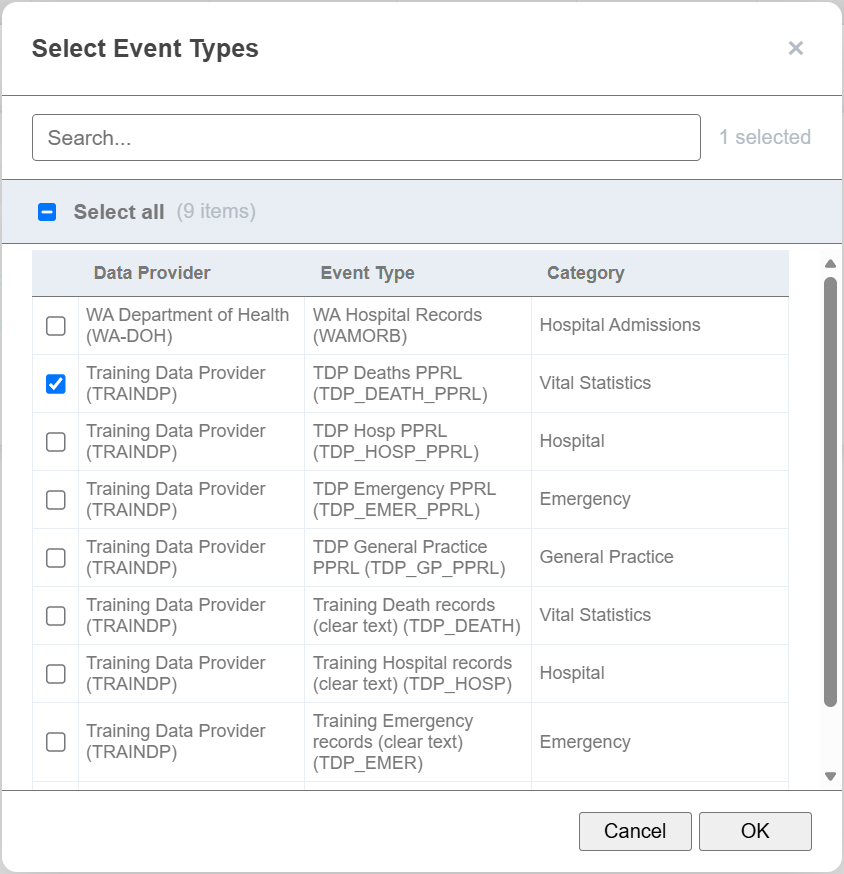
You will be presented with a list of Event Types that are already known to (defined in) LinXmart.
Check the tickbox next to Data Provider TRAINDP and Event Type TDP_DEATH (TDP_DEATH_PPRL) and then click OK.
Click the Attach button to confirm your selection.
The list of Event Types for your project should now look like this:
Linking your first encoded file
You have now added sufficient information to perform a simple linkage – a de-duplication or internal linkage of a single, encoded file – using the default linkage strategy (match/group configuration settings).
To review the default match configuration settings for this project, go to PROJECTS -> select XX_PPRL_DEDUP -> Settings -> Match Configuration.
Notice that the Match settings are similar but not identical to those used in Module 1 (De-duplication of single file). Differences:
- Linkage and Blocking variables are all Binary fields, not Text fields.
- Comparator used is Bloom Field Dice, not Jaro-Winkler.
Similarities: the default blocking strategies, weights and threshold settings are the same as those in Module 1.
The next step is to upload the TDP_DEATH_encoded.csv dataset found in the Training Data folder called TRAINDP Encoded datasets.
(You may wish to view this file in a text editor to see its contents. It is a comma delimited file containing personal identifiers and a unique record identifier – all records are synthetic. The Import Format for this datafile has already been defined within the system.)
Step 7: If you are not already on your Project dashboard, navigate to it (PROJECTS -> select XX_PPRL_DEDUP).
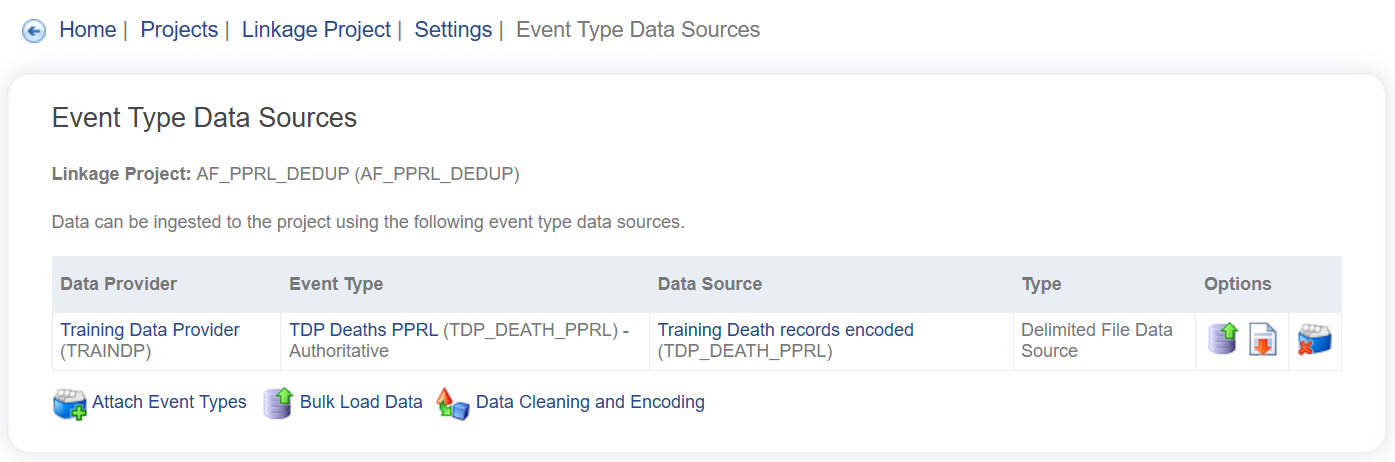
Then click on Settings. Then Data Sources. This should take you to your Event Type Data Sources page (see below).
Click the Load icon on the TDP_DEATH row on this page.
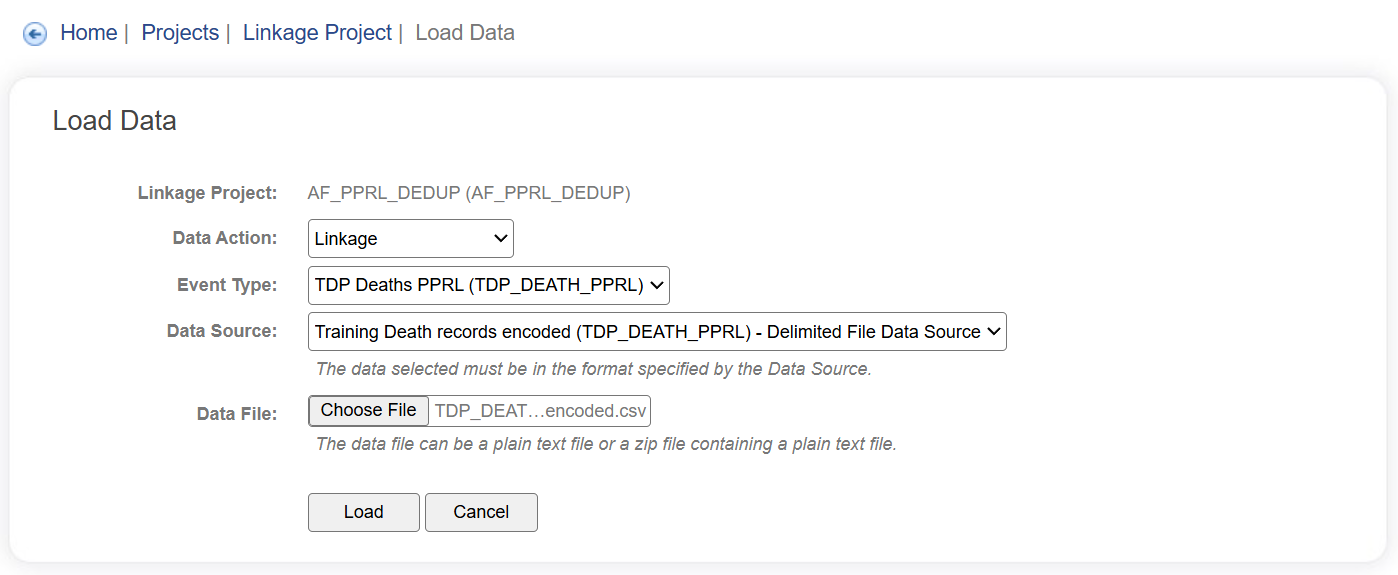
Step 8: Click on the Choose File icon and select the TDP_DEATH_encoded.csv file from the relevant Data folder. Click Load.
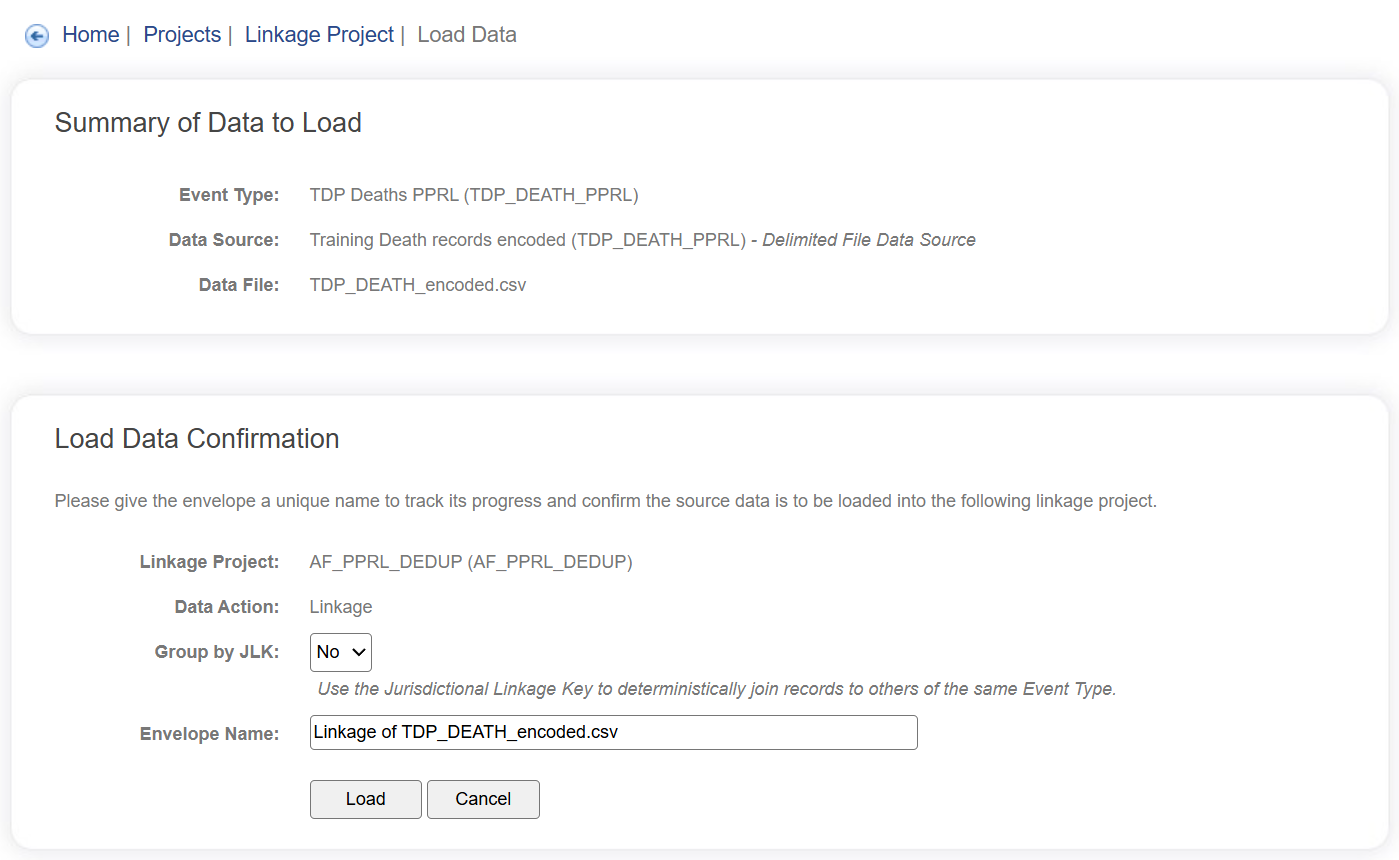
You will be taken to a Load Data Confirmation page. Please ignore the Group by JLK option for now and select Load. This will begin the linkage process; its process can be monitored in real-time through the ACTIVITY tab.
Monitoring your linkage job
Step 9: To see how the linkage job is progressing, navigate to the Job Monitoring screen by clicking on the ACTIVITY tab at the top of the screen. Next select the ENVELOPES sub-tab. Information regarding the current job's status will be appear under 'All Envelopes'.
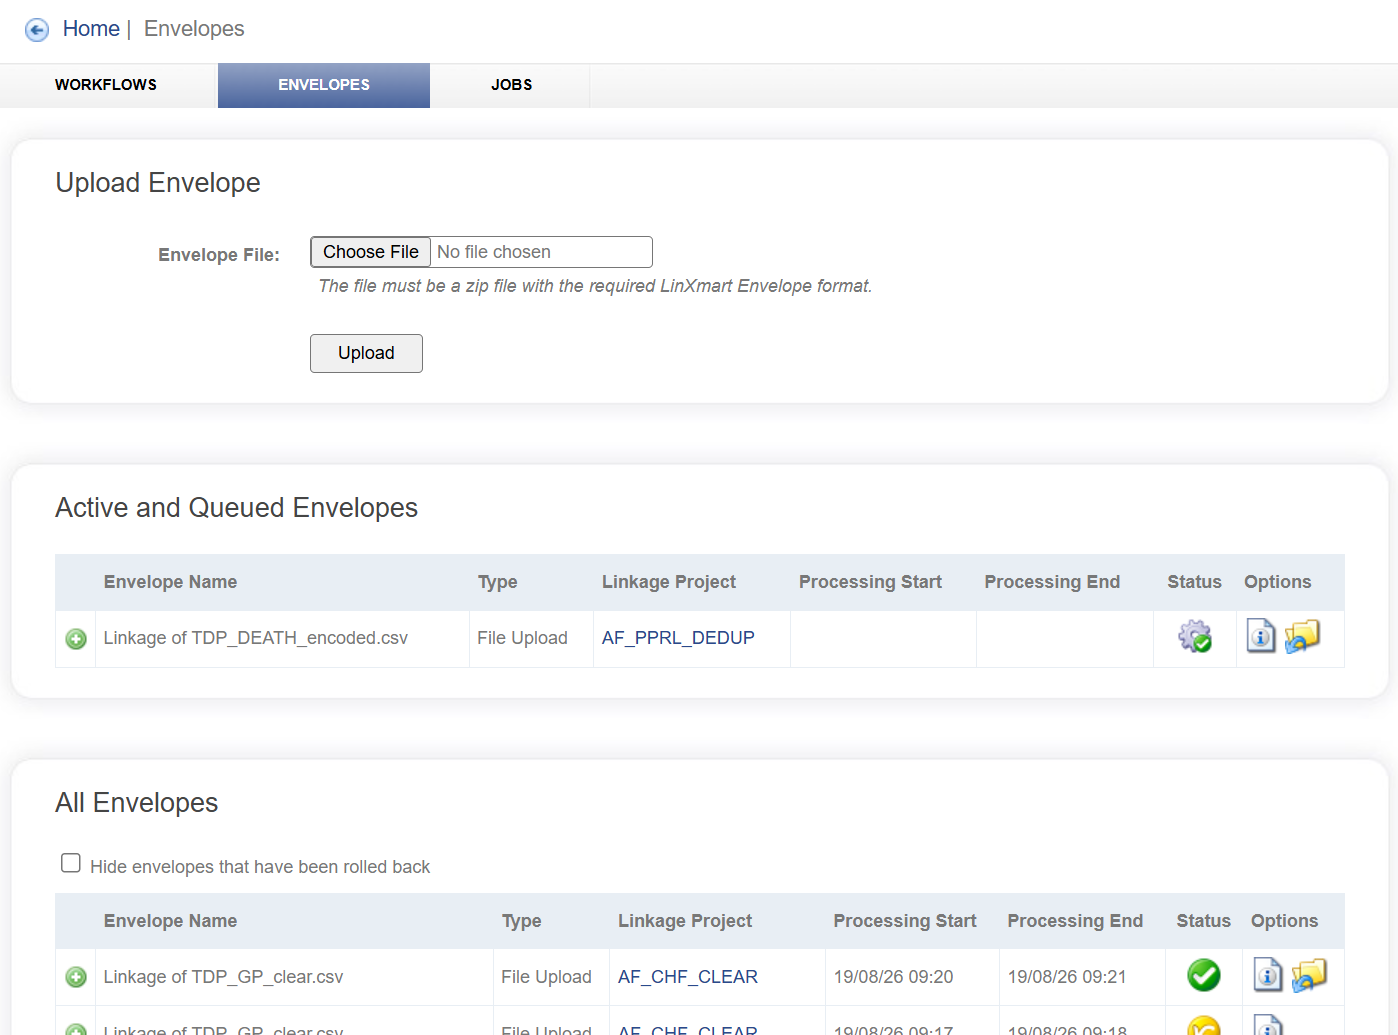

The data in this file was internally linked or de-duplicated, identifying records within the file belonging to the same person. As there were no other datasets in the Project, this is the only linkage that took place. A green tick is the Status column indicates that the job successfully ran to completion (green is good).
Step 10: Click on the PROJECTS tab and select XX_PPRL_DEDUP Project to go back to your Linkage Project dashboard.
The dashboard for the XX_PPRL_DEDUP Project will now reflect the new data, showing you the records that were added, pairs created and groups (unique individuals) that were found (as below).
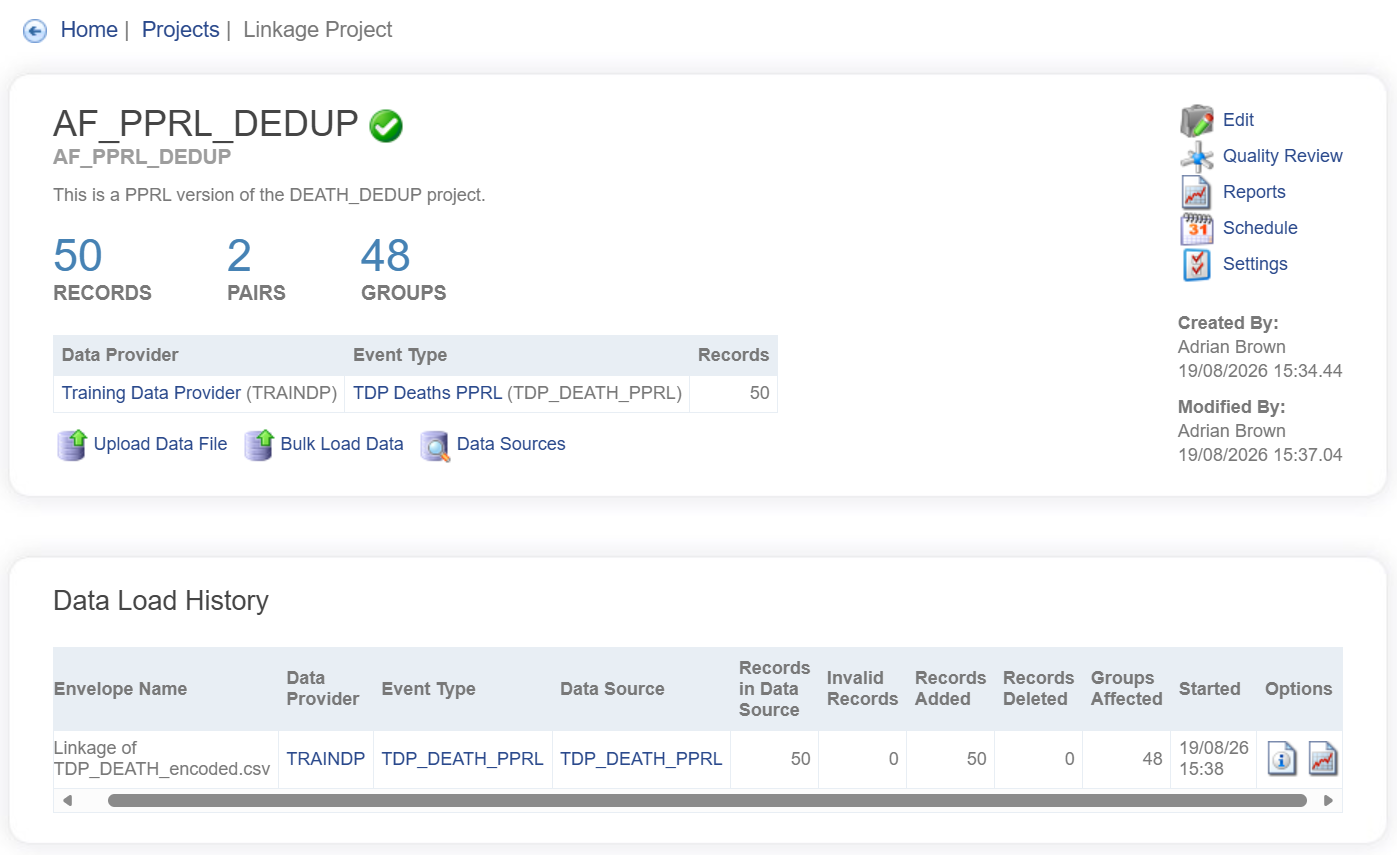
Step 11: In the Data Load History section, click on the report icon in the Options column for the linkage you just ran.
The Linkage Report details information on the changes made to the system for this particular Envelope, including storing a snapshot of the configuration used.
You can also click on the Notifications icon to the left of the Report icon to view other notifications that were sent out as part of the process.
Congratulations, you have just completed your first PPRL linkage!
Extension Exercise
As an additional step, navigate to the Quality Review screen to look at any quality issues that the system may have found with your linkage.
To do this, navigate to your project on the Project dashboard, and click on the Quality Review icon on the right-hand side (shown below).
Did any records break the Authoritative rule of Death records? What might you do next, if anything?