Module 3 - Making changes to your linkage strategy
Once you have linked some data, you may decide that you want to make some changes to your linkage strategy. This usually occurs after you have looked at your Linkage reports and/or have undertaken some checks (quality review) of linkage results.
In this Module, we will show you how to:
- Use Quality Review to inspect results, and
- Make changes to your matching threshold level
You may wish to make other adjustments to your linkage strategy, such as modifying other match configuration settings (e.g. weights). The process for doing this is essentially the same.
We will walk through the process of changing the threshold level using an existing Linkage Project (XX_HOSP_DEATH). This project was created as part of Module 2.
This module is part of a series of training modules that can be used with any LinXmart deployment. However, the user will require permissions to create Linkage Projects, load data for linkage extract linkage map results.
All required data files are available from the main self guideded training page.
Getting started
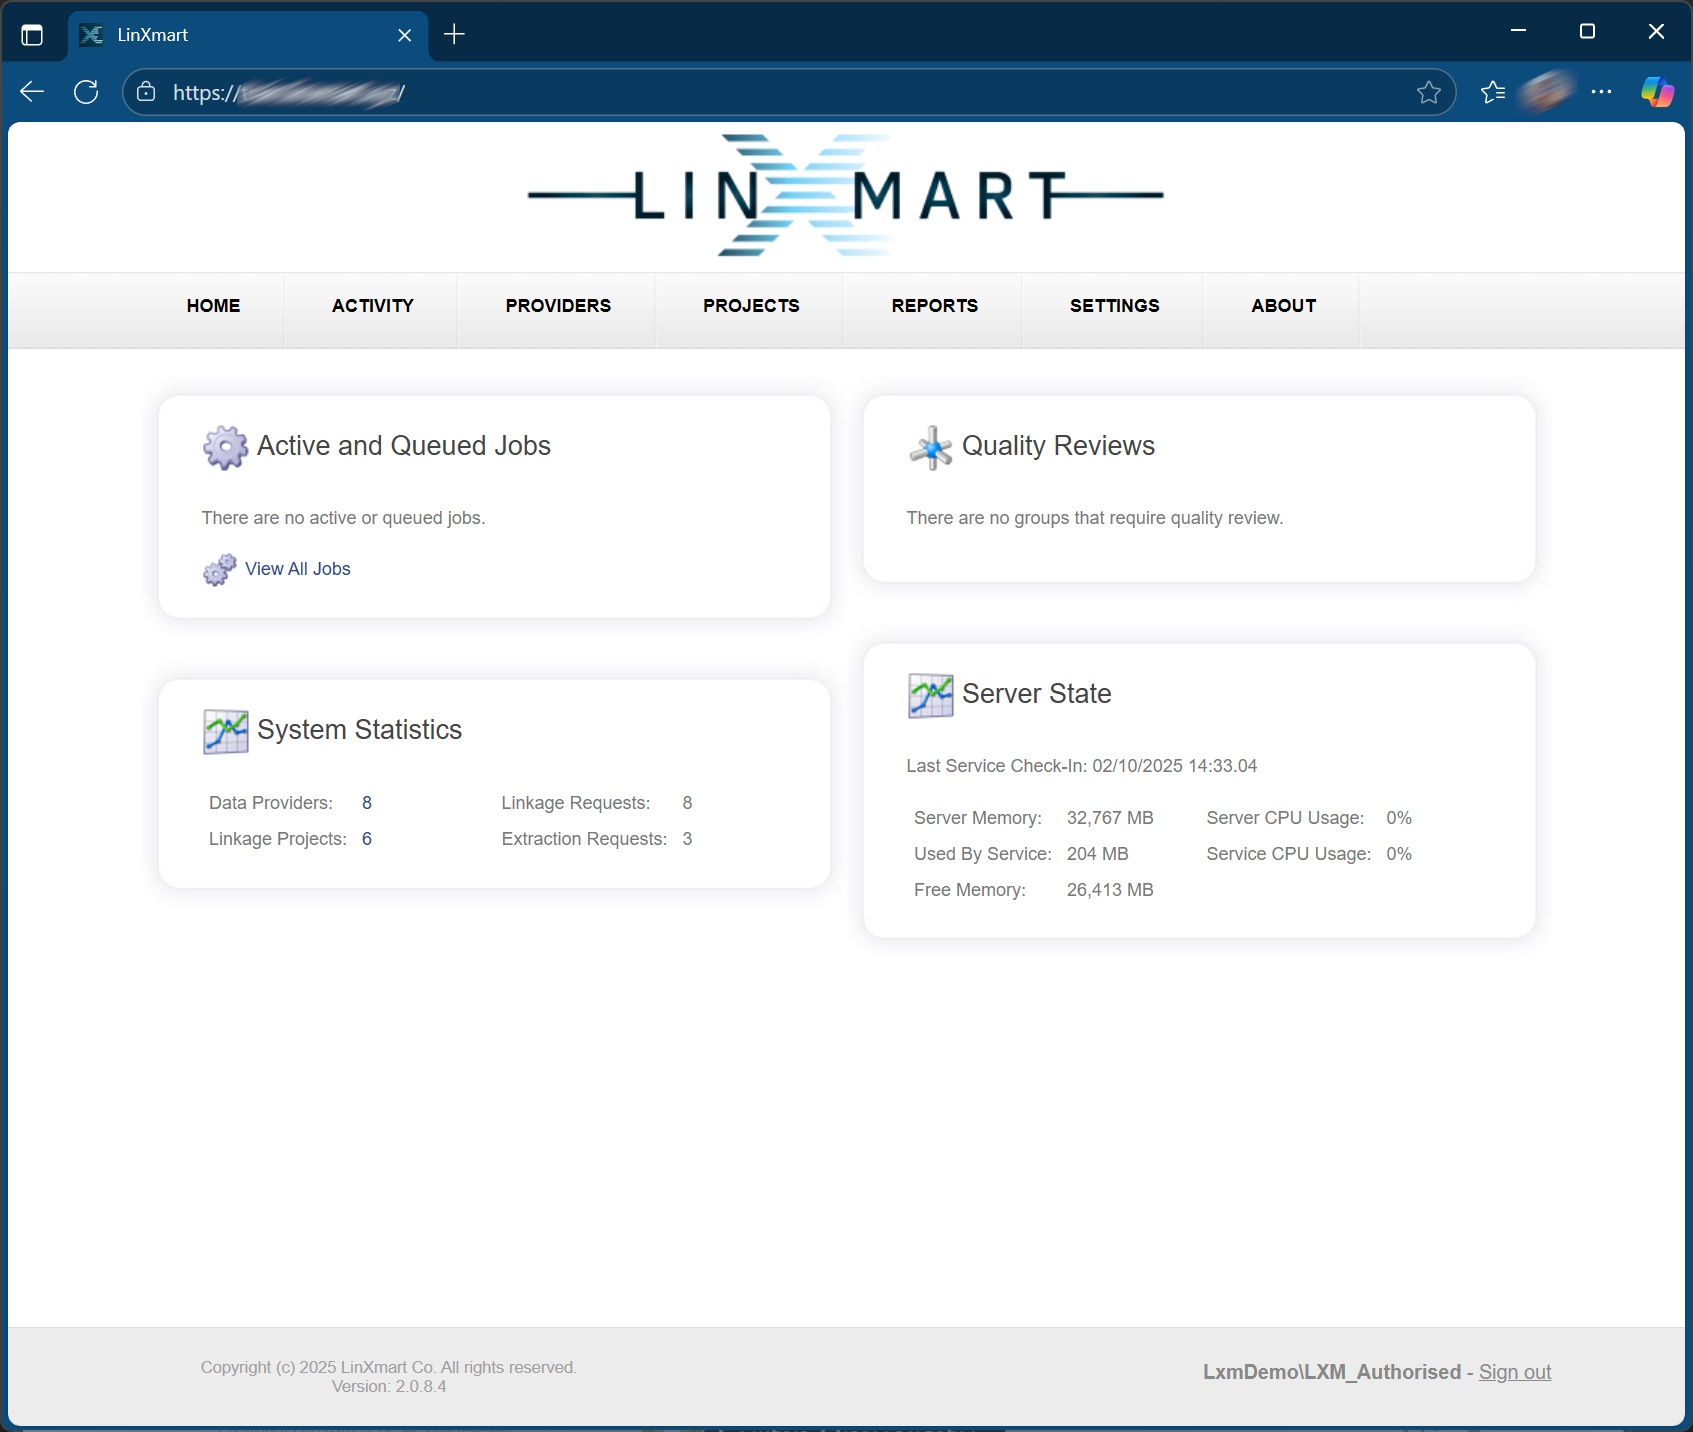
Step 1: Connect to the LinXmart web interface by typing in the LinXmart web address. You will see a screen similar to this:
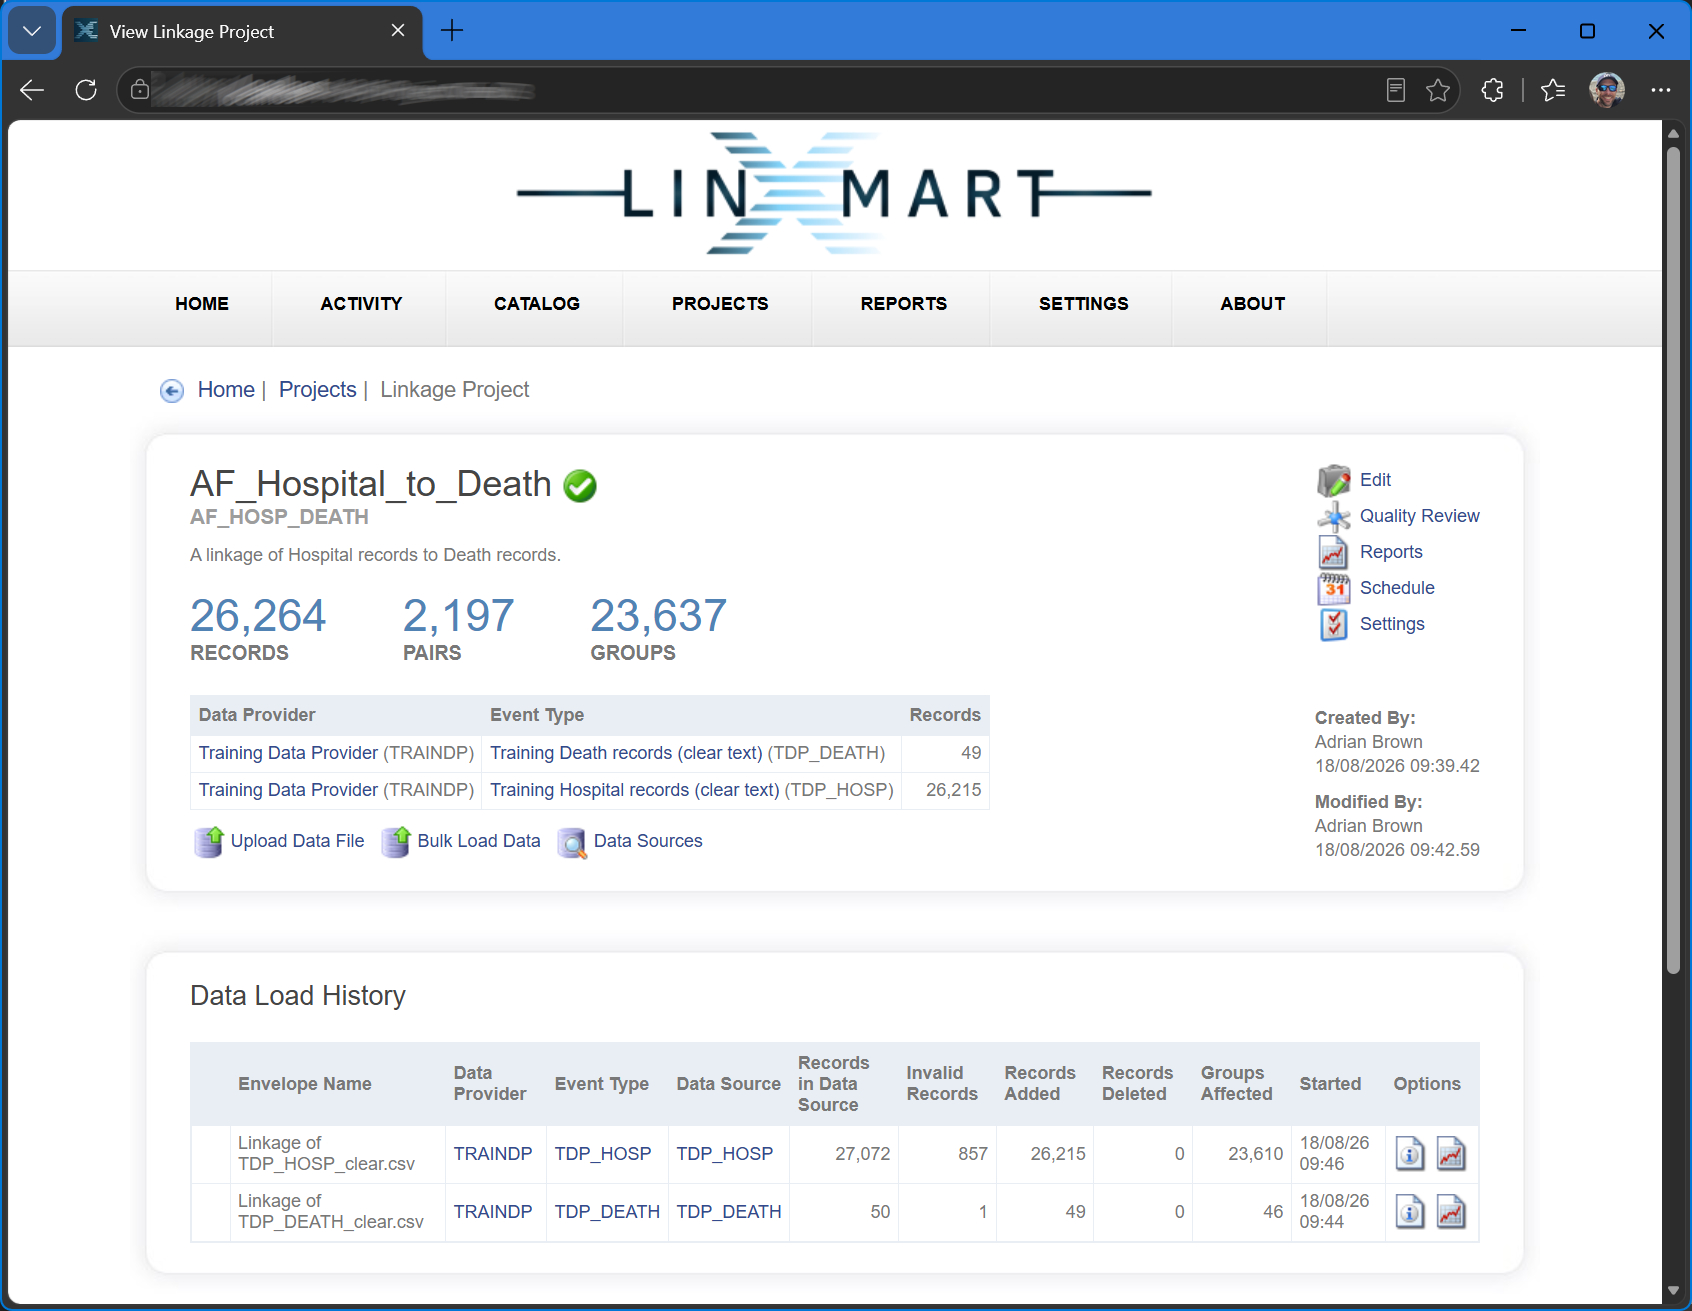
Step 2: Click on the PROJECTS tab at the top of the web page and select your project (XX_HOSP_DEATH), created as part of Module 2. This will present you with the dashboard for that project (shown below).
Should I vary my threshold?
Decisions about varying the threshold are typically made after reviewing Linkage Reports (looking at the distribution of record-pairs) and by eye-balling matches that sit on or near the cutoff value (the default threshold value is 21).
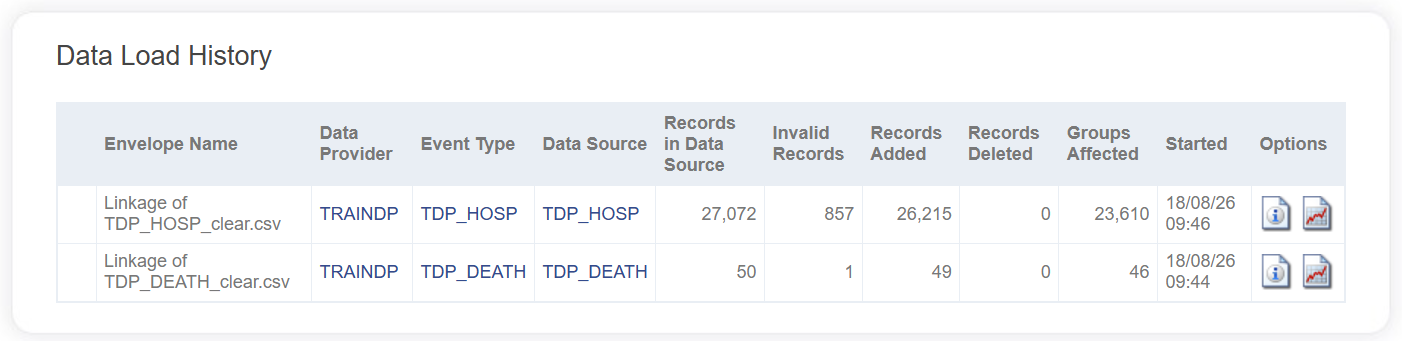
Step 3: To view the latest Linkage Report, go to the Data Load History section of the Project dashboard and click on the Report icon (shown below). Take your time to read all the details in the Report.

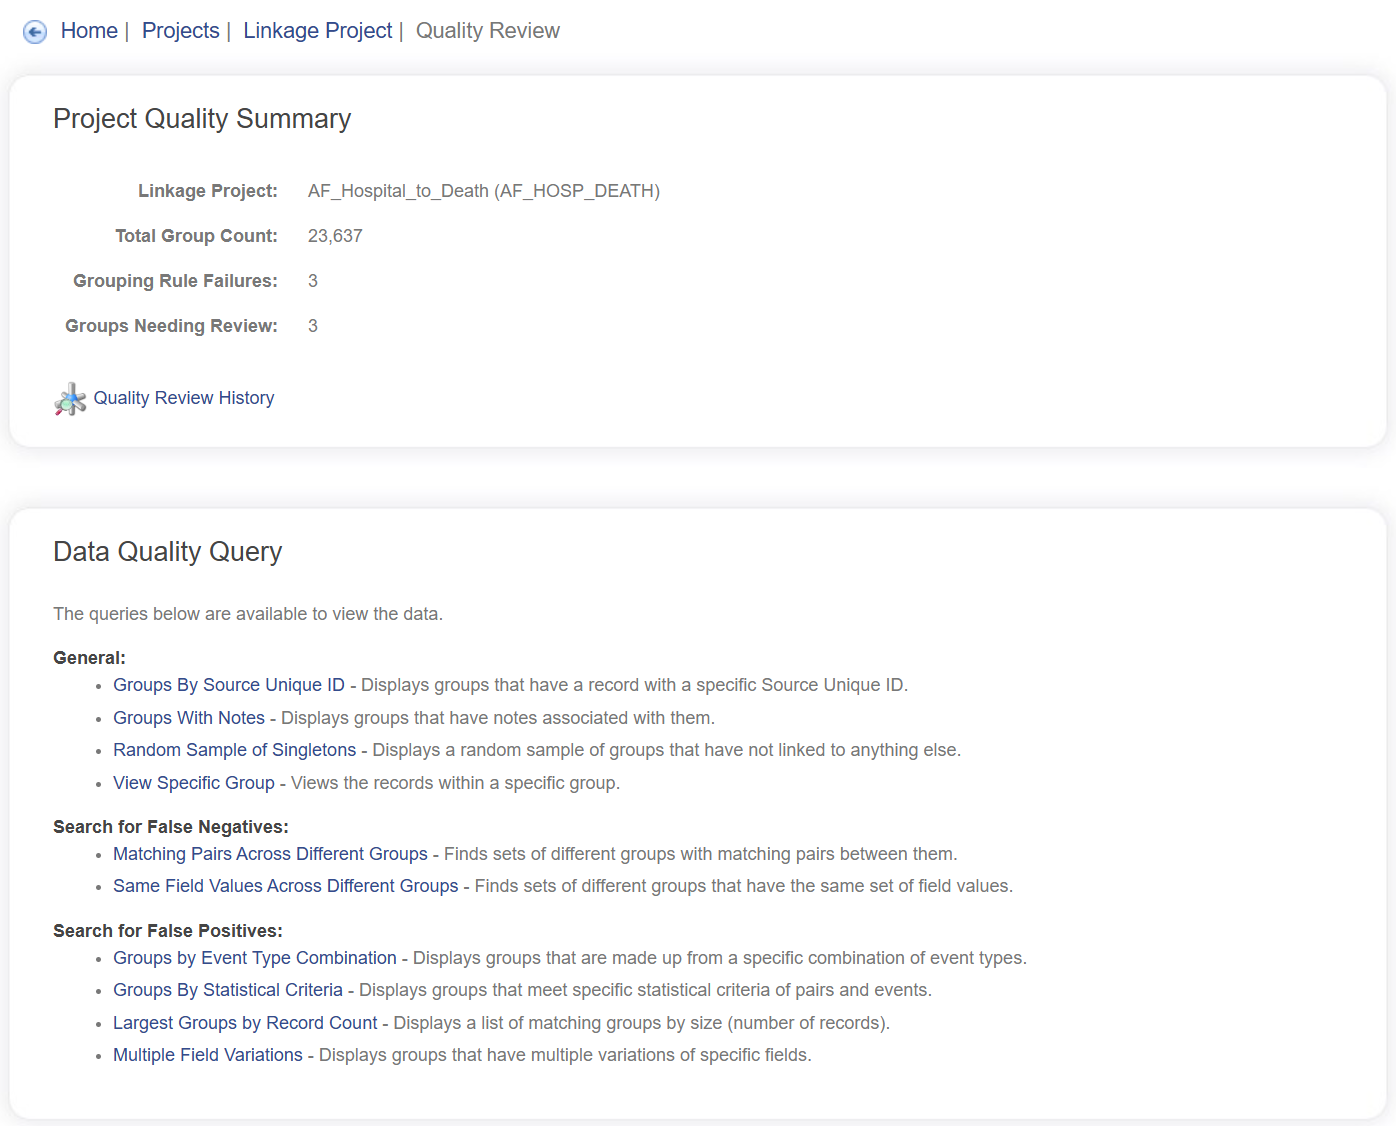
Step 4: To look at individual record-pairs that sit on or near the threshold, you will need to navigate to the Quality Review screen. You can do this from the project dashboard, by clicking on Quality Review (shown below).
The Quality Review screen allows users to sample groups of linked records from the project. There are different types of queries that can be selected.
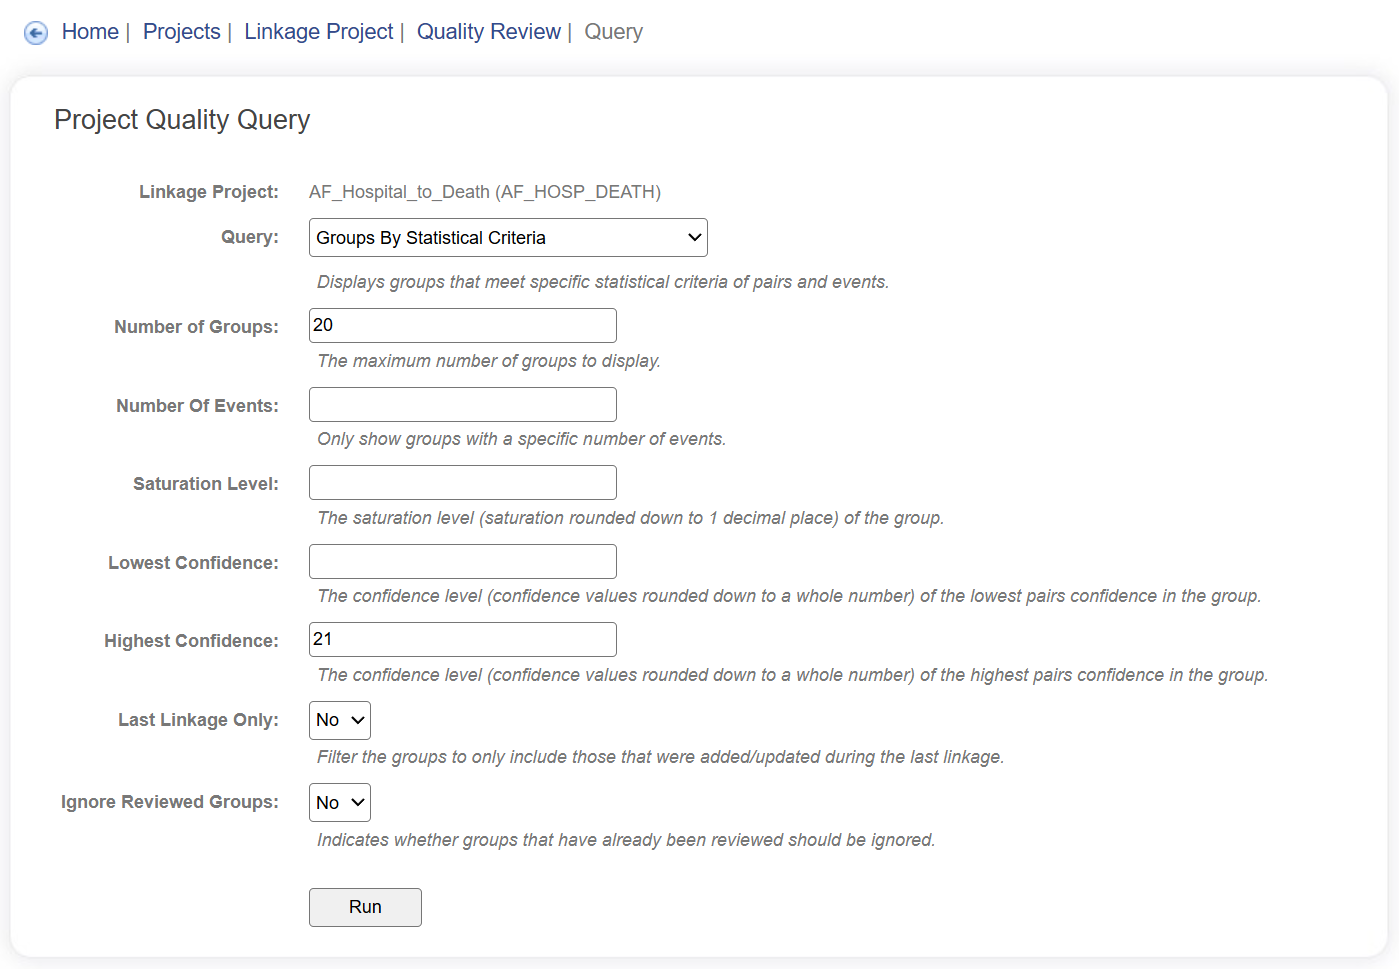
Step 5: To look at record-pairs that are near the threshold, select Groups By Statistical Criteria from the Data Quality Query list (shown below).

The next screen allows you to be more specific about your query.
Step 6: Change the Number of Groups, to 20 (this will pull up a random sample of 20 pairs of records from the database of results). In the Max Confidence Band, enter the current threshold value of your project (default is 21). Then click on Run (shown below).
The Query Results will appear below the Run button (shown below). You can now scroll through these record-pairs and make a judgement as to whether you consider them to be 'acceptable' matches.
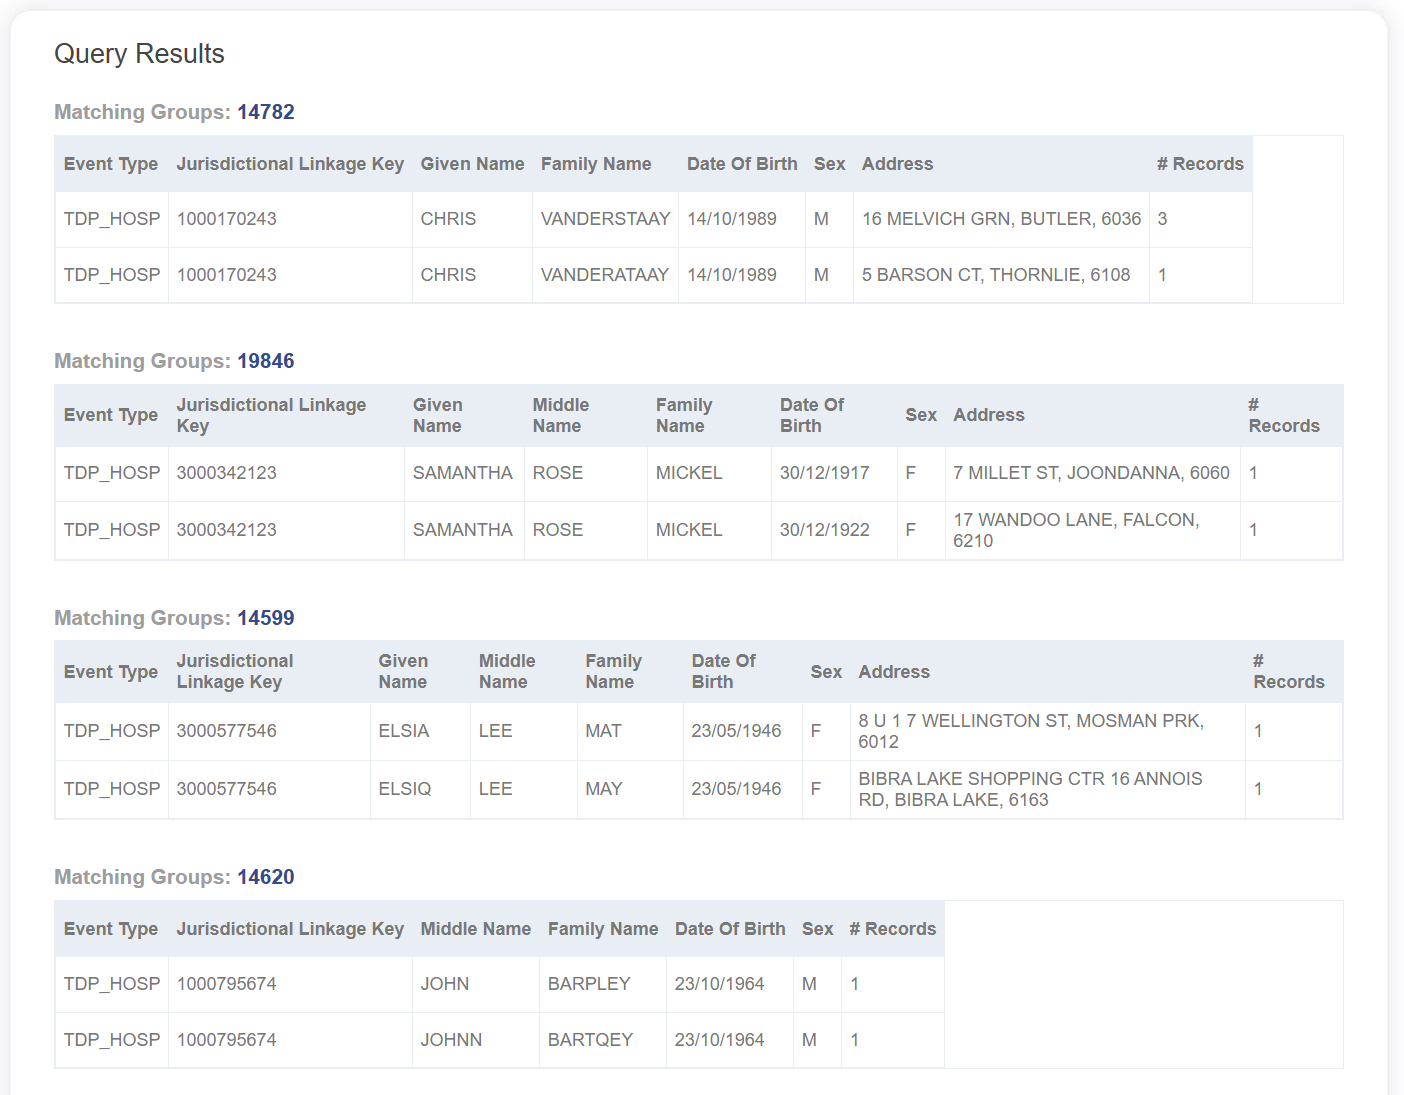
If there are many 'suspect' matches, then this is a clue that you may want to raise the threshold.
If most (all?) of the matches appear reasonable, then this is a clue that you may want to consider lowering the threshold. (Taking time to consider these decisions is a normal part of the linkage process.)
If you want to see more data, you can (re-)run the same query to pull up another random sample of record-pairs and/or you can increase the Number of Groups that are selected and presented by the query.
Note that you cannot view any record-pairs below your current threshold, simply because these have NOT been retained by the system.
If you DO want to see what lies below the cutoff, you will need to roll-back the current linkage and then re-run the linkage at a lower threshold. This 'iterative' approach is a normal part of the data linkage process.
How to do it is described in the next steps.
Rolling Back a Linkage Job
To make changes, we first need to roll-back or undo the current linkage job. Performing a job roll-back (or undo) is quite straightforward.
You can only roll-back the latest Envelope for a linkage project.
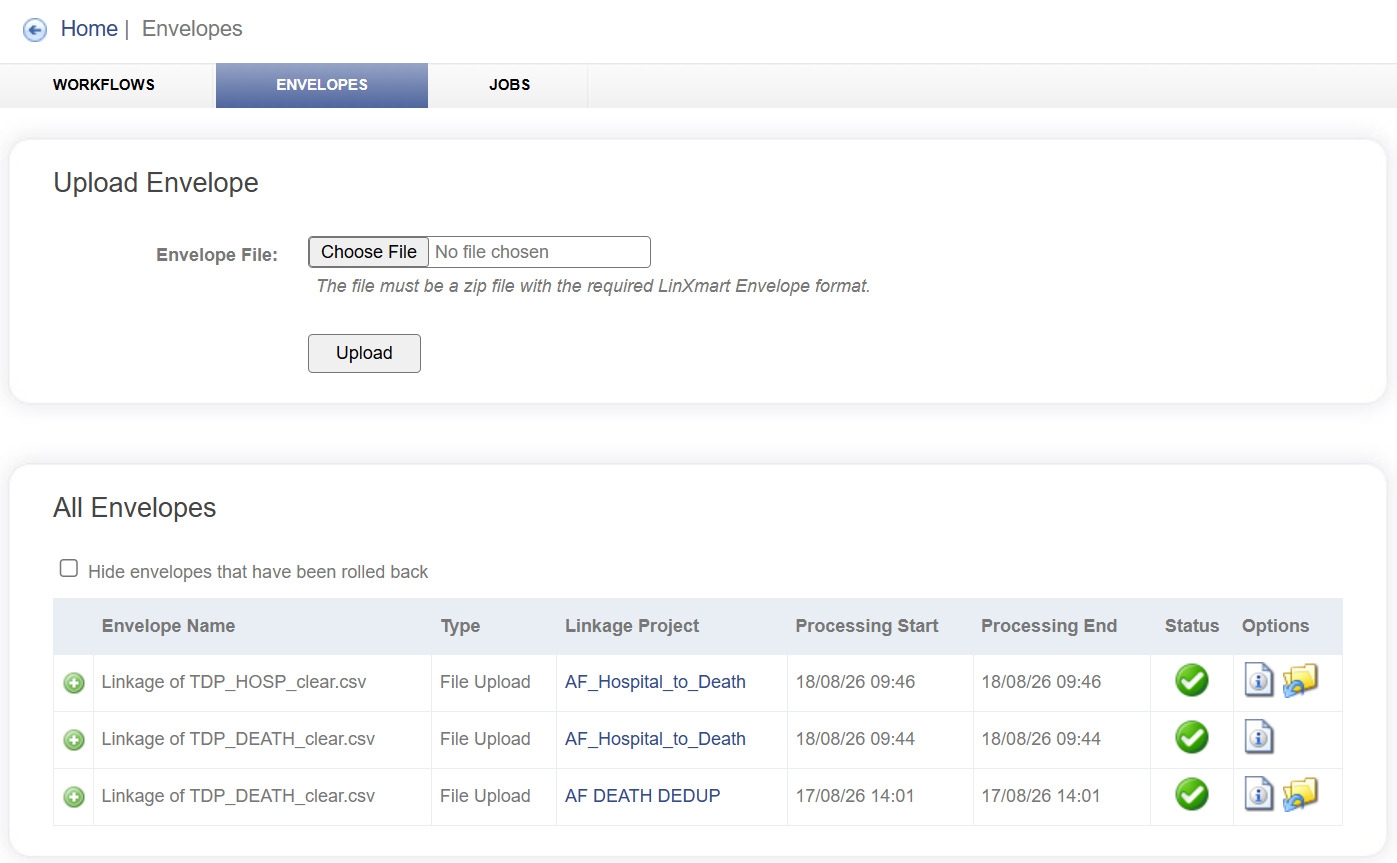
Step 7: Click on the ACTIVITY tab at the top of the screen, then click on the ENVELOPES sub-tab. After you have located the envelope that you wish to roll-back, click on the Rollback icon under the Options column (shown below).
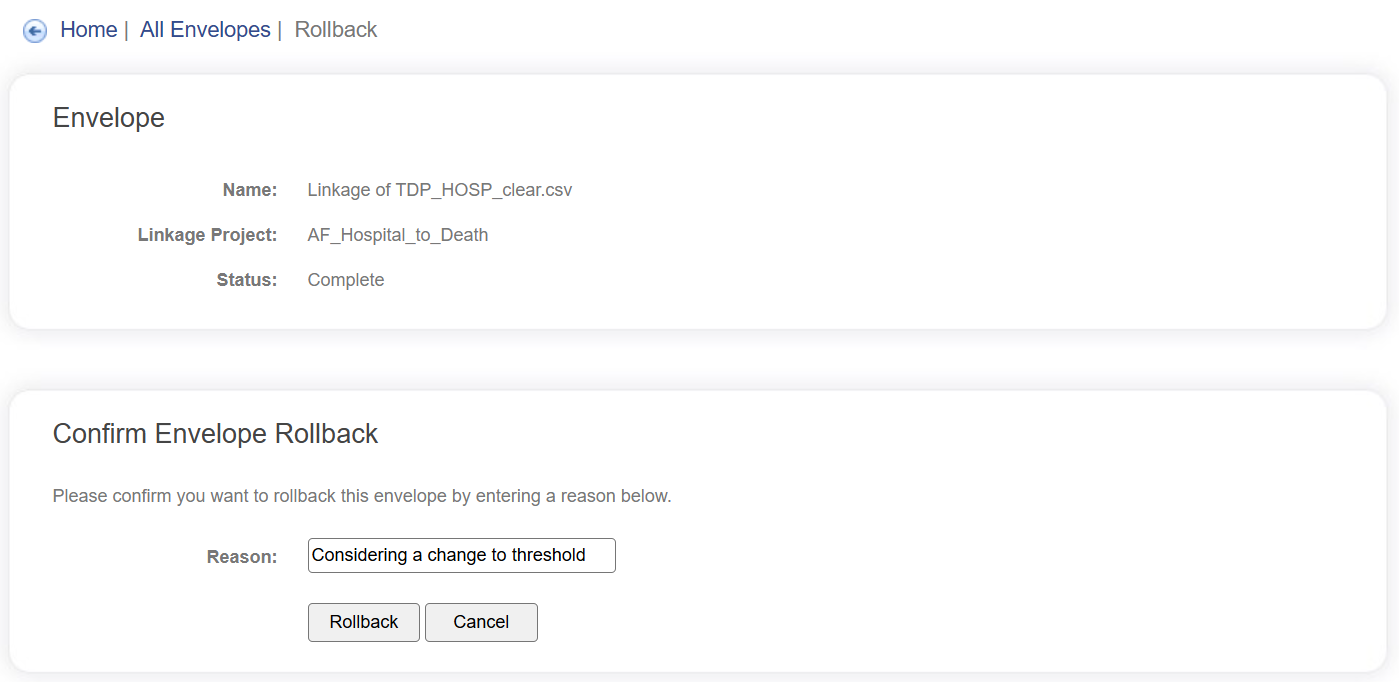
You will be asked to provide a reason for the roll-back (e.g. Want to change threshold) prior to confirming the rollback by clicking on the Rollback button (shown below).
The rollback job will be displayed in the ACTIVITY tab, under the JOBS sub-tab.
When it has completed, all the previous actions related to that linkage job (envelope) have been undone. You are now able to change (lower) the threshold before re-loading the same data.
Rollbacks occur in sequential order and are project-specific.
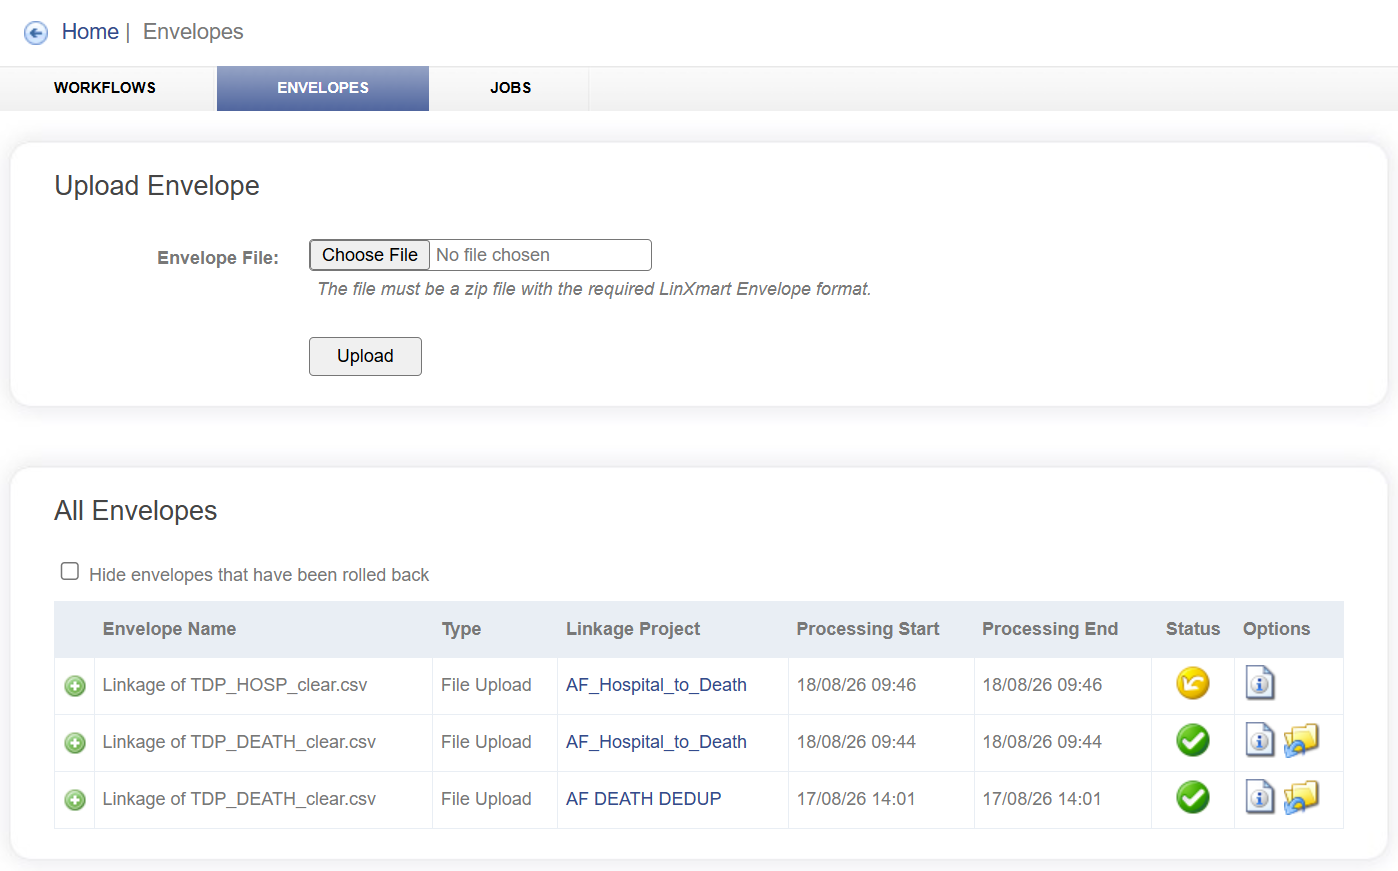
When an envelope has been rolled back, you will notice that its status in the ACTIVITY tab (under the ENVELOPES sub-tab) has changed from a green tick icon to a yellow Undo icon (shown below).
Varying the threshold
Threshold settings are part of the match configuration of your project. To make changes, we will need to navigate to these configuration settings.
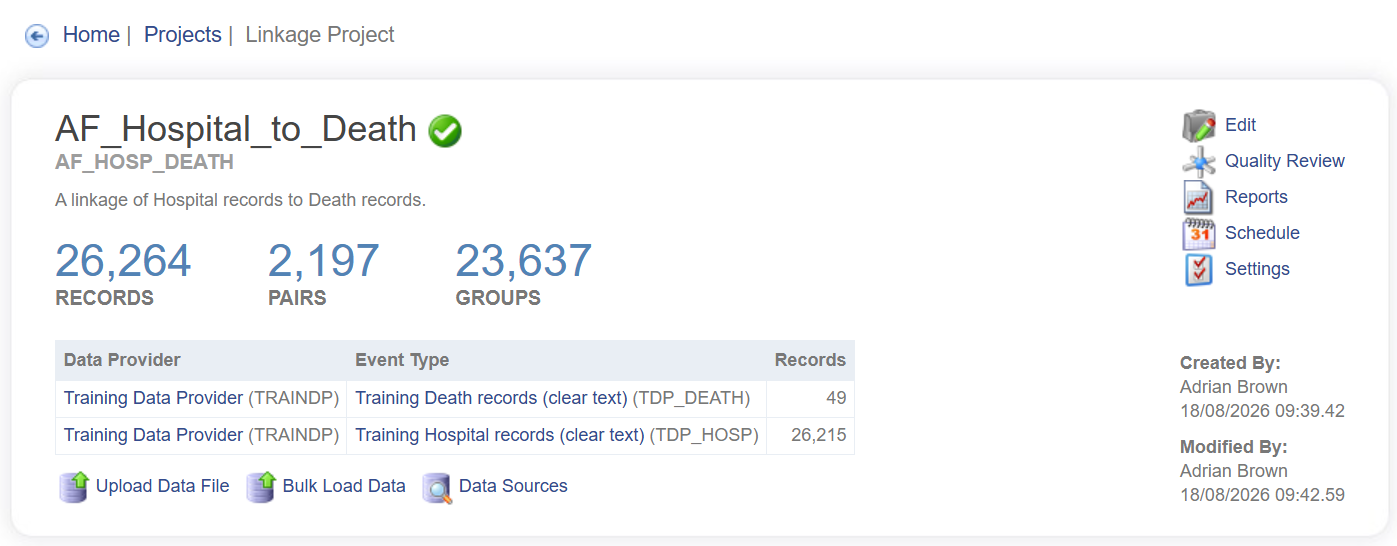
Step 8: From the XX_HOSP_DEATH project dashboard, click on the Settings link.
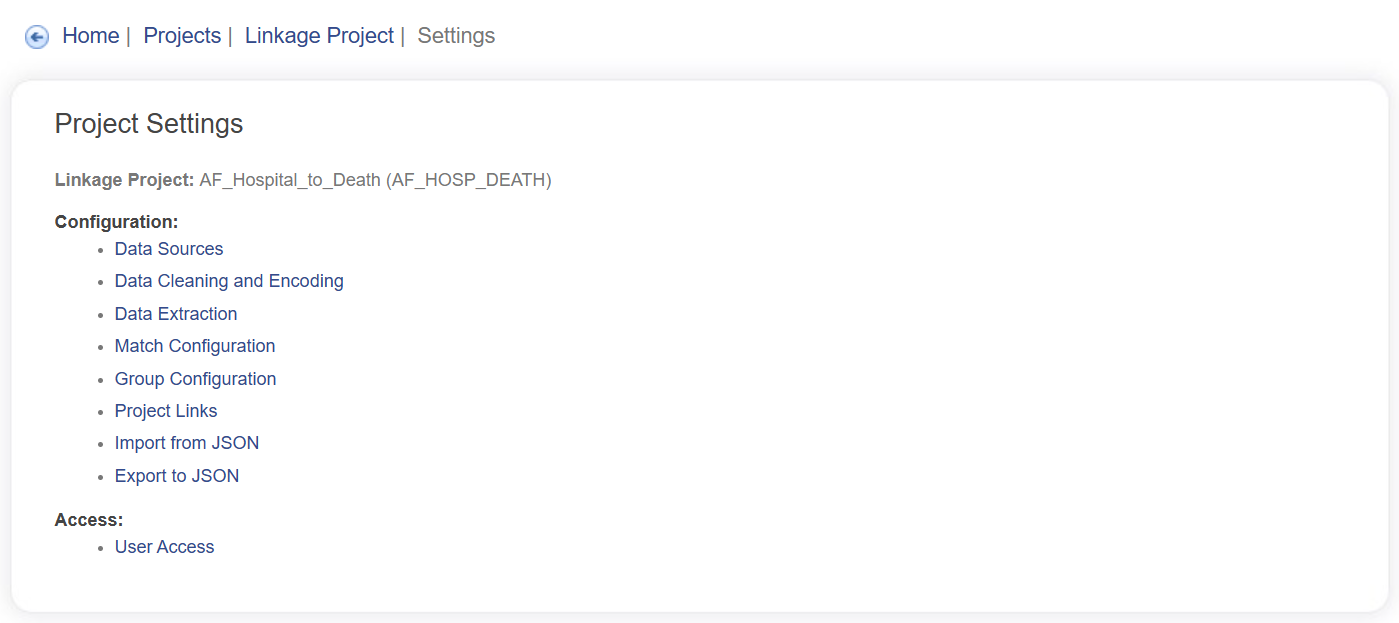
Then select Match Configuration.
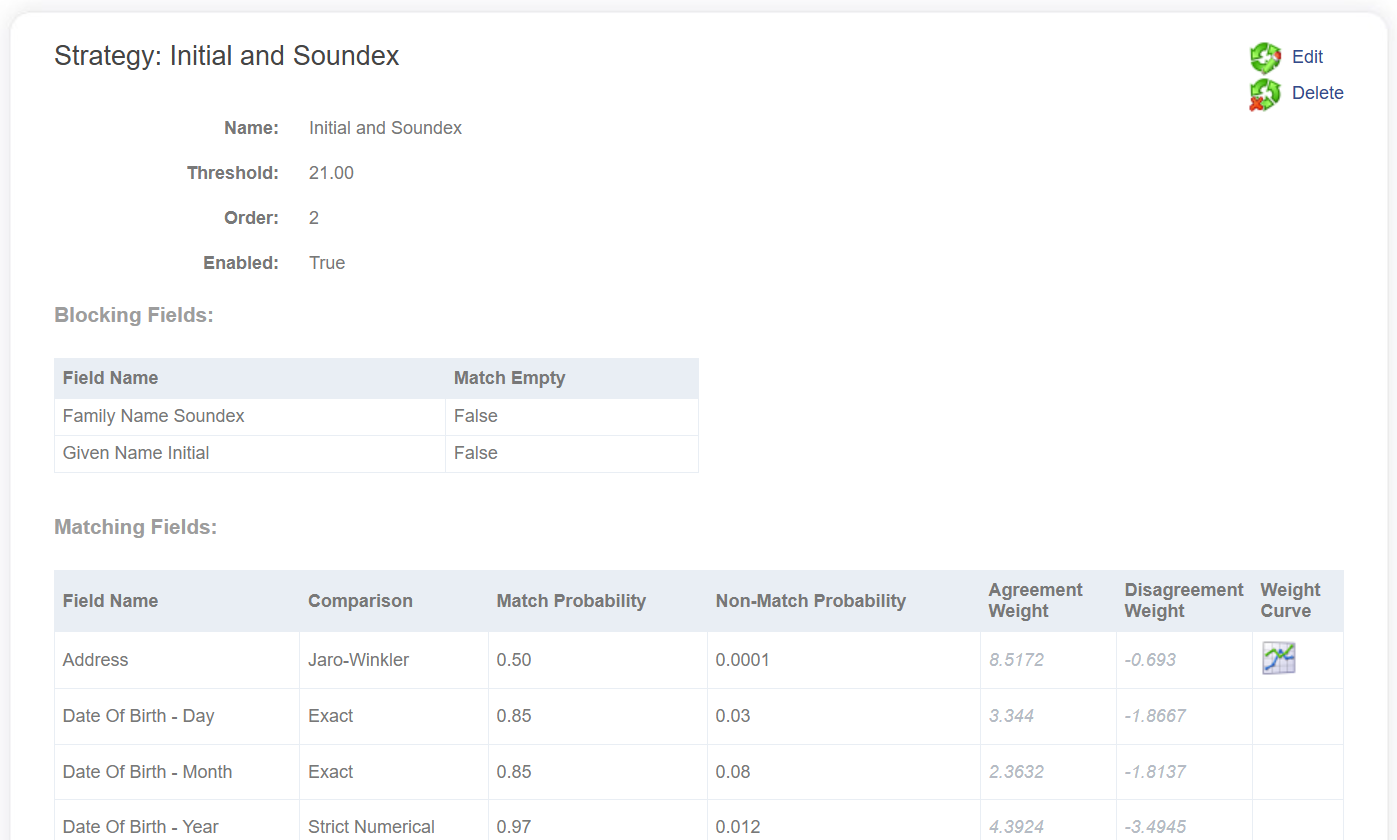
You will now see the details of your matching configuration (shown below). LinXmart has a series of default settings which includes a Threshold value of 21. There are also two default matching strategies – one for each (default) block.
Take a moment to read through and get comfortable with these default strategies.
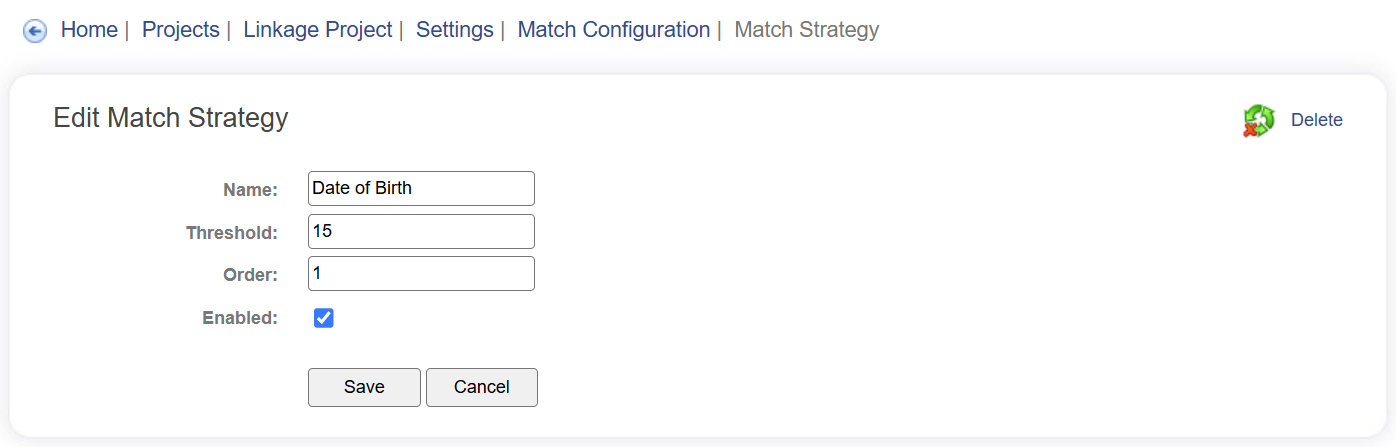
Step 9a: For Strategy called Date of Birth, click on Edit.
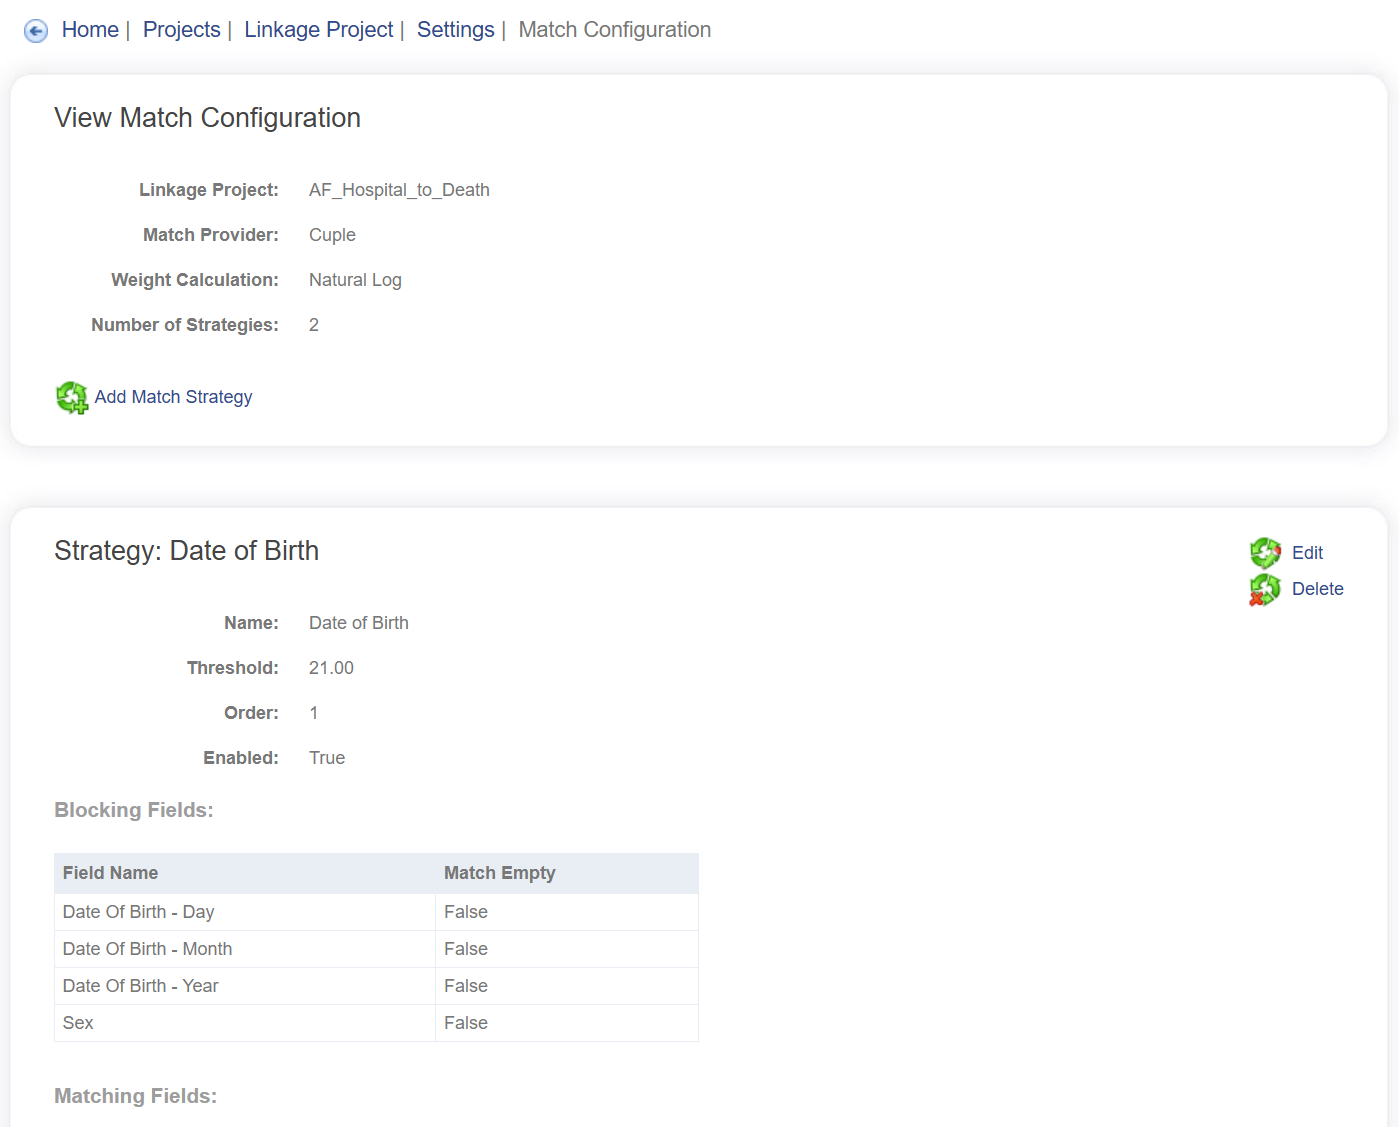
Change the Threshold value from 21 to, say, 15. Then click Save.
Step 9b: Scroll down to the next Strategy (Strategy is called Initial and Soundex) and make the same change.
Click on Edit, change the Threshold value from 21 to 15. Then click Save.
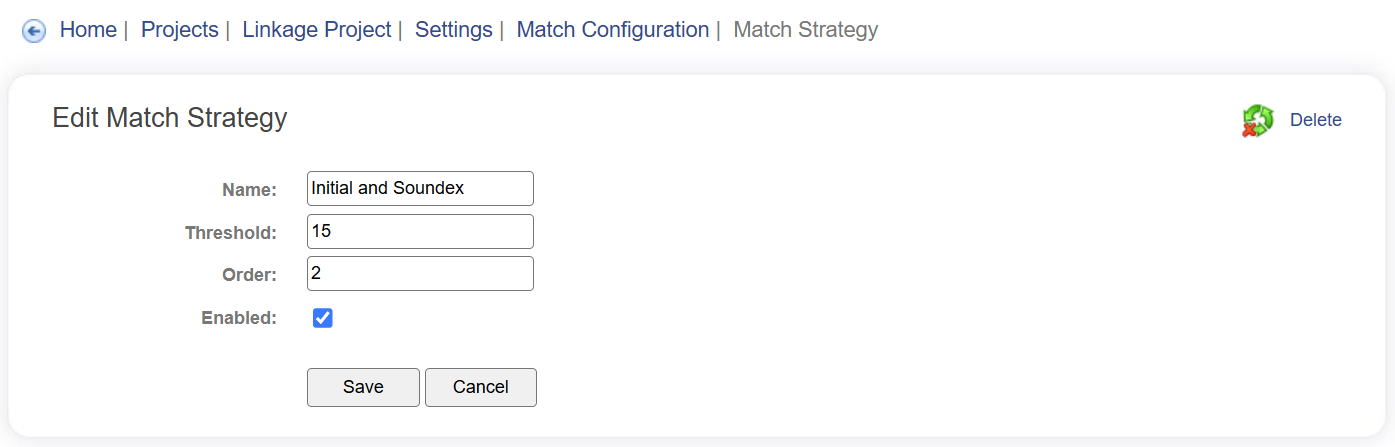
The threshold has now been lowered. You can now re-load your data which will be linked using your altered strategy.
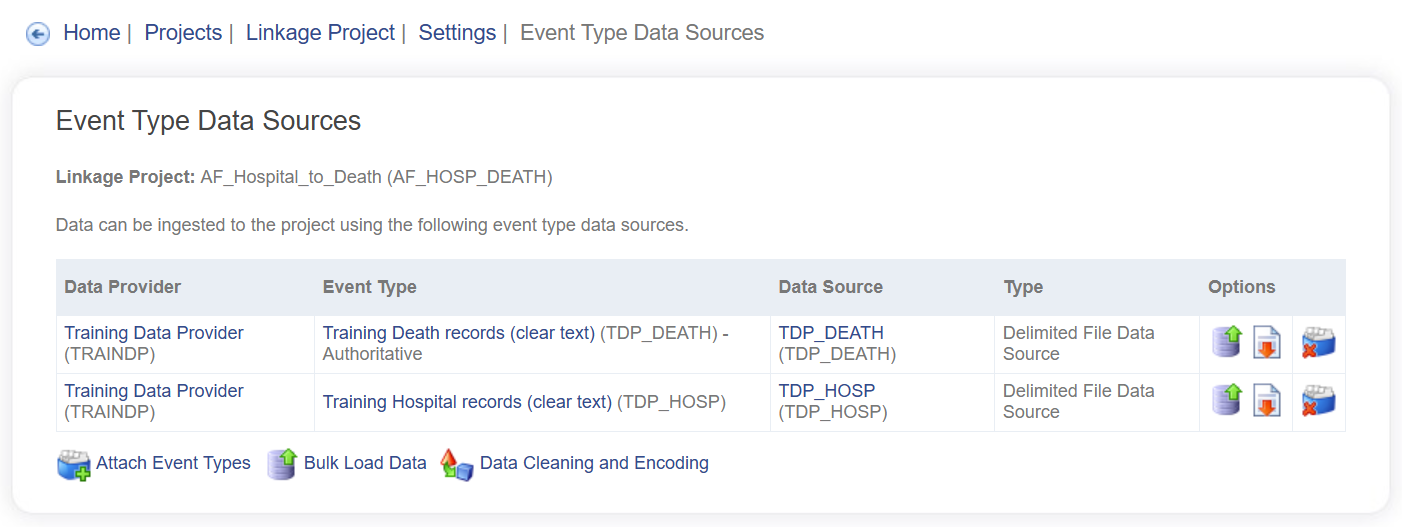
Step 10: To re-load your Hospital data, go to the PROJECT tab and select your project (XX_HOSP_DEATH). Then click on the Data Sources icon below the list of Data Providers (shown below).
Step 11: Next, from the list of Event Type Data Sources, click on the Load icon for the hospital data (shown below).
As previously, select the Choose File icon, and select the same file as previously (TDP_HOSP_clear.csv) from the Training Data folder. Then click Load (shown below).
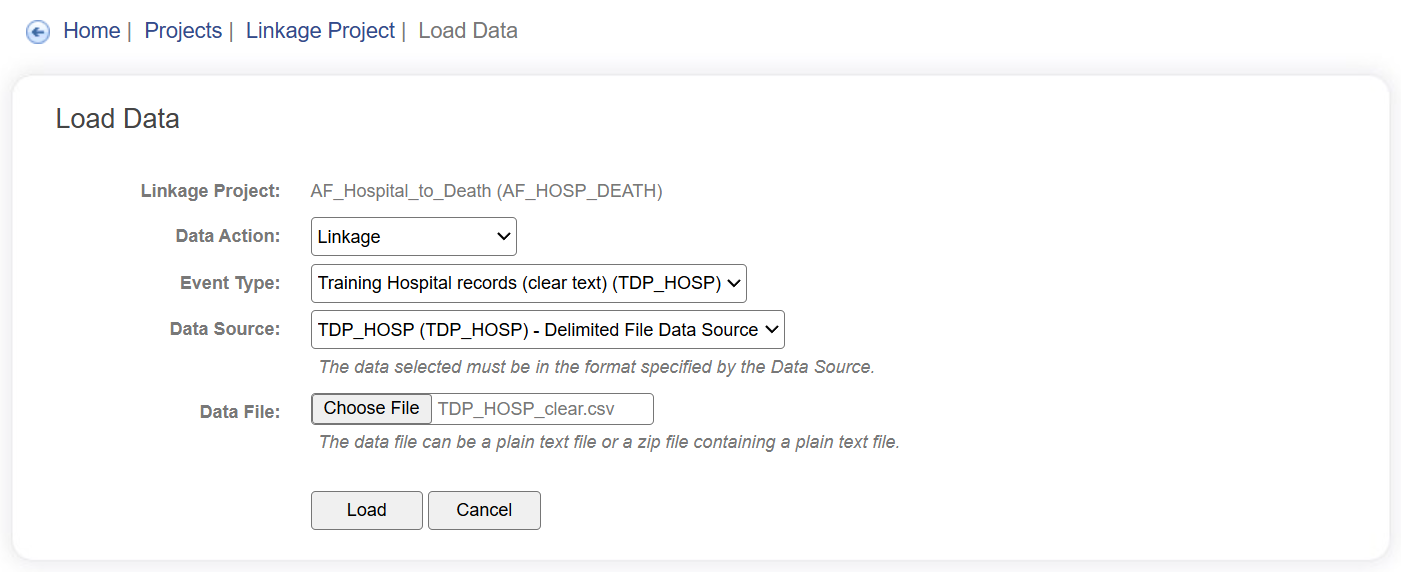
This may take a minute while the dataset is uploaded to the LinXmart server from your local machine. You will then be taken to a Load Data Confirmation page. As previously, ignore the Group by JLK checkbox (if it is presented).
Before you confirm the re-linkage, go to the Envelope Name box and give this job a different name (I like to add a suffix to indicate what has changed e.g. that the threshold has been lowered; an example is shown below).
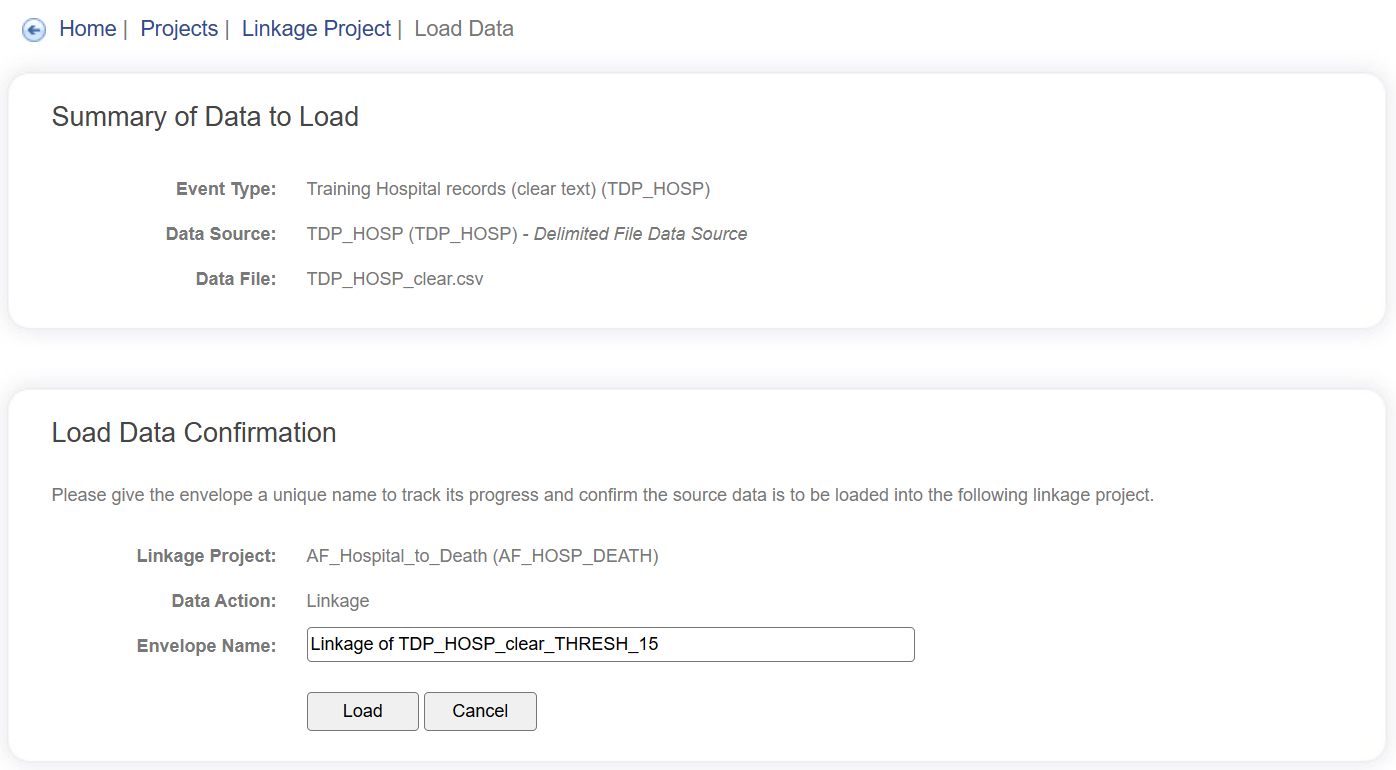
When you are ready, click on Load to progress the linkage.
This will initiate the linkage process using your altered match strategy (i.e. using a lower threshold setting). The processing of this envelope can be monitored in real-time through the ACTIVITY screen.
Monitoring your Hospital re-linkage job
Step 13: To see how this re-load and re-link job is progressing, navigate to the Job Monitoring screen by clicking on the ACTIVITY tab at the top of the screen. Next select the ENVELOPES sub-tab. Information regarding the current job's status will be appear under 'All Envelopes' (shown below).
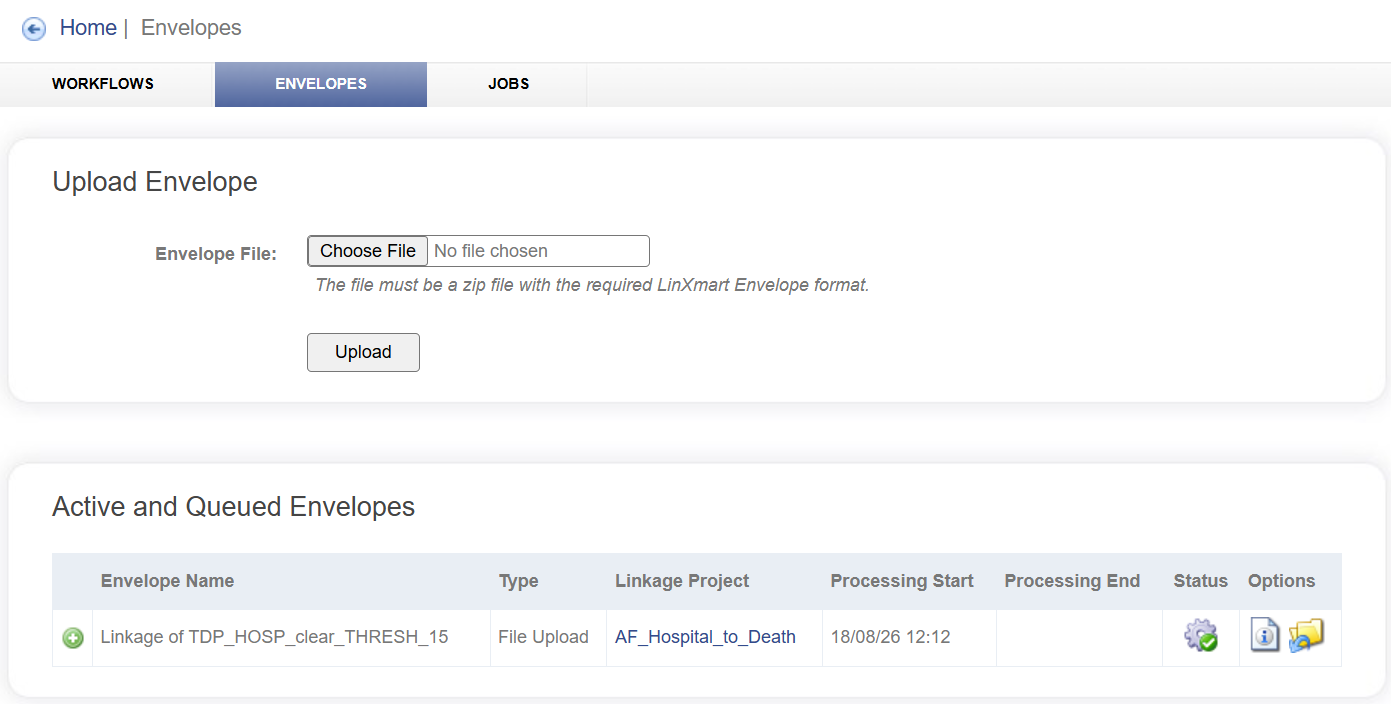
Step 14: Click on the PROJECTS tab and select XX_HOSP_DEATH Project to go back to your Linkage Project dashboard.
The dashboard for the XX_HOSP_DEATH Project will now reflect the status of the project after the re-load and re-linkage of Hospital data at a lower threshold. The summary statistics show you the total records in the linkage, pairs created and groups (unique individuals) that currently exist (shown below).
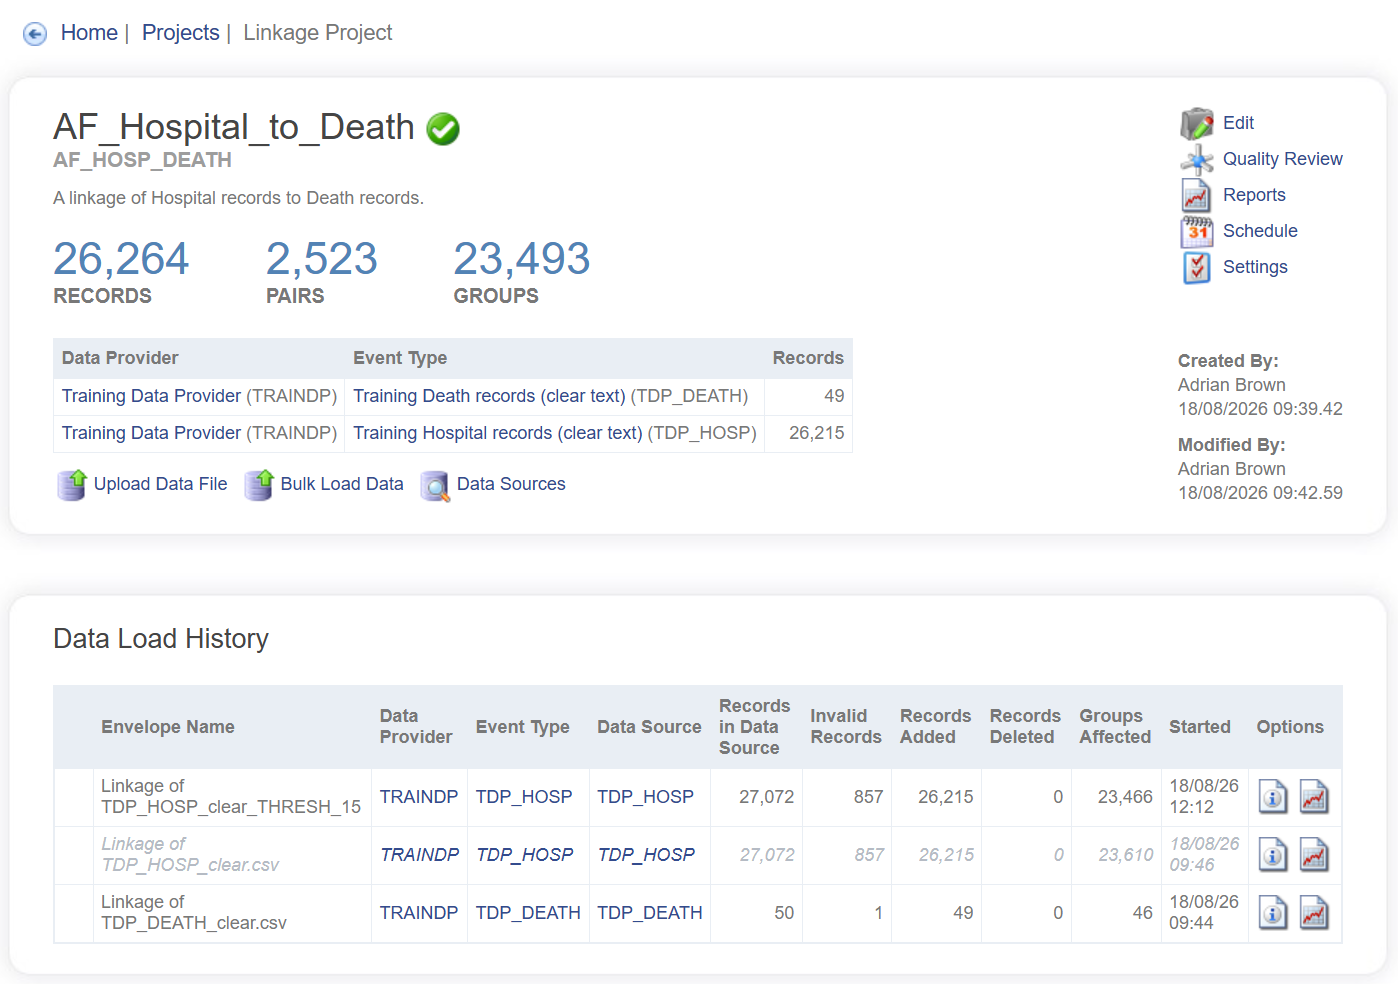
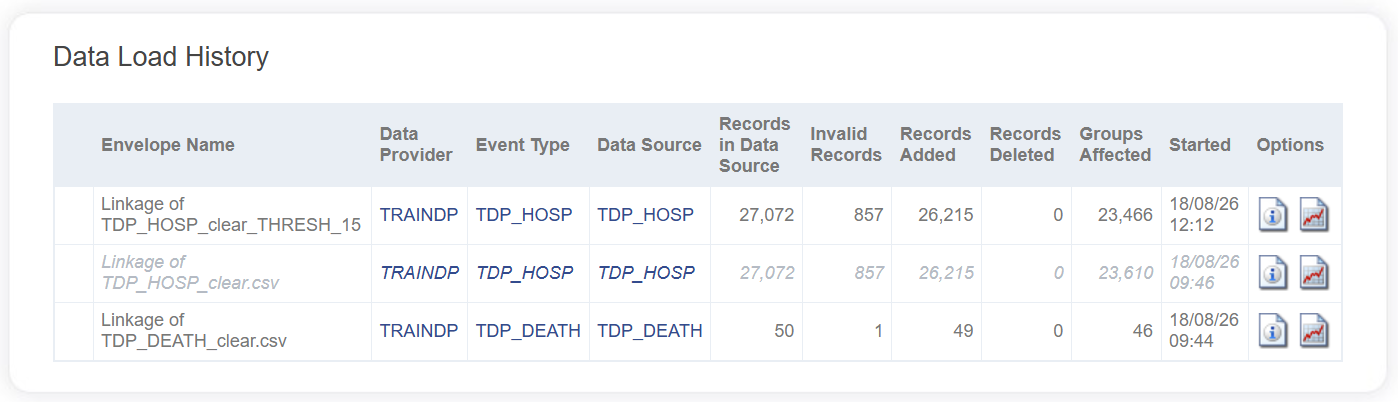
You will notice in the Data Load History section, that there are now THREE envelopes that belong to this Project – the first added Death records, while the second and third added (and linked) Hospital records. The second envelope is greyed out because it was rolled-back (i.e. the linkage was undone) by you.
Step 15: In the Data Load History section, click on the report icon in the Options column for the most recent job that you just ran (shown below).
The Linkage Report details information on the changes made to the system because of loading this particular Envelope, including storing a snapshot of the configuration used. Please take some time to read this report.
You can also click on the Notifications icon to the left of the Report icon to view other notifications that were sent out as part of the job.
Quality review
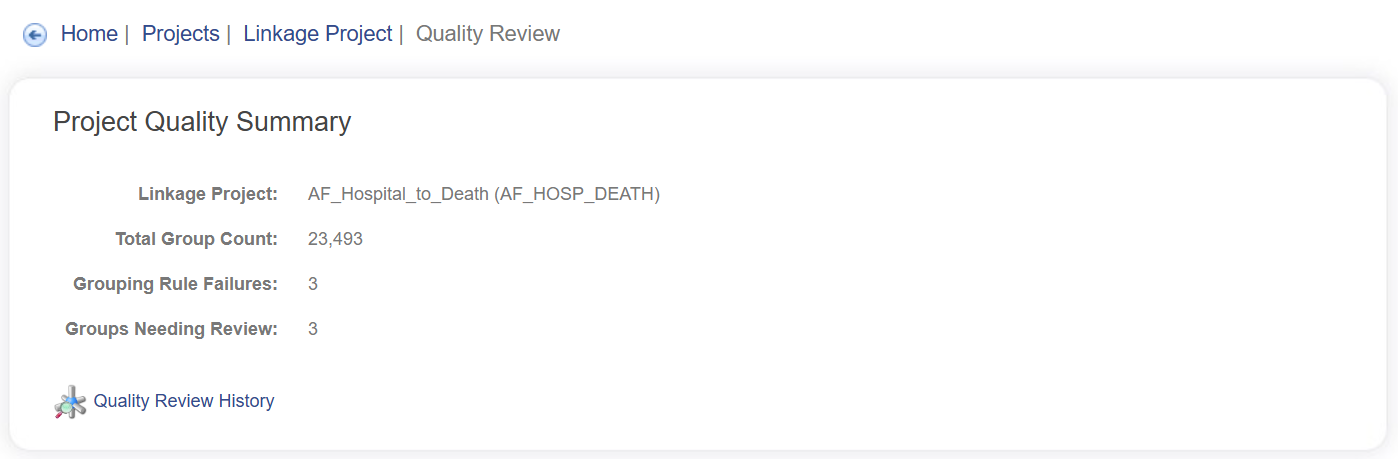
Step 16: As a final step in this Module, navigate to the Quality Review screen for this Project to look at any other quality issues that the system may have found (shown below).
You will notice there are several Grouping Rule Failures and a small number of groups that need to be reviewed.
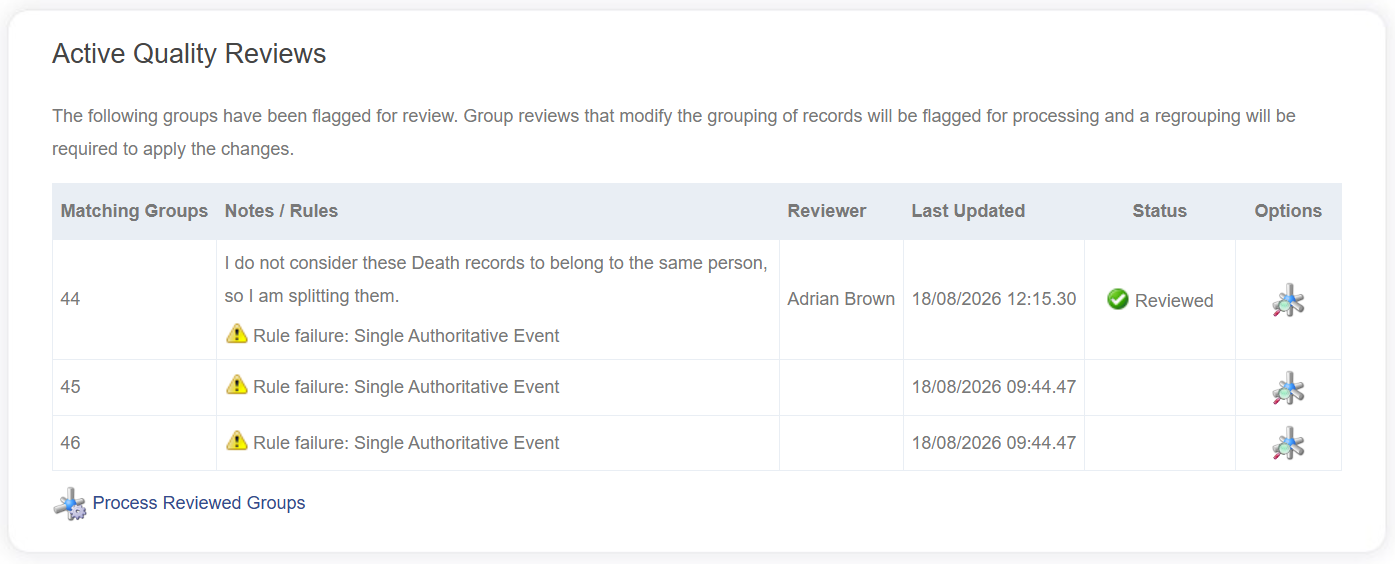
The individual groups that require closer scrutiny are listed in the bottom portion of the screen (shown below).
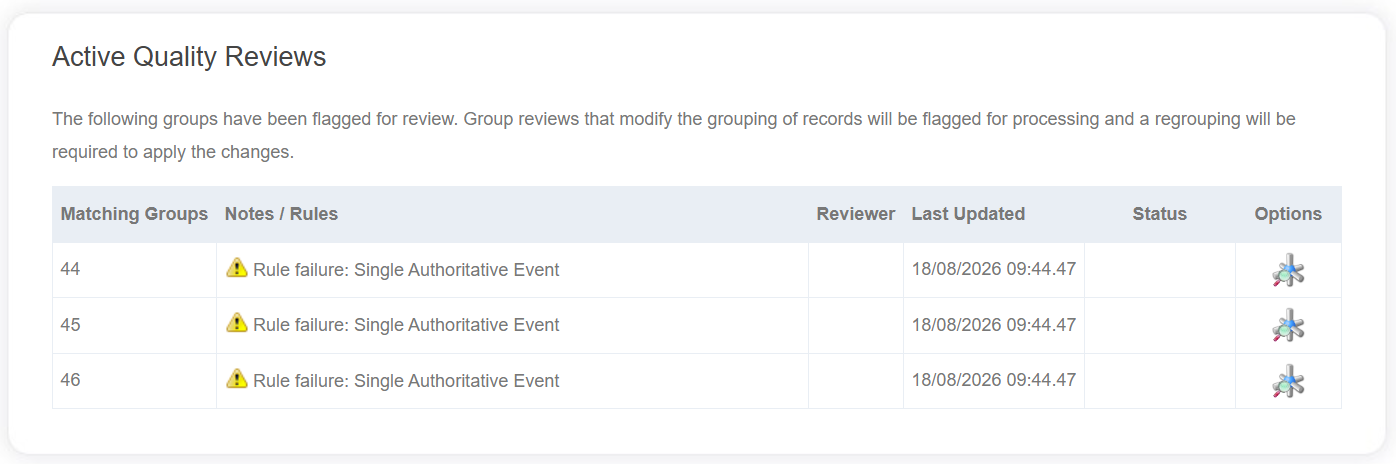
In all cases, the system reports that the group has failed the 'Single Authoritative Event' rule. In other words, each of these groups contains more than one Death record.
Step 17: You can inspect each group by clicking on the View icon.
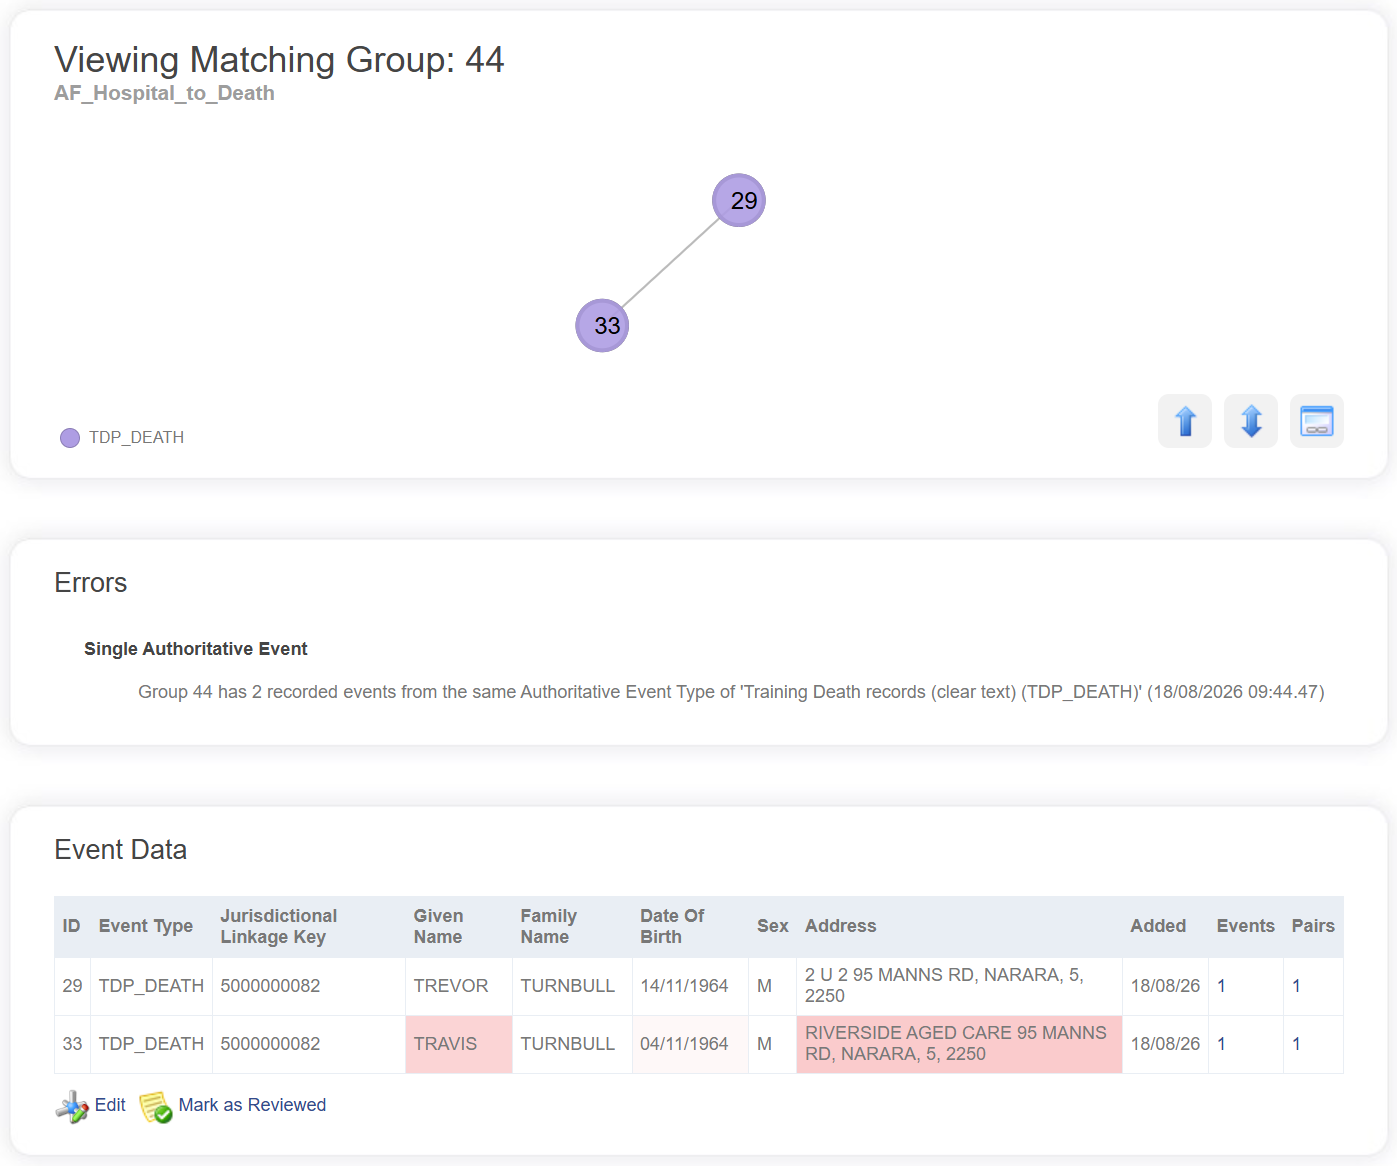
If, after inspecting the records, you decide that the two death records belong to different people, then the group will need to be 'split'.
Step 18: To split the group, click on the Edit icon (shown below).
Step 19: Allocate one record to Target Group 1 and the other record to Target Group 2. Add a comment to explain your actions (these will be saved by the system). Then click Save (shown below).
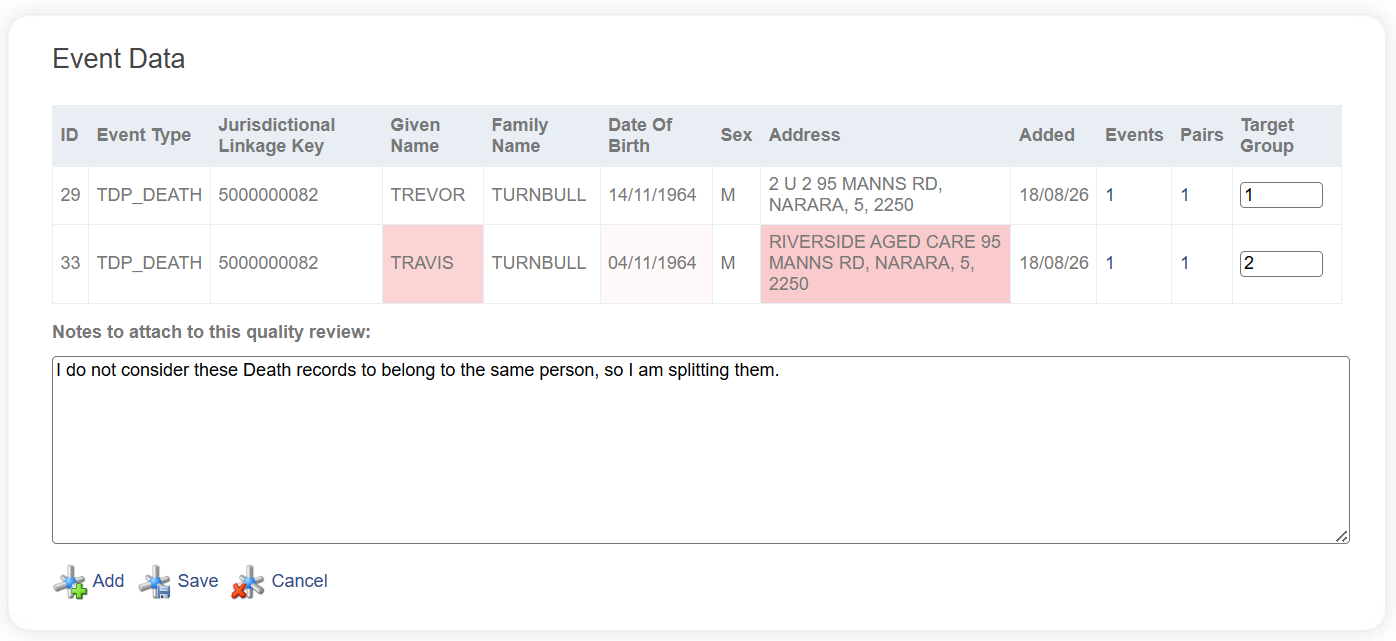
Your clerical review decision for that group is now locked. You can continue to review other groups in the same way.
Step 20: When you have finished reviewing groups and/or want your review decisions to be executed by the system, click on the Process Reviewed Groups icon at the bottom of the list.
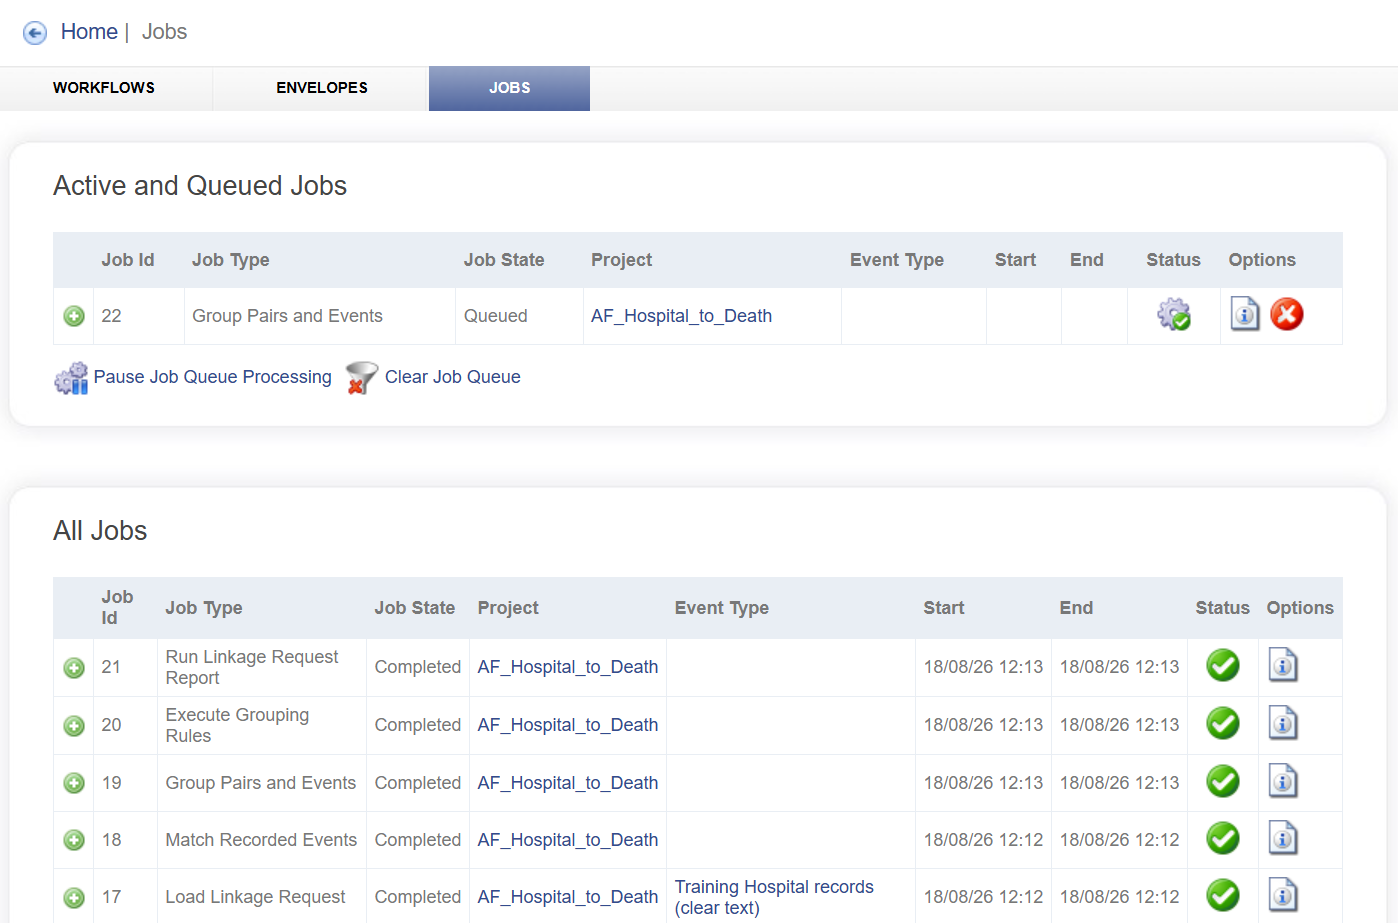
This will trigger a Re-Grouping Job which can be monitored by going to the ACTIVITY screen -> JOBS tab.
Congratulations, you are gaining proficiency with the LinXmart software! You are now making changes to matching strategies and conducting quality review of groups of records.
If you are feeling confident, try the following Extension Exercise.
Extension Exercise
Selecting and editing other groups through Quality Review
To view (and possibly edit) other groups in your linkage project (for example, groups that comprise a large number of records), navigate to the Quality Review screen.
Step 21: From the Quality Review screen, click on the query 'Largest Groups by Record Count'.
Step 22: Run this query using the default settings. Results from running the query will be displayed below the Query (shown below).
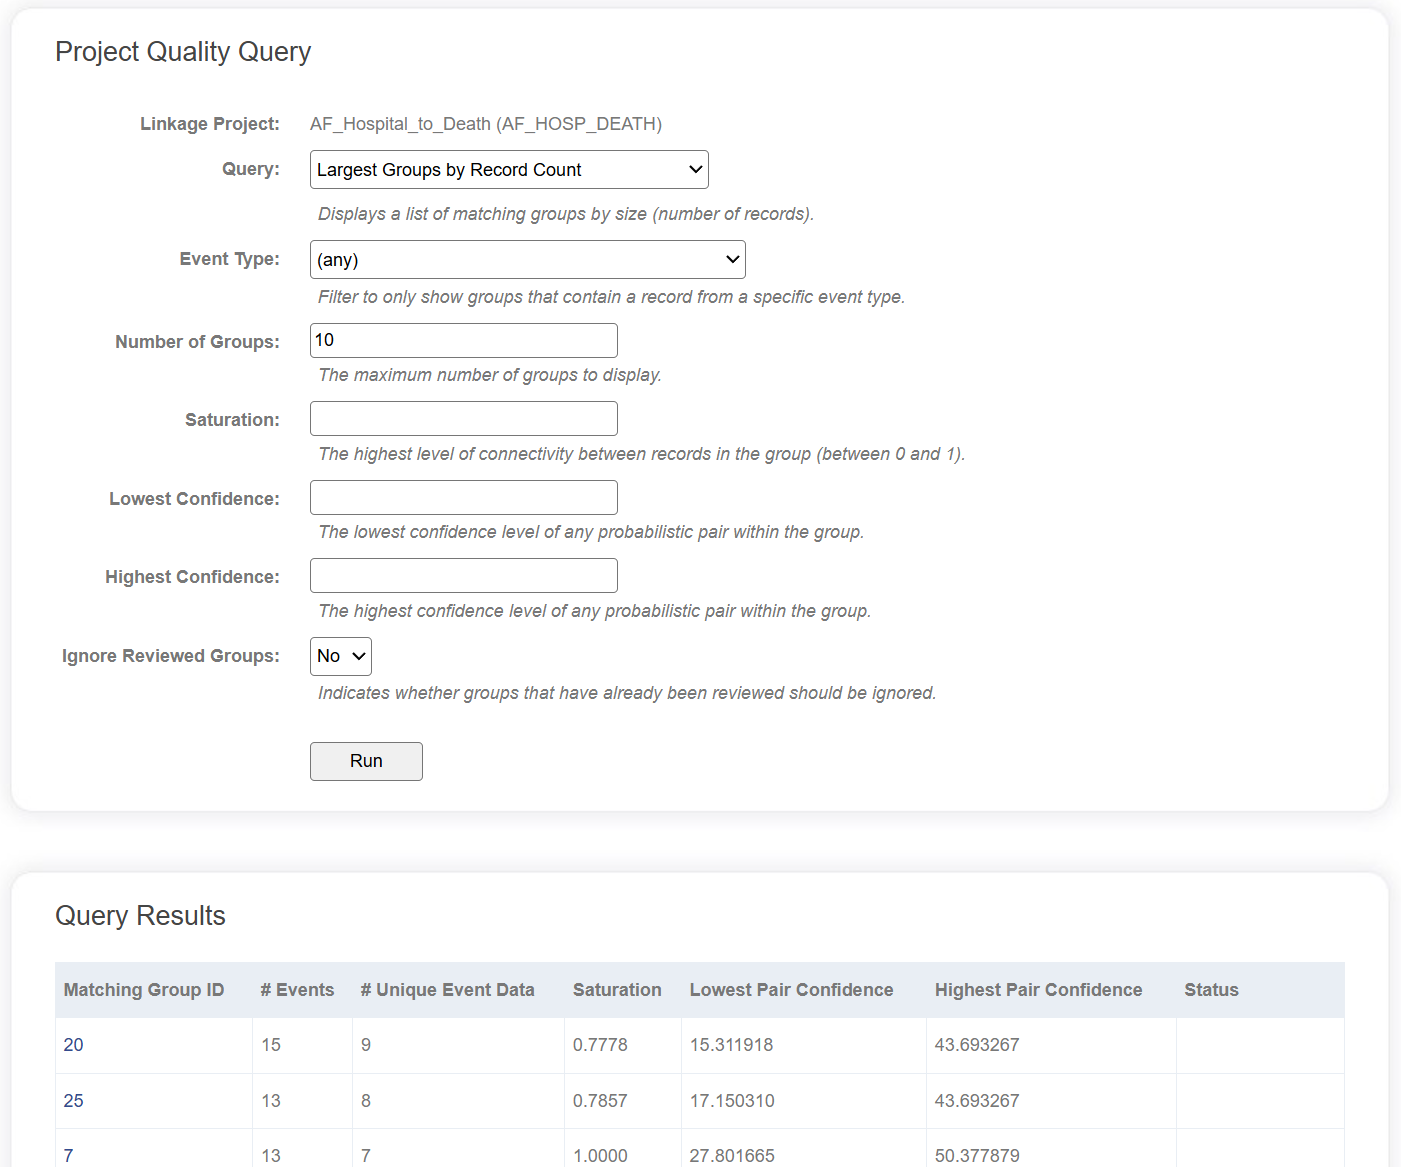
Step 23: Click on the group which appears at the top of the list.
You will be presented with both a graphical and list view of the member records of this group.
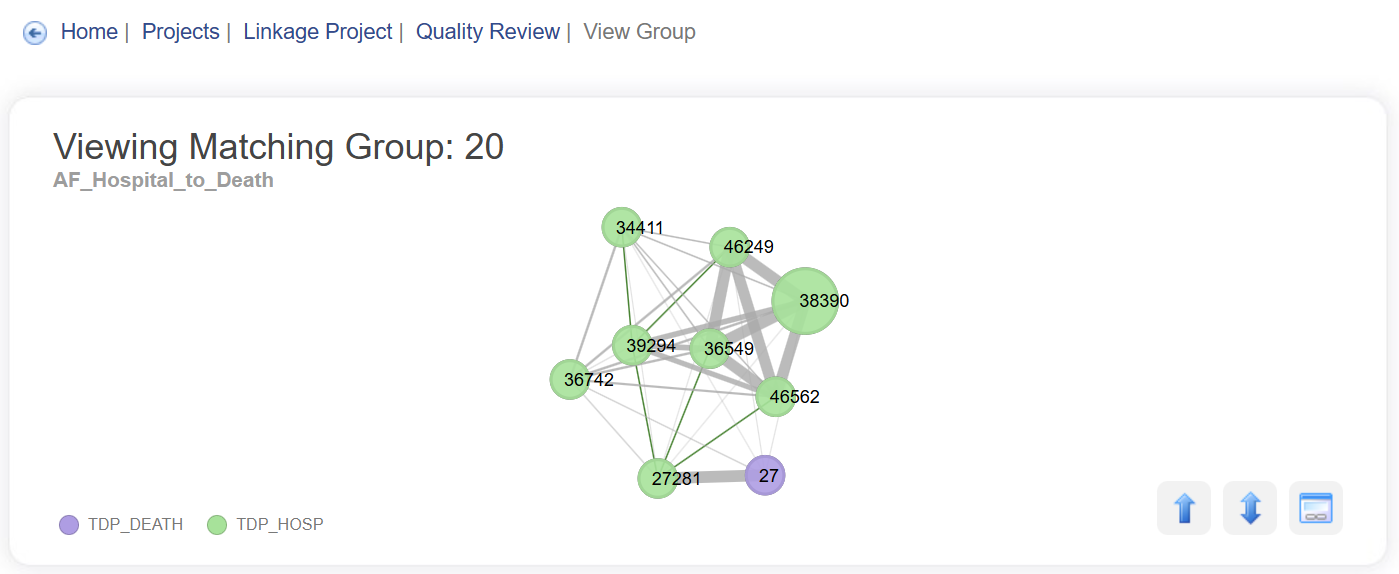
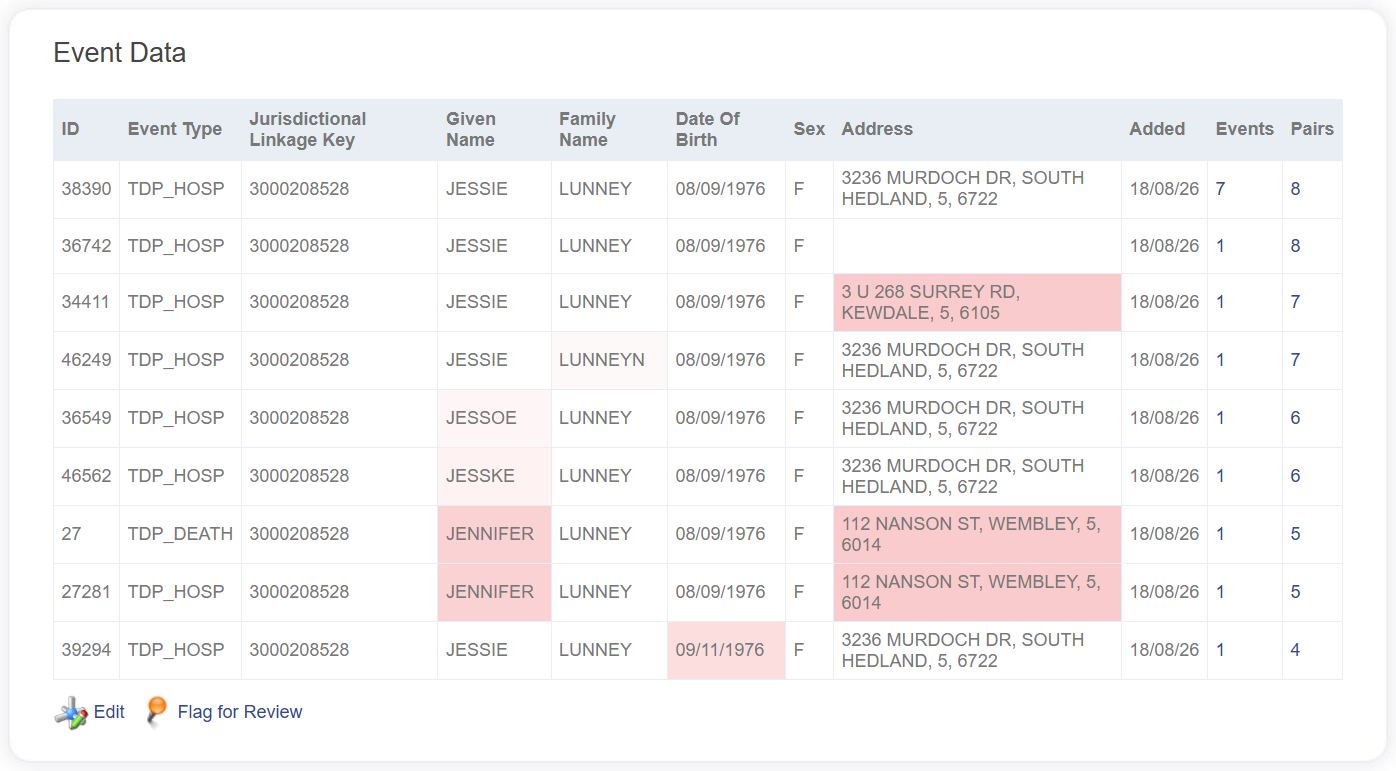
A scan of the list will show two records belonging to Jennifer Lunney while all the other records appear to belong to Jesse Lunney. Let's knife off the Jennifer Lunney records from this group. These records will then become their own group in this linkage project.
Step 24: Click on the Edit icon at the top right of the displayed list.
Assign the records belonging to Jennifer Lunney a different group number (you can use any number provided it is different to the group number used for the remaining records). In the example below, we have assigned that record a Target Group number of 2; the rest have Target Group number 1.
It is also useful to add a note to document why you have made these changes.
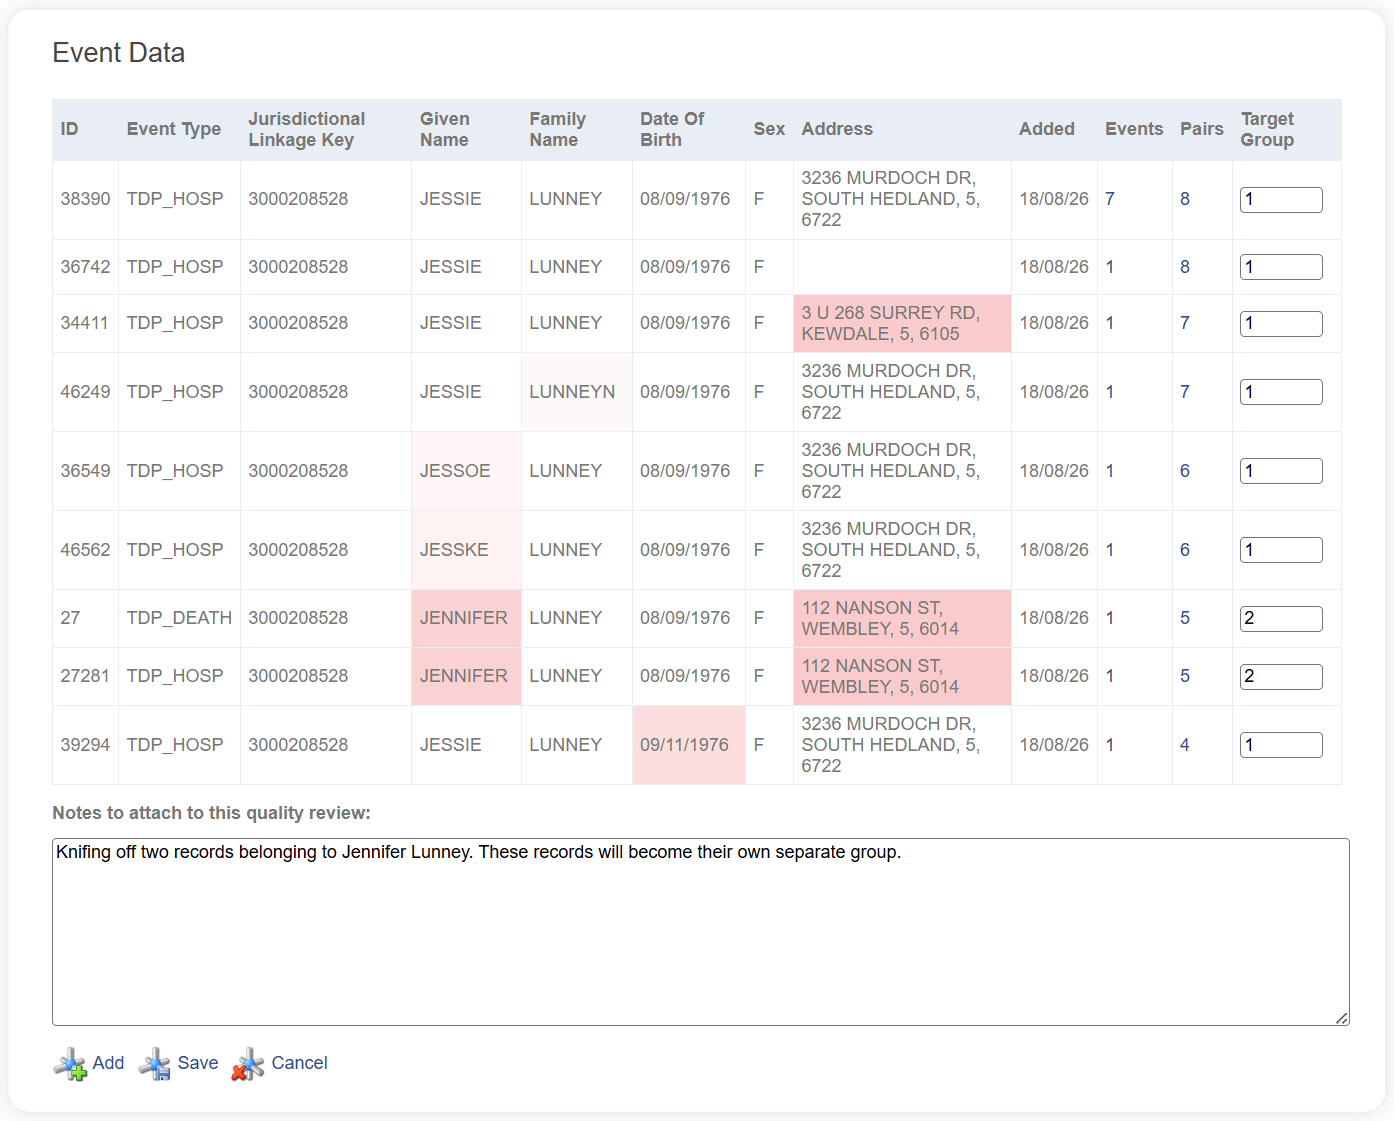
Step 25: When you are done, click on the Save button (bottom right). This will return you to the Quality Review screen. You will notice that the group you have just edited is reviewed and locked for editing. It will remain locked until you initiate a re-group. The group cannot be edited a second time.
Step 26: Back at Quality Review screen, you will notice the Active Quality Reviews (list at bottom of screen) has one locked group - the one you have just edited and saved. Click on the Process Reviewed Groups icon to initiate the re-group of this group.
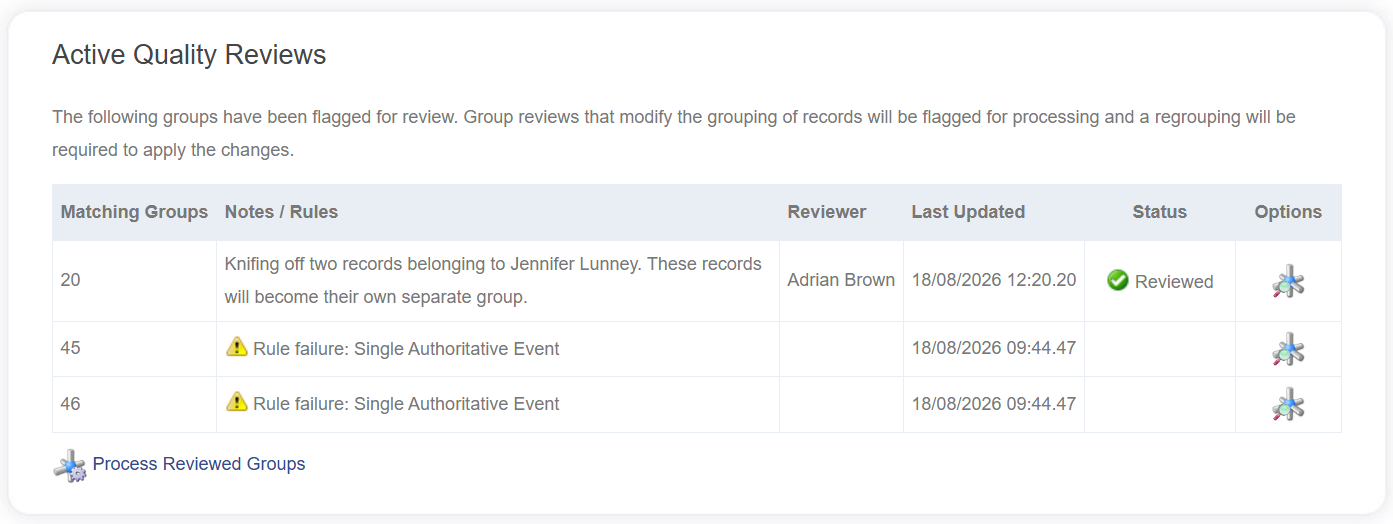
After you have initiated the re-group, a notice may appear to let you know that a Job has been started. You can monitor the progress of this Job through the ACTIVITY screen (Jobs tab).
When the re-grouping job has completed, you will notice that the group is no longer in the list of Active Quality Reviews.