Import / Export of Linkage Project Settings
There are a few reasons why you might want to import/export all settings for a linkage project:
- Backup of current configuration
- Creat a standard set of project settings to reuse
- Copy configuration from one linkage project to another
- Manually reviewing the full configuration
Export to JSON
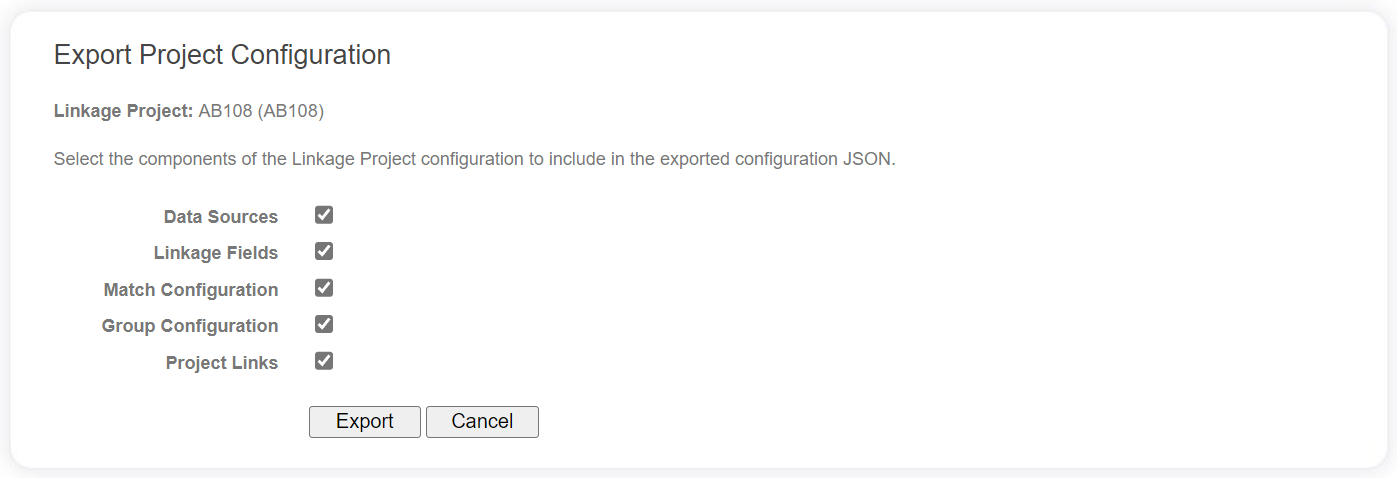
The settings of a specific linkage project can be exported and downloaded into a JSON file and the user can specificy which settings to include in the export:
- Data Sources
- Linkage Fields
- Match Configuration
- Group Configuration
- Project Links
On the Linkage Project settings page, click on the Export to JSON link in the list. This will take you a page that allows you to specific which settings to be exported.

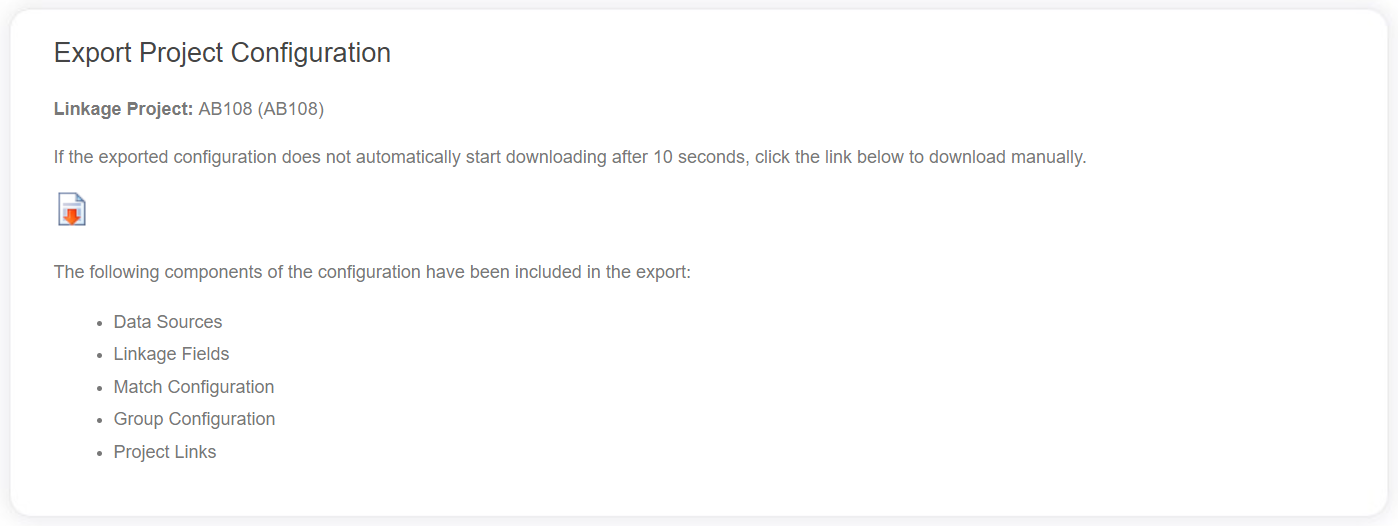
Clicking on the Export button will take you to another page where the download of the selected components will begin immediately.

If the download does not automatically occur, you can click on the Download icon to manually trigger it.
An example of the beginning of the exported JSON file:
{
  "LinkageProjectCode": "AB108",
  "EventTypeMembers": [
    {
      "DataProviderCode": "WA-DOH",
      "EventTypeCode": "WAMORB"
    }
  ],
  "LinkageProjectFields": [],
  "MatchConfig": {
    "MatchProvider": "Cuple",
    "UseLog2ForWeights": false,
    "MatchStrategies": [
      {
        "Name": "Date of Birth",
        "Order": 1,
        "IsActive": true,
        "Threshold": 21.00,
        "BlockingFields": [
          {
            "FieldName": "doby",
            "IsMatchEmpty": false
          },
          {
            "FieldName": "dobm",
            "IsMatchEmpty": false
          },
          {
            "FieldName": "dobd",
            "IsMatchEmpty": false
          },
          {
            "FieldName": "sex",
            "IsMatchEmpty": true
          }
        ],
...
Import from JSON
A JSON file that was created from the linkage project export process can be imported into any Linkage Project, even the one it originated from.
To import linkage project configuration, click the Import from JSON link in the list of options on the project settings page.
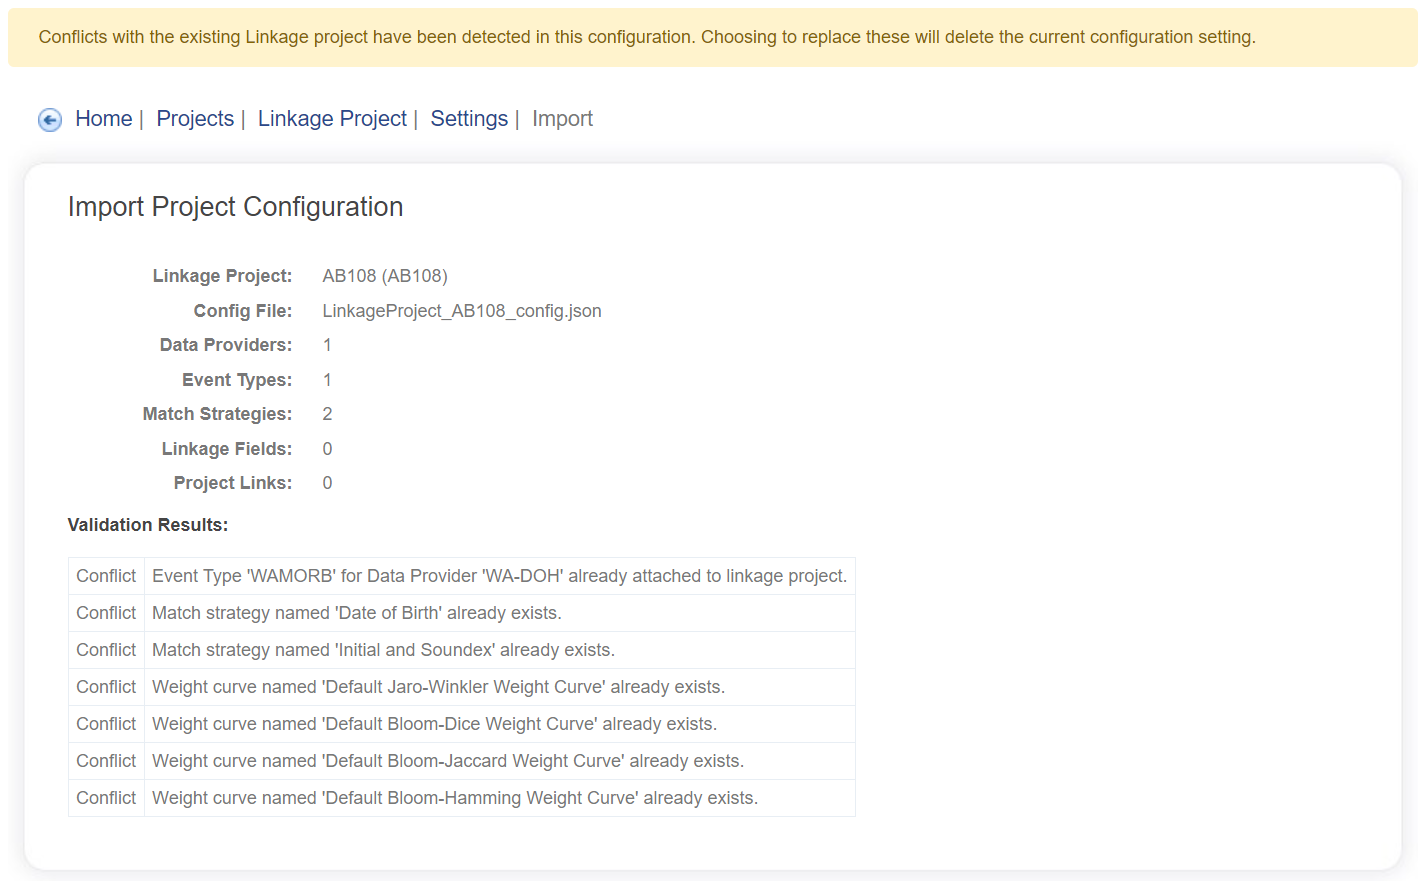
The file will be validated. If it isn't a valid linkage project export, an error will be displayed. If it is valid, the system will assess what components of the file, determining conflicts, warnings and errors.
A summary of the components in the file will be displayed, along with the validation results that may contain conflicts with existing settings in the project.

Below the validation results is a confirmation form, prior to applying the new data. If any conflicts are detected, you will have the option to either ignore item with the conflict or replace it with the new data.

Once you have determined how to manage the conflicts, click the Import button to apply the changes. Alternatively, click the Cancel button to completely cancel the import process.
If you do choose to apply the changes, a summary of the changes made will be displayed.